So pumped! It’s finally here! I can not be any more excited to be finally sharing with you guys the most requested Baking 101 post ever, Cake Pops 101! Today I’ll be breaking it right down to the crumbly cake, sharing the basics, tips, tricks, and more to help you create these adorably delicious treats on a stick.
One could say I might have been delaying this post a bit, ok a lot! If truth be told, I’ve been kind of intimated by it! Why? Because there are SO many different ways to conquer cake pops, and not one single way will work for all. And let’s be honest, as cute as the little pops are they can be a real pain at first. I think all cake poppers will tell you that the best way to learn is hands on experience. But to get your started (or maybe help some failed attempts) today I’ll be sharing what works best for me, while there are many ways this one works for me! In addition I’ll be sharing all sorts of information along with tips and tricks that will help you conquer your own cake pops and find the way that works for you!

First let’s make sure were all on the same page – what’s a cake pop? A cake pop is a bite sized treat on a stick that normally consists of cake, icing, and chocolate/candy coating. Cake pops are fairly new to the baking scene and have been giving their cupcake cousin a run for their money in the adorably cute single serving treats department. Believe it or not they originated just a few years ago when the now famous Bakerella decided to place a cake ball on a stick and shape it like a cupcake! Before you knew it she was sharing them on Martha Stewart, the world was craving cake pops, and the rest is sweet history! Now we have cake pops of all flavors, types, shapes, themes…you can even find them in stores pre made! Now let’s break it down Barney style and conquer the sweet little treats. We’ll start with the 3 ingredients.
Ingredients
Cake
Obviously, we’re going to need some cake! So far, I haven’t found a cake that won’t work for cake pops. The beautiful thing about cake pops is your going to turn the cake into crumbs then mix into dough. So even if the cake is a little dry, spongy, moist, dense…it won’t matter! While you can absolutely bake a cake from scratch, most cake poppers start from a cake mix. Let’s face it, cake pops take a time commitment and baking a cake from a box just helps speed up the process a little bit. For me cake pops often come from leftovers or cakes that went wonky. Did your cake crack? Make cake pops! Baked twice as much cake as you needed? Freeze it for later, then make cake pops! Baked 24 cupcakes but only need 12? Make cake pops! With all the baking I do, I almost always seem to have left over cake or cupcakes. I wrap them up and place them in the freezer and often they become cake pops in the near future.
Icing
Here is where I believe I differ from most cake poppers. I really don’t like to use canned frosting in my cake pops for two reasons – taste and texture. I think that using a sturdy homemade buttercream not only gives me a easier to work with cake pop “dough” I think it tastes way better. Now I know using canned icing for most is simply about speeding up the process because it really is time consuming. But for me I would always rather take just a few extra minutes to whip up my own, if I don’t already have some in the fridge of course! Once again using leftovers – the beauty of cake pops!
Chocolate/Candy Melts
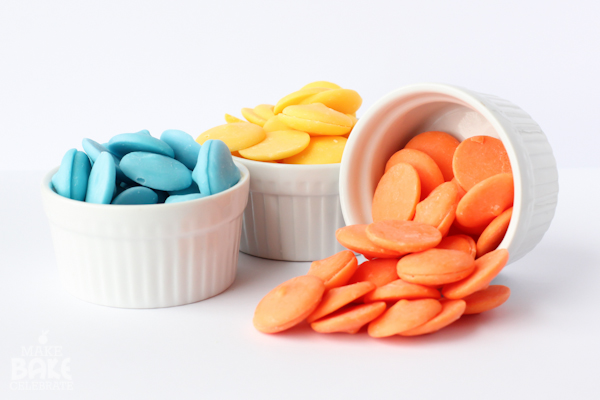
Believe it or not, not all chocolate is created equal! If you haven’t already learned this lesson you most certainly will when it comes to making cake pops. You can use either melting chocolate of candy melts to coat a cake pop. Candy melts come in all sorts of sizes and flavors but you have to be careful and use a good brand. You want to use chocolate/candy melts that maintains a nice thin dipping consistency when warmed. If your candy chocolate/melts are too thick when melted they will not coat nicely. You can add a little shortening to the chocolate to help thin it out. Normally I’m a huge fan of Wilton products but I have to admit they are not my favorite brand of melting chocolates for cake pops. While they work when needed, they always take a little thinning out to get to the right consistency. I’ve had much better luck with Merckens. You can often find many different candy melts at lock craft or baking supply stores. My favorite chocolate/candy coating, however, is Candiquik coating. Candiquik can be found at almost any grocery store in white and milk chocolate and it melts so smooth and nice every time. We’ll talk more about coloring the chocolate a little later on.
Cake Pop Amounts
You’re results will depend on how big you roll your balls, what cake recipe your using, how you coated your pops, and how much frosting you have used. Here is an approximate guideline to how many cake pops I can make with the ingredients. Remember you don’t have to make 36 cake pops all at once, you can always freeze half our your cake and use it later.
1 Full Cake (9X13in) Made From a Box Mix = 36 Cake Pops
And 8in Round Cake (Or Half A Cake Mix) = 18 Pops
12 Cupcakes = 18 Cake Pops
Up to 3/4 Cup Of Butter Cream Per Full Cake
36 Cake Pops = Two Cups Of Candy Melts Minimum
How To Make A Cake Pop
Before we move on to more cake pop details, like coloring, flavoring, and decorating, let’s look at how we actually make a cake pop. Like I said before, there are SO many ways to make a cake pop. Here’s a step by step guide on how I make mine.
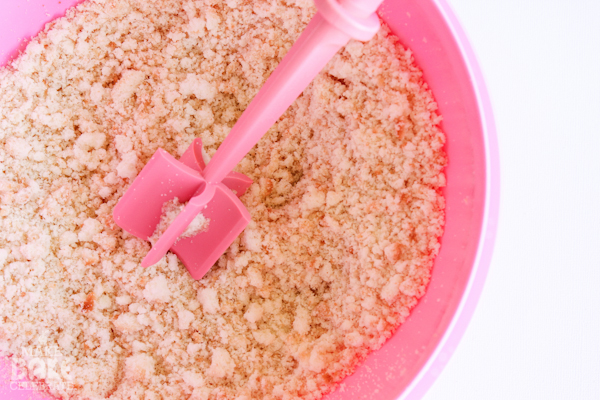
Step 1: Destroy that cake! Using a food processor, fork, grater, or whatever your weapon of choice you want to get the cake into little bitty crumbs (I’m not quite done destroying in the above picture!). When I’m not using my food processor I love to use my mini meat chopper, it works really great! You want to make sure you don’t have any big chunks left before moving on. If your using a food processor make sure not to pack the cake in. You will want enough room for it to move around and work evenly, otherwise you’ll end up with cake puree at the bottom and chunks a the top.
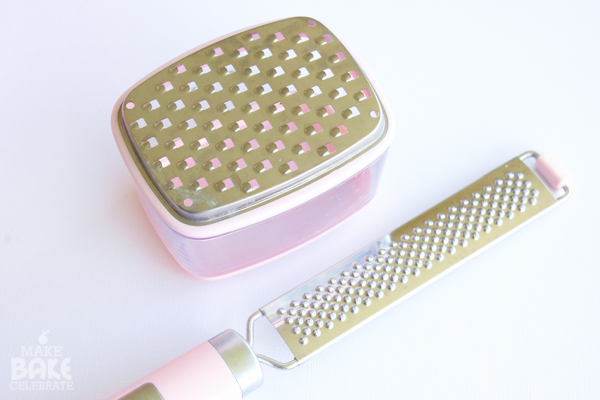
In the passed I’ve also used graters like this to help turn my cake into crumbs.
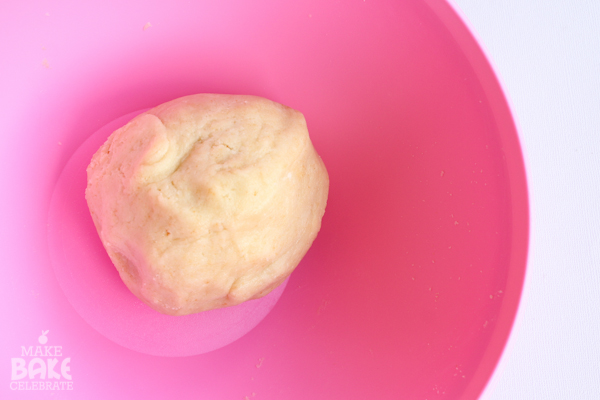
Step 2: Once your cake is nothing but crumbs, use a spatula (and probably your clean hands) to work the icing into the crumbs a little at a time. You can also save a little time and do this in the food processor. I like to take my time and do it with my spatula and hands so I can make sure I have just the right “dough” consistency. For one full cake mix I use up to 3/4 cup of buttercream. The amount can depend on not only the cake texture but the temperature and humidity in the room. For example I use a lot less buttercream since we’ve moved to Texas then I did in New York. I measure out my buttercream and set it aside then slowly add it in, stopping when I’ve got the right dough consistency. You want a dough that won’t crumble when rolled into a ball but sturdy enough to hold it’s shape. Remember you can always add more icing but you can not go back once you’ve added too much icing. The only way to recover for a dough that’s too soft is too add more cake.
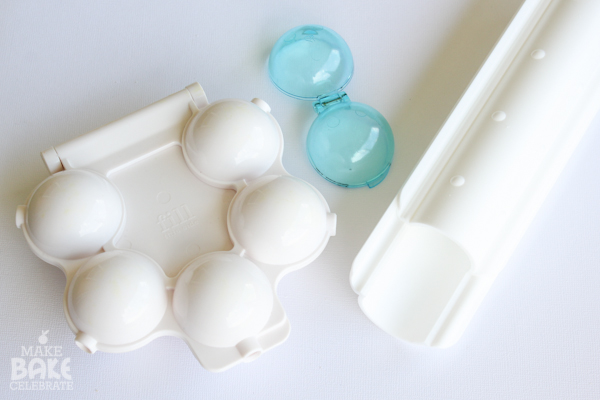
Step 3: Next it’s time to roll your cake pops. You can do this completely by hand or with the help of a cake pops tool. There are many different cake pop tools to help you get the shape. But no matter how your rolling your cake pops you need to first measure the balls out with either tablespoon or small cookie dough scoop. Then either roll by hand or use a tool to help get a round shape and place your rolled cake balls onto a wax or parchment paper lined cookie sheet and place them in the freezer for about 15 minutes. You want them to firm up but not freeze completely.
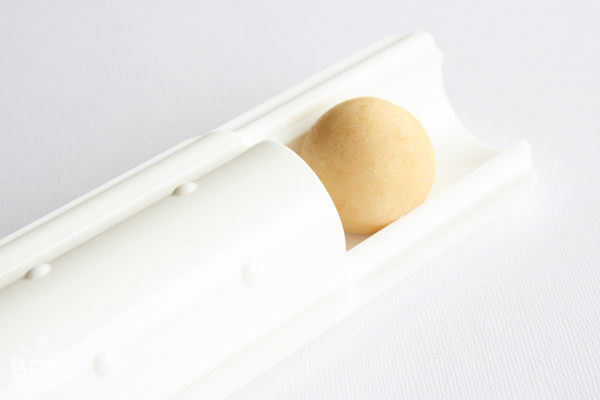
So far, I have had the best luck with my simple “Treat Baller” I picked up at Wal-Mart for 7 bucks! To use the roller I measure out the cake pop amount, roll it a bit with my hands, place in the middle of the roller, and then move the top back and forth until I’ve got a smooth cake ball. I can roll about two at once this way and it really speeds up the process. It still take a bit of time measuring, rolling, and smoothing but I believe I get a much smoother finished result using the roller vs. my hands. I feel like I spend a lot more time trying to get them smooth with my hands and warming them up in the process.
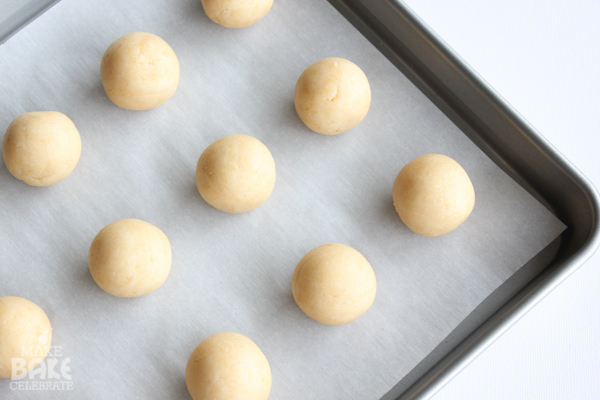
Step 4: While your cake balls are firming up you can prepare your decorations and melting chocolate. Because this process can be a little finicky you want to be completely prepared ahead of time. Make sure to have you decorations, sticks, and something to place the cake pops in ready to go. I also recommend keeping a paper towel close by. When everything else is ready and your cake pops are firm, prepare your melting chocolate. You can do so in a deep microwave safe bowl but I really prefer to use my Wilton chocolate melter. Chocolate in a bowl will continually cool down and become more and more firm and eventually need re-heating. The chocolate melter keeps it nice and warm and at the perfect dipping consistency the entire time I’m working. (more info on melting chocolate at Melting Chocolate 101) If you are not using a warmer you may want to only heat up a small amount of chocolate/candy melts for the next step.
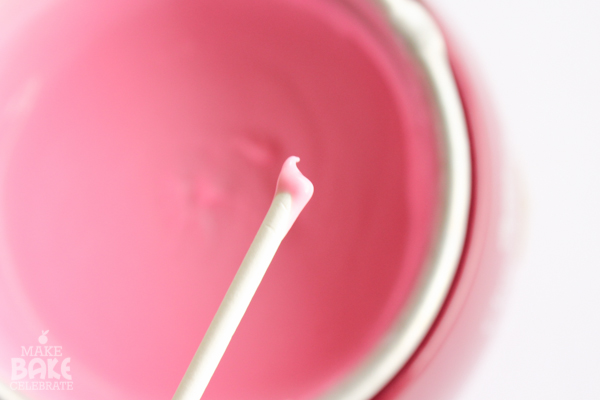
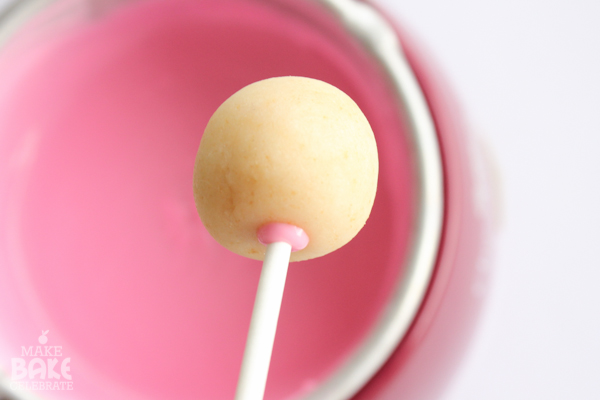
Step 5: Once your chocolate is ready pull the tray of cake balls from the freezer (remember they should be firm not froze solid). Begin by sticking about 1/4in – 1/2 in of the stick in your chocolate then place the stick no more then half way through the cake pop. This will help “glue” the cake pop to the stick. Place all “glued” cake pops into a cake pop holder and place back in the freezer for a few moments.

(optional) While I like to use straws for my cake pops, I don’t feel like they provide enough support on their own. Here’s is where I mix it up a bit. After inserting my lollipop stick I think do the exact same thing with my straw, dip and then slide over the cake pop stick and press into the very bottom of the cake pops.
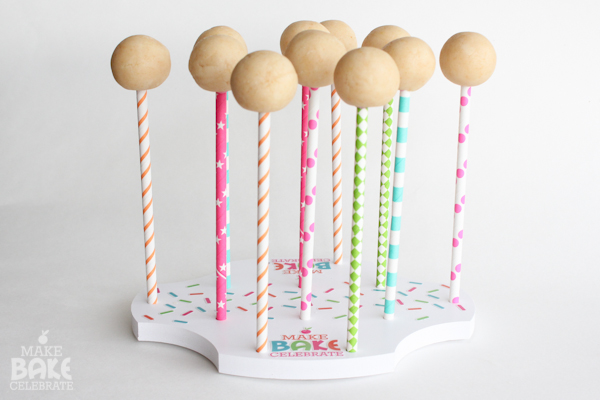
Step 6: Place the “glued” cake pops back in a cake pop stand and then place back into the freezer for a few minutes until the chocolate is once again firm. In the mean time you can double check your supplies and stir or heat more chocolate if needed.
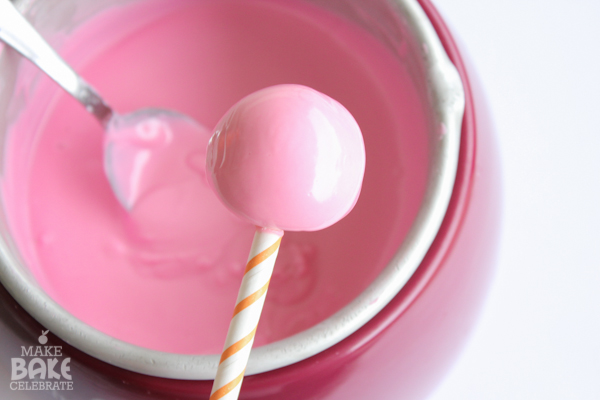
Step 7: Once your sticks have been “glued” on and your ready to cover your cake pops in candy coating, remove them from the freezer and begin covering them one at a time. You can gently dunk the cake pops fully in the chocolate or gently spoon it over the top. If your submerging in the chocolate you want to make sure you get one quick swift dunk in and then out. Holding it under too long or having to recover it will most often result in the cake pop falling off. The second way to do this is to gently cover the cake pop with a spoon. While this results in less broken pops you have to be sure to cover quickly and not pour on too much, or you’ll never get the excess off.
Either way after the cake pop is covered you want to turn the cake pop at a 45 degree angle up and begin slowly turning the cake pop (to distribute the chocolate) while gently tapping on your hand or wrist to shake off the excess. DO NOT tap the stick on the edge of the rim. Doing so will risk your chocolate “glue” and cake pop to separate and end in cake pop disaster.
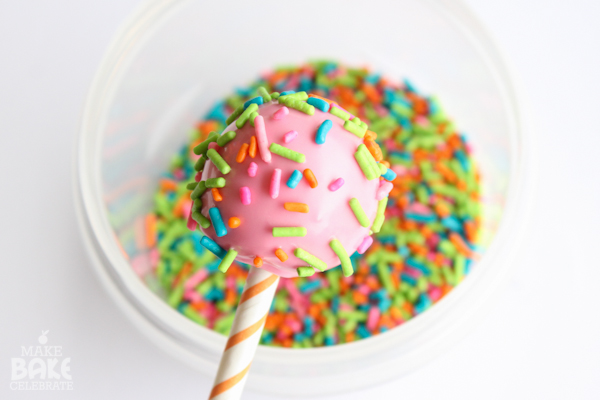
Step 7: If your decorating on wet chocolate, like I have done with sprinkles, you can do so now! Just sprinkle and place back in the cake pop stand to let the chocolate firm.
Step 8: If your decorating on firm chocolate (like done here) wait until the chocolate has completely firmed and then use a toothpick to “glue” pieces on with chocolate. You can do so by dipping the toothpick in the chocolate and dabbing on a small amount of chocolate. You can also create designs by piping on warm chocolate and coating in sprinkles.
Now that we have a good idea of how cake pops are made, let’s go over some additional ways to change up your cake pops.
Flavoring Your Cake Pops
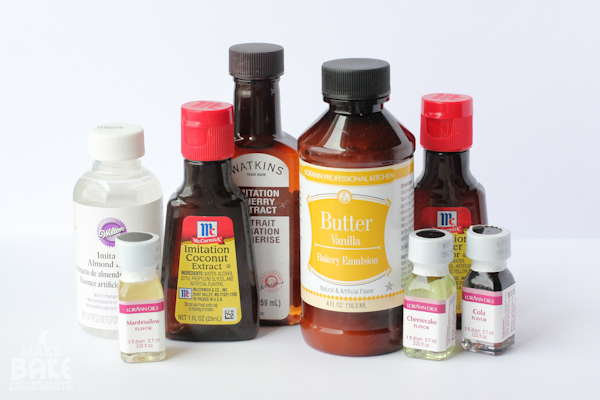
Just like any other dessert cake pops can come in any flavor you would like! There are three opportunities to flavor a cake pop: cake flavor, icing flavor, and chocolate flavor. Changing the cake flavor is a no brainer just swap out recipes or different box mixes. The frosting is also just as easy. If your using buttercream like me you can add any extract, creamer, fresh fruit, or candy oil to your buttercream to change the flavor. (more on that here at Buttercream 101) If your using canned icing there are already a wide variety of flavors to pick from especially with Duncan Hines Frosting Creation Packets. Chocolate, mint, and caramel? Chocolate, strawberry, and vanilla? The cake pop flavor options are endless! And of course you can also change up the flavor of your chocolate using candy oil flavorings. There is a wide variety of oil flavorings available, but remember they have to be oil based to not ruin the chocolate.
Coloring Your Cake Pops
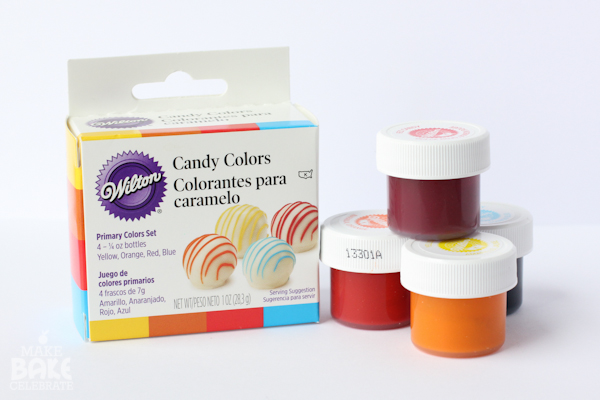
Unlike flavoring your cake pops coloring cake pops can be a little more tricky. Candy melts come in many different pre existing colors that are ready to use out of the bag. But you might not always have the colors you need and that’s where oil based coloring come in handy. I use oil based coloring from Wilton. They are specifically made to color chocolate and candy melts. If you attempt to color chocolate with a water based coloring (even the gel colors!) it will cause the chocolate to thicken and become unusable, with no return. I like to keep my favorite white Candiquik chocolate on hand along with an assortment of Wilton’s oil based colorings so I can color chocolate as I go. However, when you are coloring your own colors, make sure you have plenty of that color from the start. If you run out in the middle it can be tricky to match the chocolate up again with the same shade.
Decorating Your Cake Pops
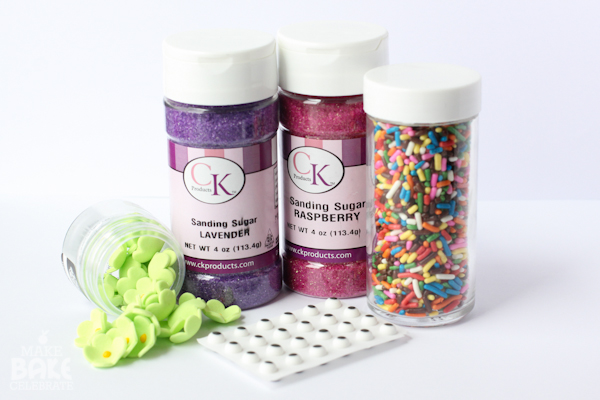
Decorating cake pops is by far the fun part! Decorated cake pops can go from a quick shower of sprinkles to intricately places sprinkles and candies. You can decorate cake pops with all sort of edible embellishments like sprinkles, candy, fondant, edible glitter, royal icing, and more! For more intricate designs my best advice is to have everything laid out before hand. If you are covering part or all of your cake pop with sprinkles it will need to be done while the chocolate is still warm. Additional chocolate designs can be layered on after the first coat has dried, chocolate swirls for instance. For more intricate designs the timing will vary. Some times you can apply candy buttons or eyes on right as the chocolate is still warm but keep in mind it may sink a bit and can slide. Most often I layer on my pieces after the chocolate is firm. I do so by using a toothpick to place chocolate “dots” on the already firmed chocolate and then “gluing” on the sprinkles/candy with the melted chocolate dots. This works really well for placing pieces like eyes, feet, noses, and so on. Plus, if I mess up on place meant I can easily pull it back off and wipe the area clean of chocolate to start again.
Edible markers can add life to a cake pop very quickly! Just make sure your chocolate is completely dry before attempting to use an edible marker.
You don’t have to stop at just the cake pop though, why not decorate the stick! I almost always spruce my cake pops up with fun patterns of paper straws or washi tape! You can also tie ribbons or use printable cake pops tags to decorate the stick.
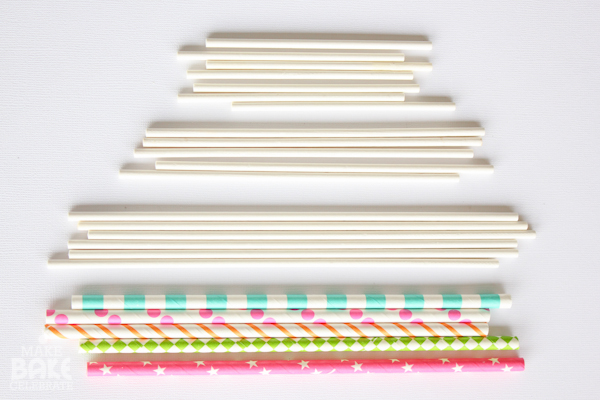
Sticks And Straws
Lollipop sticks come in multiple lengths, which can be purchased at any local craft store in the baking section. I adjust my stick length depending on the project but most often I use 6in cake pop sticks. I also love to use paper straws to spruce up my cake pops. While you can use them alone I like to slide them over my cake pop sticks so I can have the firmness of the stick and the look of the straw. You may need to trim your straws to the length of the stick with a pair of scissors.
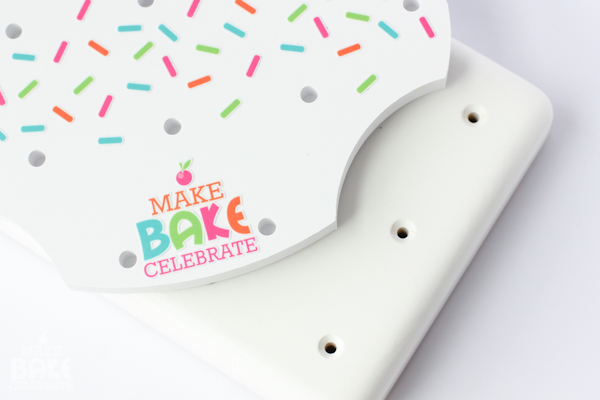
Cake Pop Stands
While cake pops stand aren’t a MUST in the beginning they are certainly helpful in the process! If your just starting out making cake pops you will at least need a block of styrofoam to hold up your cake pops while drying. If your going to continue making cake pops I would highly suggest investing in a stand or two to help out. Not only do they make the process so much smoother they are great for displaying your treats as well! I have two stand that I use and love my KC Bakes Stand and my new custom Cake Pop Stand Co. stand. Both stands have been really great to work with. In this tutorial I used my Cake Pop Stand Co. straw stand, which you can read more about here.
Baked Not Rolled
Some of your may be wondering about the little cake pop bakers you see in the stores and wondering if they work. I actually own a Babycakes Cake Pop Maker and love it. The big difference here is instead of rolling a mixture of cake and icing into balls, your baking up little bites of cake without the icing. Both ways have their advantages. For those who like a less sweet cake pop, baking the cake pop will be to your advantage. It’s also much faster to bake them up round and ready to go then baking, destroying, mixing, and rolling.
There are a few downsides to baking the cake pops of course. My biggest problem is they don’t always bake perfectly round. You may need to either adjust the cake recipe or how you are filling the baker to get nice and smooth cake pops. I’ve also had the problem of seams baking in where the two plates join. And last but not least, since you are sticking the stick into a fluffy can and not a firm dough, there’s less to adhere too making them less stable.
As with anything else, I like both methods and switch between the two when I feel one way is better then the other. For a baked cake pop check out my S’Mores Cake Pops.
Additional Tips And Trouble Shooting
Keep Them Cool – While you don’t want your cake pops frozen you want to keep them firm while working on them. Rolling a lot of them or in a warm room can make even the best cake pop dough get soft. Since we live in such a warm environment I generally work right beside my fridge when making cake pops so I can stick them right back in after working on them in between each step. If it’s really hot and humid out you can even try pulling out one cake pop at a time from the freezer, covering and replacing.
The Right Amount Of Icing – Remember you want a nice smooth but stable dough to roll. If your cake pops are crumbling and falling apart when rolling, add more icing. If they are not holding a shape you’ve added too much icing. It’s best to add a little icing at a time when mixing your dough.
Flat Bottoms – Sometimes it’s just going to happen, the cake pops get a little flat on the bottom from sitting on the tray. Don’t worry you can always reshape them a bit after letting the firm up in the freezer. If your balls are TOO flat on the bottom them your dough is most likely too moist, next time add a little less frosting.
Covering Down – When your covering your cake pops, make sure that your chocolate has gone all the way down to the stick. The chocolate at the bottom will help once again “glue” the cake pop to the stick creating a lot less casualties. If you have too much chocolate on the bottom you can always remove the excess by gently placing your finger at the base of the stick and turning the stick around letting the excess fall back into the bowl.
Packaging And Storing – Cake pops can be stored for a day or two right on the counter in a covered container or for about a week in the fridge. Cake pops CAN be froze but condensation will accumulate on the outside shell once thawed. Craft stores now carry all sort of different cake pop boxes and cellophane bags to help package up your treats.
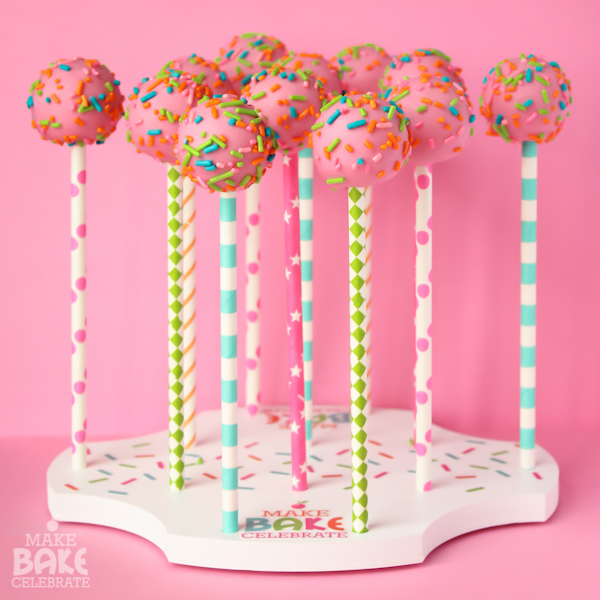
I think that just about covers every angle on cake pops, and completes Cake Pop 101! I hope this guide (more like book) comes in super handy to start off your cake pop adventure! Ready to get rollin?









This was a great read on cakepops. I’m a newbie cakepopper and am positively smitten with these bite-sized morsels of yummy goodness. I enjoy making them and agree that the best way to learn a thing is to do a thing. Practice makes progress. TFS!
~ Cakepoppin’ Constance
Thanks so much for sharing cake pops 101 with us. I love making these little yummy confections on a stick. I’m actually getting pretty good at it! I love the idea of using straws instead of sucker sticks. They look adorable! Thanks for all the tricks & tips too. Think I’m going to look into purchasing the wilton chocolate warmer & the treat baller. Looks like it would save some time. I love your Blog, Toni. I look forward to reading your posts. Keep all your ideas coming, the Holidays will be here before you know it!
Nancie, I’d love for you to give our paper straws a try and would be happy to offer you a discount to get you started. Just shoot me an email at Janine@cakepopstandco.com and I’ll send you a coupon code you can use to get a couple packs of straws for just $3 per pack.
This was a wonderful post! I have been making cake pops for about a year and this is the most informative piece I have read. I am now following you on Pinterest and thank you and your husband for the military service as well!
P.S. I have to find that treat baller!
Thanks for sharing! I haven’t made cake pops in a long time and this article is getting me excited to give it a go again. That cake baller that you got at Wal mart is just what I’ve been looking for. I’ve also been eyeballing the chocolate warmer from Wilton, it would sure make things a lot easier.
Thanks again for sharing, you inspire me to bake!
Great post! Do you have a brand name or a link for the roller you got from WalMart?
It’s simply called a “Treat Baller”, you can find it here:http://www.walmart.com/ip/Bite-Size-Elegance-Cake-Pop-and-Treat-Baller/37964523
Very nice post. I just stumbled upon your blo and wished to say that I’ve truly enjoyed surfing
around your blog posts. In any case I’ll be subscribing tto your feed and I hope
you write again very soon!
Also interested in the cake ball roller that you purchased at Wally World…
It’s called a “Treat Baller” you can find it here: http://www.walmart.com/ip/Bite-Size-Elegance-Cake-Pop-and-Treat-Baller/37964523
When you use the straws do they fit in the stands or do you trim the bottom off?
I have a stand made for straw sticks. But you can also cut the bottoms off for display! Cake Pop Stand Co. offers both hole sizes.