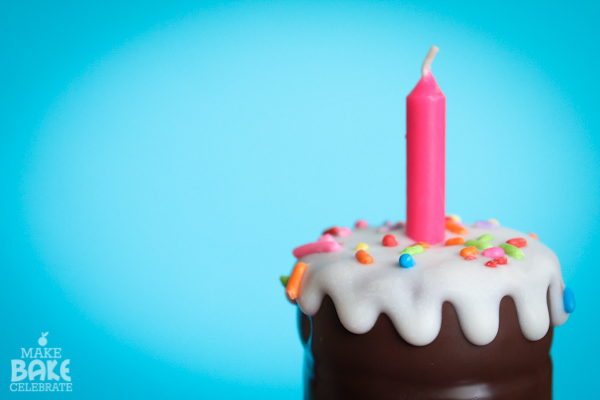
Why hello there, would you like to meet these darling cake pops? I made these birthday cake cake pops and another two tier version to celebrate my twin girl’s birthday this week. They turned three!
While I was recently editing posts and placing them in the new sweets index I realized there was only one post currently in cake pops. One lonely little post! So why exactly have I not been showing cake pops love? Hmmmmm. Well I think it’s because I really hadn’t found a method I loved or really tried very hard at making them fun. It seemed to me like a whole lot of effort for just one bite of cake. And I’ve sampled a few before that I didn’t just think was worth it…
So I figured me and the cake pops need to give it another go…and settle our issues. ;). I had the perfect chance with the girl’s birthday. I am always trying to find other fun birthday treats we can use on their birthday so we’re not having several cakes (party and real birthday). With a bit of playing and a new cake pop stand from KC bakes I found a great method of making cake pops that I really enjoyed and couldn’t stop eating. Hey it’s like 4 cake pops to one cupcake so it’s ok…
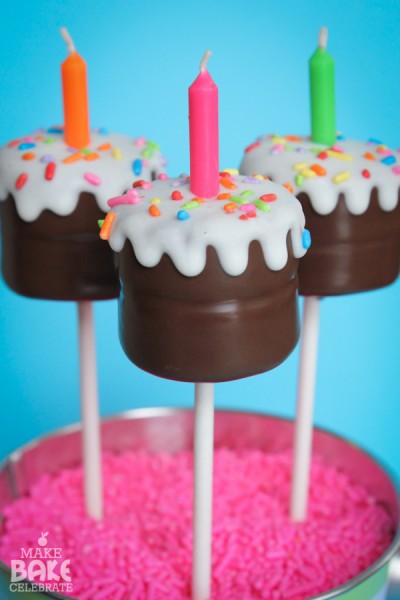
Normally I bake my cake pops in the babycakes cake pop maker. This isn’t the traditional way of crumbling and mixing in icing. But for one I often found cake pops to be too sweet and for two it’s way easier. So while I still like that method of baking there are times where you want something more then just a round ball…and that’s where I was limiting myself! This time I didn’t just crumb my cake and then mix in icing. I actually put my cake in my Ninja (food processor) until they were just tiny little fine crumbs…then I stuck only half a can of Duncan Hines frosting creations starter icing in with the crumbs and turned my Ninja back on. It resulted in a incredibly easy to work with cake and icing dough. Most cake pops are rolled with a dough that still has small cake chunks and quiet a bit of icing. This was seriously just as easy to use as sugar cookie…actually even more so. I’m pretty sure I could make any shape with this. I also never even rolled out the little balls before shaped…I found that kind of pointless for me and went with a different method.
It had a really nice texture when eaten…it really was more like a truffle. Nice and soft and oh soooo yummy. Definitely not too sweet. I used the Duncan Hines frosting creations starter icing because it’s the only canned icing I keep around…when I use the flavor packets in things like fudge or mousse. I wasn’t sure how it would work but I think it might have played a key roll in the taste because the icing is quiet a bit less sweet due to the fact it’s made as a base to add the flavor packets in. I can’t say for sure yet…but that’s my guess.
Whew. Ok let’s go over how I made these exactly. If you already have a method that works for you…you can still swap out yours when needed if that works for you.
1 Box Duncan Hines Yellow Cake Mix + Ingredients Listed On Box
8oz. Duncan Hines Frosting Creation Starter Icing (half can)
Milk Chocolate Melting Chocolate
White Melting Chocolate
Lollipop Sticks
Sprinkles
Candles
Makes 18 cakes pops.
Step 1: Bake cake.
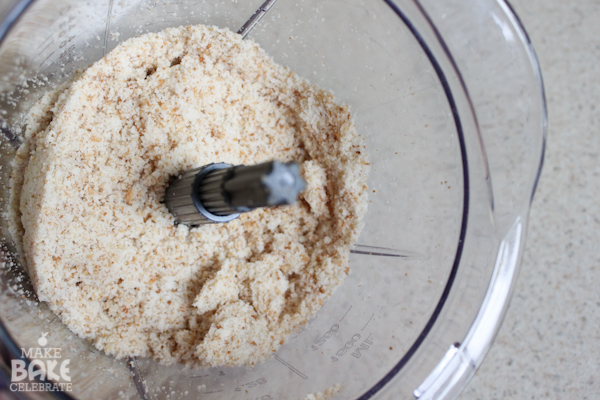
Step 2: Crumble cake into food processor and process until the cake is tiny little crumbs.
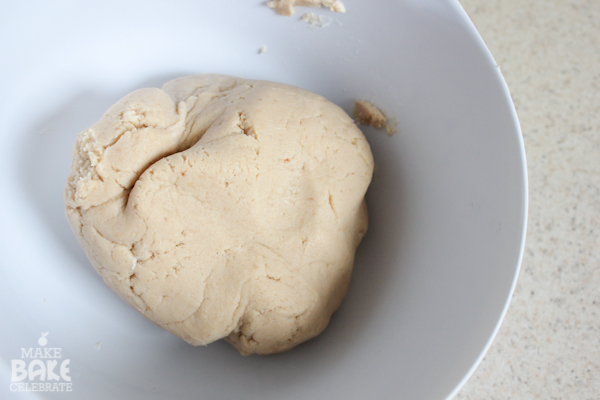
Step 3: Add in 8oz (half can) of Duncan Hines Frosting Creations Starter Frosting© blend until completely combined. Move icing/cake mixture into a bowl work together with your hands just a bit and form a ball. Place in the fridge for 20 minutes to chill.
Step 3: Roll and cut cake pop circles.
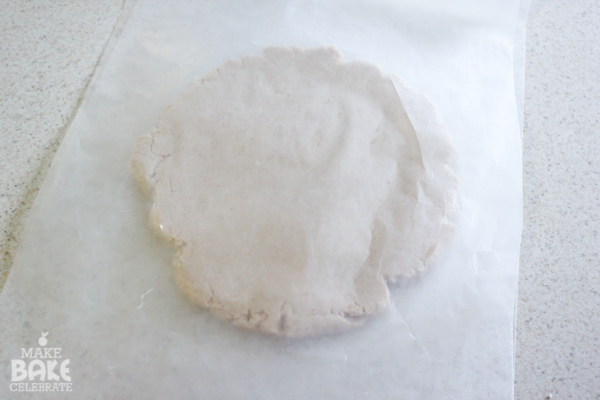
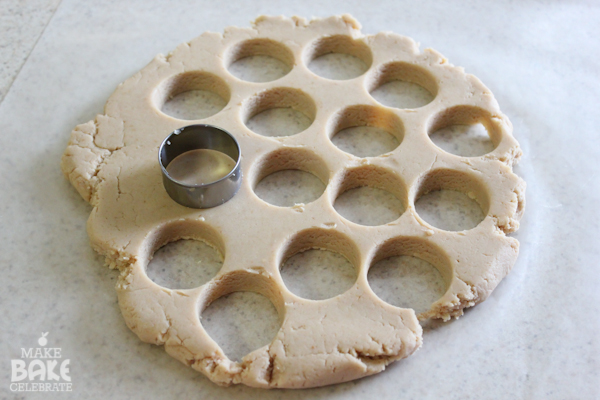
Here’s where I REALLY strayed from the average cake pop method. I never rolled the little balls and then shaped each one. I simply just rolled between two pieces of wax paper. Then I just used my circle cutter and cut out two circles for every cake pop. You can use the old method or try this out…but this worked for me. And made by brain hurt a whole lot less. I didn’t have a guide that was thick enough so I just eyed it…but my dough was about 1/2in thick. The circle cutter I used was 1.5 inches from Wilton’s circle cutting set.
Step 3: Roll and cut cake pop circles and place on wax paper. (you can see the other cake pops I made in the photos as well).
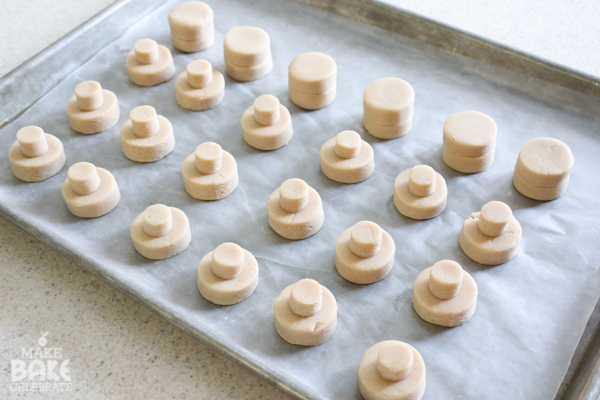
Step 4: Melt a little bit of your milk chocolate melting chocolate. If your using a chocolate melter like I do, you can go ahead and melt it all now. If you need more info on melting chocolate or my process you can find that in Melting Chocolate 101. (pst) mine is white because I was still working with the other cake pops, sry!)
Start by dipping a half inch of your stick in the chocolate…then spread it around between the two circle layers of cake pop. This will “glue” your cake layers together…make sure they are nice and “glued”! Then dip your stick again and push half way into the two laters.
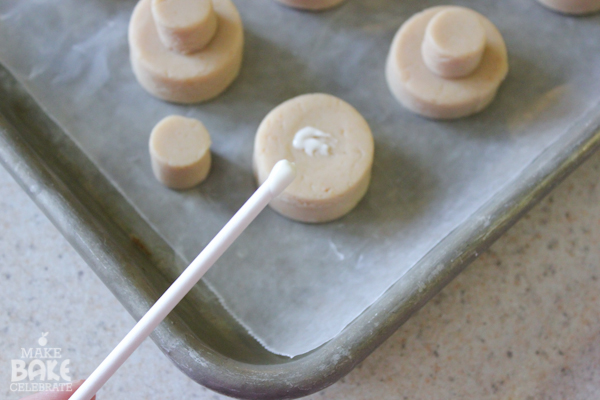
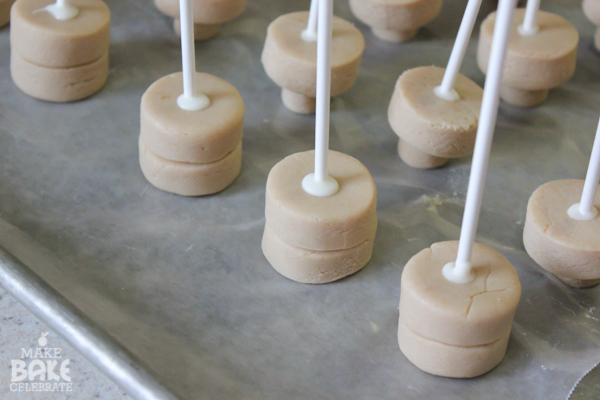
Step 4: PLace them in the freezer for a few minutes to let the chocolate firm. You can lay them on their side if needed. While they are chillin go ahead and trim up your candles.
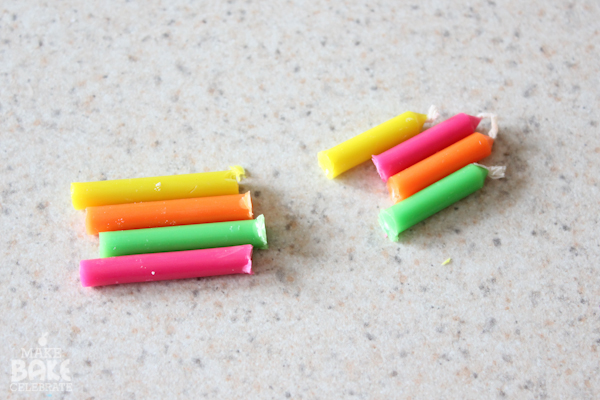
Step 5: Pull the cake pops and let them set on the counter for a few minutes. You don’t want to cover a freezing cold cake pop with warm chocolate. While you are waiting get your milk chocolate ready and supplies organized.
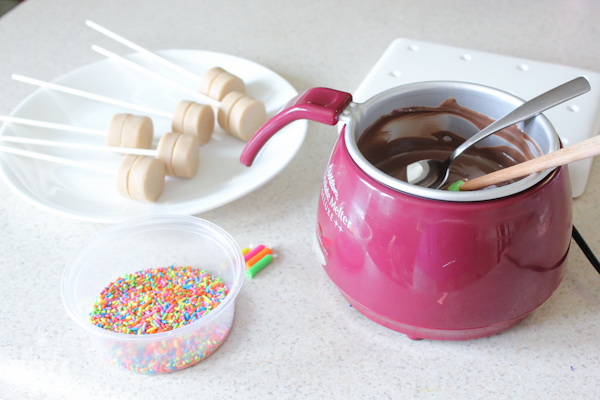
Step 5: Either dip or spoon chocolate over your cake pop. Then gently tap and swirl till the excess is off. I always spoon chocolate over…much less chance of the cake pop sliding off! I also keep my cake pop tilted up on the side of my melter while tapping. Then prop up to dry…I’m using my new KC Bakes stand. Good bye styrofoam!
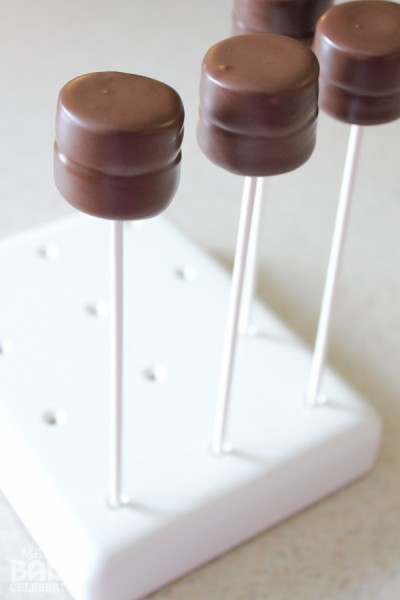
Once all your cake pops are covered in milk chocolate it’s time to melt your white chocolate. If you have extra chocolate don’t waste it! Check out how to save that extra milk chocolate here.
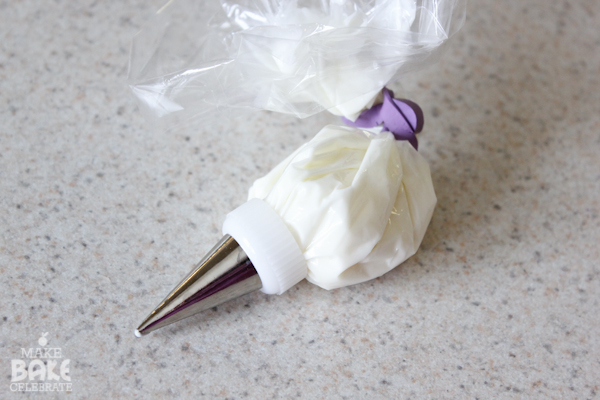
Step 6: Once your white chocolate is melted, pour a small amount into a plastic bag with a small round tip. You will use this to make the “dripping” icing on top.
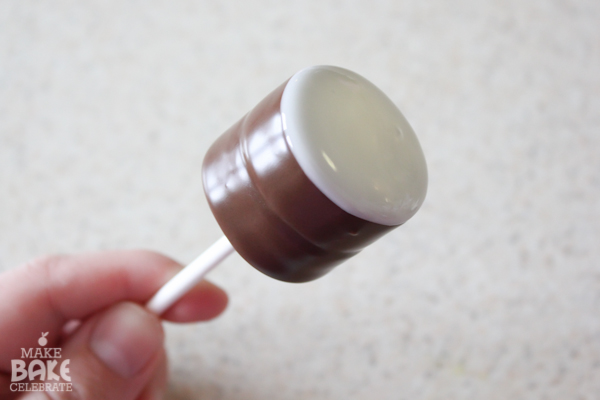
Step 7: Gently dip your cake pop into the white chocolate. Just BARELY dip it…you don’t want it running down on it’s own. It’s not pretty! lol.
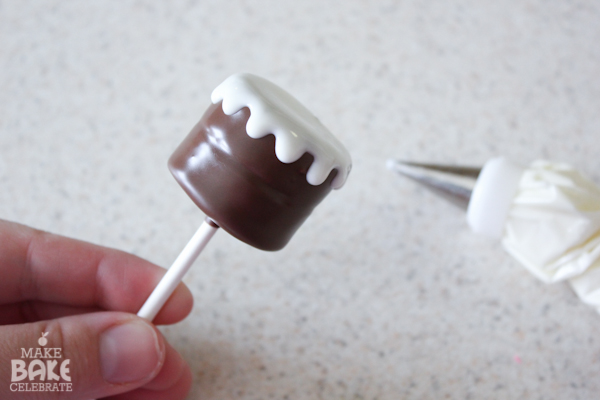
Step 8: Right away while the top is still wet use the white chocolate in the pipping bag and gently pipe the drips on. The best way I found to do this was apply just a bit of pressure then move the tip over a bit…apply more pressure…more it over a bit more. Each time letting the icing drip just a bit and allowing space between each “drip”.
Step 9: While icing is wet gently push the candy in a little bit and sprinkle with sprinkles.Let dry.
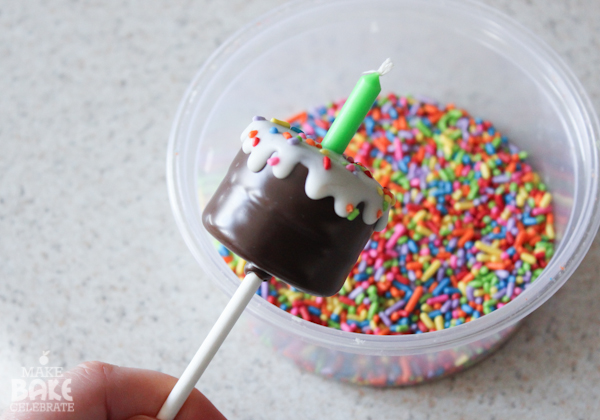
NOTE! I had originally planned on pipping icing where the line “cake” shows through AND I only had that deep of cutter. But it just looked so cute like that I left it. You can add on that center line or icing, leave it like me, OR if you have a cutter with more depth you can skip the whole two layers completely.
What a cute and easy way to say Happy Birthday! I really love how these little cakes turned out. They were WAY less work then a real cake…and I think the kids liked them more! Plus they still got to blow out their candles :).
Want it even EASIER? Try making these with marshmallows! They are the perfect shape!
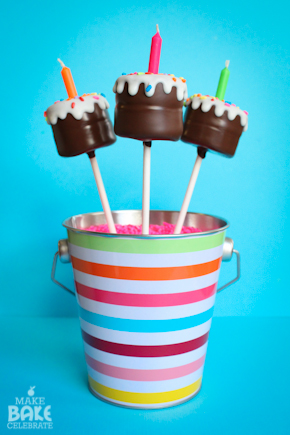
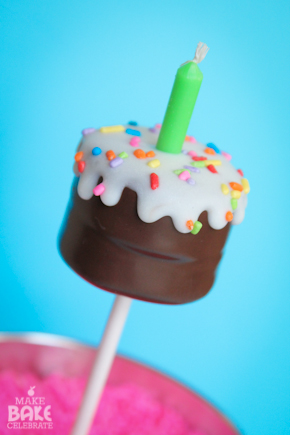
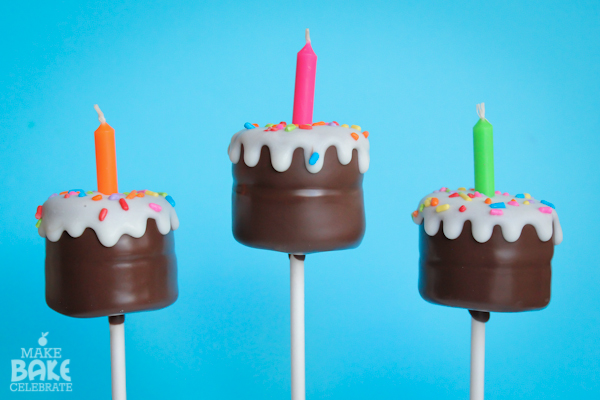
I hope you guys like these sweet little cakes as much as I do! Happy Birthday to my sweet little THREE year olds!












Question: Why use Duncan Hines Frosting Creation Starter Icing vs. any other icing (cream cheese, vanilla, chocolate, etc.)?
It’s not a must just what I used. There’s a bit more information on my choice within the post. :)
Thry turned out adorable and perfect, Toni! Love your darling new blog look!
Those are darling! Thank you so much! I’m very glad I found your blog!
Linda
http://coloradofarmlife.wordpress.com
http://deltacountyhistoricalsociety.wordpress.com
Oh my gosh!! I love this!!! Thanks for sharing this tutorial!! :)
What a unique way to create a cake pop! Thanks for sharing :)
Thanks!
Love it! Great tutorial, thanks!!
I just found your blog… very informational! I was curious about cake pops in general.. does shape matter? Can you any cookie cutter shape?
Hello! You can play around with any shape you want, but they don’t always cover as well. For example – I made little star cake pops once and they looked great on the stick but when I went to cover them they were a lot harder to cover with all the different points and some even broke. So you can always play with different shapes, just know the more complex the harder to cover in chocolate. Smooth shapes always work best. :)
Alright, thanks for the insight! I know what my culinary experiment is going to be this weekend!
These are my new favorites! I love cake pops and these are the cutest I’ve seen so far. Love them! (Great tutorial too!) : )
These are so cute!!!
Hello!
I really love how this turned out! but i have a question, where can i buy a circle cutter?
please help :)
Circle cutter sets can be found at almost any craft store that carried cake supplies! Michaels, Hobby Lobby, and Joanns normally all carry a Wilton brand set of circle cutters. :)
what are the little pieces on top ?
on top of the 5th picture?
Yes, please tell us what those smaller circles are sand what they’re for. If they’re made of the cake ball mixture, they look like tiered wedding cakes.
The other little cake pops were used to make these: http://makebakecelebrate.com/kcbakescakepopstan/
I wish this was printer friendly.
so cute and you did a good job!!
I am going to try these for my daughter’s 2nd birthday next week. Can you explain the pail display…how are they standing up? I am a total cake pop rookie!!
I have the same question. I want to make them for my daughters birthday but I am not sure how the pail display works.
The cake pops are simply stuck in a pail full of sprinkles! Sprinkles can be bought in bulk at almost any cake decorating store or online at places like Country SweetArt Kitchen. Hope that helps!
I made some of these last night and they turned out ADORABLE! My Mom’s Birthday is tomorrow and she will be very surprised! The directions were very clear and they came out just like how you have pictured. Thank You SO much for sharing with us :)
Yay! That’s exactly what I love to hear! If you have a picture I’d love to see it! Toni@makebakecelebrate.com :)
I e-mailed you a picture :)
Rolling out the dough, this is genius….. pure genius! I made cake pops the other day and they were nowhere near as easy as these look. I almost vowed to never make cake pops again lol (yeah right!). Have you ever tried molds like these? http://www.amazon.com/My-Little-Cakepop-Cake-Mold/dp/B00AK1H1VA/ref=pd_sim_k_1?ie=UTF8&refRID=0V2A2R2Y8NRK3R0R35FM
I actually have some of these molds and you know I just haven’t really gotten into using them! I always end up shaping them on my own! I have a cake pop 101 post coming soon. Maybe that will help?!?
These are adorable! I’m going to try these out. How soon before a party can you make them? Once they are completed, how to do store them (should they be be covered/refrigerated, etc.)
Hello! You can make and store them in an air tight container for a few days before the event. They can be refrigerated or even frozen for longer but you run the risk of condensation.
in my country lollypop sticks are not available, any substitute
Hello! What about cutting up wooden kabob skewers or sturdy straws or stir sticks?
when I first saw these, I thought you decorated a marshmallow! These are too adorable!
You know, it does kinda look like a marshmallow! Ha!