

Last week I shared these Salad Sugar Cookies on my Instagram feed, with a punny explanation that I had a resolution of eating more greens this year. I mean look at all those shades of green? That’s some solid pun content right there guys. Forget the Vitamin A, B, or C – that’s a downright dose of funny. All joking and sugar aside, I’m actually not a New Years resolution kinda girl. Gasp, shock?! And no, it’s not because I have my life together (Because that was the obvious explanation right?). The truth is with each passing year I’ve learned that in order to make real positive changes in life, I need to discover, start, and commit to them in their own time. When I am physically and mentally ready and open to bring a positive change to my life – be it eating habits or house routines – not just because it’s January.
With that said what I do love to do in January is take a look back at the last year and seriously appreciate all the good it brought (there is ALWAYS good if you look) and celebrate the wins I/we had. And of course, I like to highlight a few areas that I want to pay more attention to and improve on in the coming year. So while I’m not suiting up for a huge resolution and bolting into an attempt at success on January 1. I’m just taking the time to recognize where I’m at (life, work, spiritual) and highlighting the areas that need a little, or a lot, of improvement in the new year – when it’s time. Then instead of spending that time trying to commit to a new habit or whatever it might be, I spend January cleaning out everything from the last few months of holiday chaos and prepping everything for success in the New Year, I just don’t see the need to pledge a change and throw myself into it the moment the clock strikes midnight. Make sense? If not just enjoy these silly Salad Sugar Cookies a minute…that will take you right back to happy.
Which brings me to the perfect time to explain why I made a salad, made of cookies, when half the people in the world are making the pledge to eat better. Wow, typing that out made it seem almost like they were meant to mock, eek. As Ricky would say…YOU’VE GOT SOME SPLAYNIN TO DO!
The truth is just the opposite. These cookies were made just to make you and I giggle. That’s it. They were not made for an awesome event, or a friend who has a crazy affection to salad…literally they were just made to bring a little joy to the New Year. In 2017, as I stepped back into the blogging world after having the 4th kiddo and moving to a new country, I made a promise to myself that I would take time to create things that just make me happy and bring just a little more joy to your news feed. Sometimes we get so wrapped up in setting goals and getting down to business we forget to just enjoy. Especially for the creative, you guys I understand you’ve got bills to pay but you also have to remember to keep that heart on full. You’ve got to take time to create things just for the fun of it. That is what fills that heart tank and keeps us moving forward.
I also learned to let go of the anticipation/anxiety of what others might think of my creations. Huge win there! When I’m shooting a project and I am giddy with excitement, I know it’s a win. And over and over again, you guys have shown me this year, that when I let myself just create with joy, you guys love it! Look at how fun these cookies were right out of the oven. Not a drop of frosting and I loved them…
Before we hop into the how-to for these cookies, can I just challenge you guys to put in on your plan this year to create for the sake of joy? Find the time to set aside do whatever it is that fuels your tank. Maybe it’s make salad sugar cookies and if that’s the case then you are in luck!
DECORATOR’S NOTE! As always you can add or adjust tools and supplies to fit your ideal end result or tools you already have. But here’s what I used. Also, all of these royal icings could easily be switched to 20-second icing. I am just so darn old school I love to pipe and flood.
SUPPLIES
- sugar cookie dough
- gel food colors
- outline + flood royal icing for each color you would like in your salad
- clear sugar crystal sprinkles
- black sugar crystal sprinkles
- green + brown airbrush spray (totally optional)
TOOLS
- an assortment of cutters to resemble your salad pieces (see image above + links in step 1)
- rolling pin
- airbrush (optional)
- piping bags
- small round piping tip
- food safe paint brush
MAKE THE SALAD SUGAR COOKIES
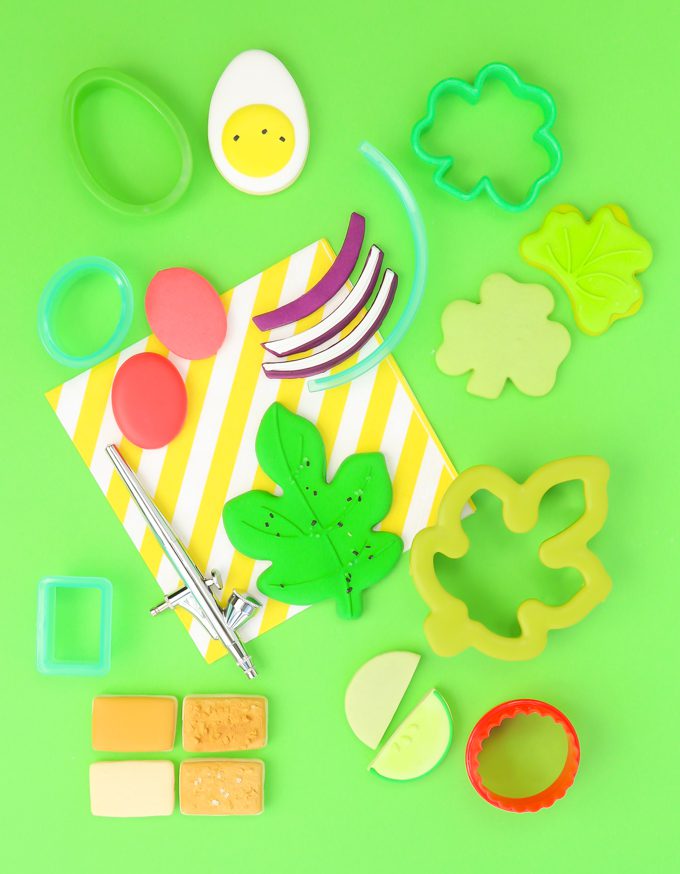
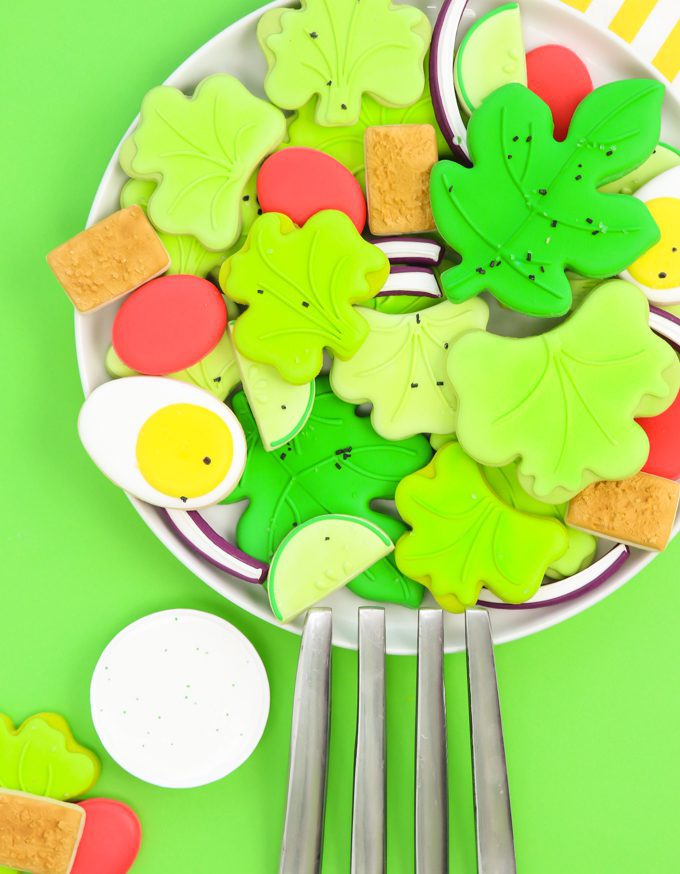
Step 1. The first key to cookie salad success is finding the right cutters. For the cutters, you’ll be happy to know all of these cutters were simple standard cutters most cookie makers have around or can even be bought at a local store. With the exception of the edging tool, I used for the onion you probably already have a version of all of these. And even better news, the edging tool can be replaced with the side of a circle cutter. Though I highly recommend grabbing this edging cutter set as I use it all the time in my cookie adventures.
Here are the cutters I used:
tomatoes
croutons
lettuce + leaves (some clovers I used the curve edger to cut off the stem)
onion
egg (I can’t find the exact one but any standard Easter egg cutter will do)
cucumber ) (I linked to a similar set, however, you can pick up a nesting circle set at any local bakery supply section for just a few dollars.)
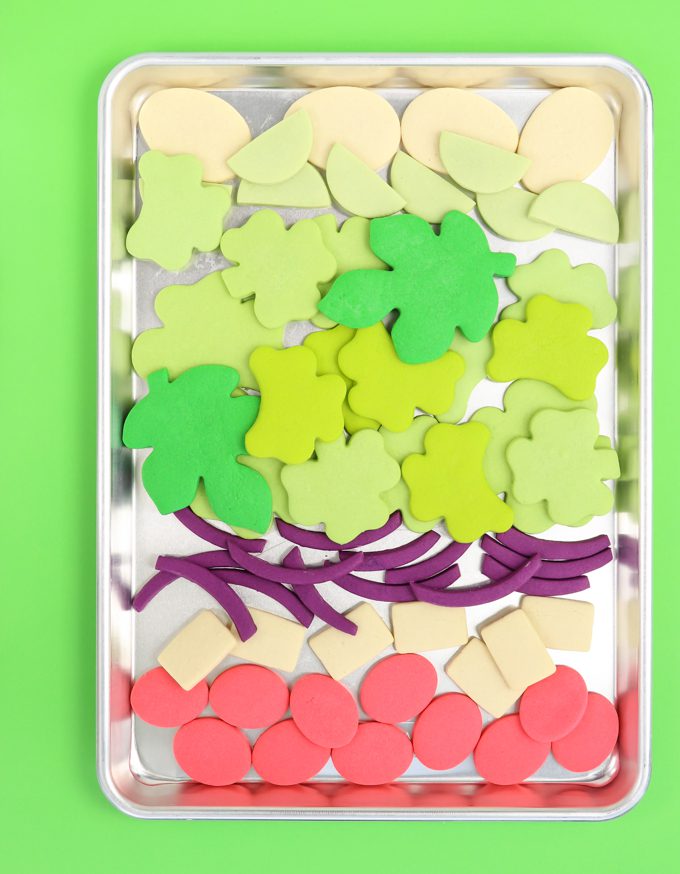
Step 2. Although you can’t see it particularly well in the final photos, the second key to salad success is coloring the dough. This has become a key trait for my food in disguise treats. In person, they really change the look of the entire cookie platter, and they make the whole thing blend together without bright cookie edges sticking out everywhere. In this case, I even left a little of the green cookie naked on the lettuce to give me the freedom to give the lettuce pieces a little more character. After you have your sugar cookie dough ready, split in half and set the first half aside, don’t color it just yet but this will be your greens. Now at this point, you can color your dough the faster way, or in the use every bit of dough possible way. For the faster way, divide up your dough, setting aside one part of each color you need. Color each color then roll, cut, and bake. I chose to do so in a way that takes longer but results in more cookies and very little left over dough. First I cut out a handful of eggs and croutons from plain dough. Then I color a little red and cut a few tomatoes. When I feel I have enough tomatoes I take that dough and add blue to make purple for the onions. Then I grab the half of the dough I set aside and I start by dying it a light green. I cut a tray or two of lettuce and cucumbers then add more green for the next round. When I only had a few cookies worth of dough left I added a lot of green to make a few dark green leafs for the salad.
This method allows me to get all the cookies I need and use us practically all of the dough. It also saves me from running out of dough before I have all the cookies I need as well. You can either wait until all the cookies are done to start baking, or you can pop them in the oven as each tray fill. Bake at 350F, time will depend on cookie size. I used just 6 minutes for the onions and up to 12 for the large leaves.
Baker’s Note: If you’re mixing colors to get the exact colors you want it will be helpful to jot down the what colors and ratios you used in each color so you can recreate it easily with the icings.
MAKE ICING + DECORATE
3. For the icing you could really use the same coloring mixing principle to save icing. But one batch of icing generally makes more than enough for a set of cookies. And I prefer to do all of the mixing and sorting prior then sit down to do all of my decorating with a full set of icing. You will need to make one outline icing and one flood icing in each color. (info on that here)
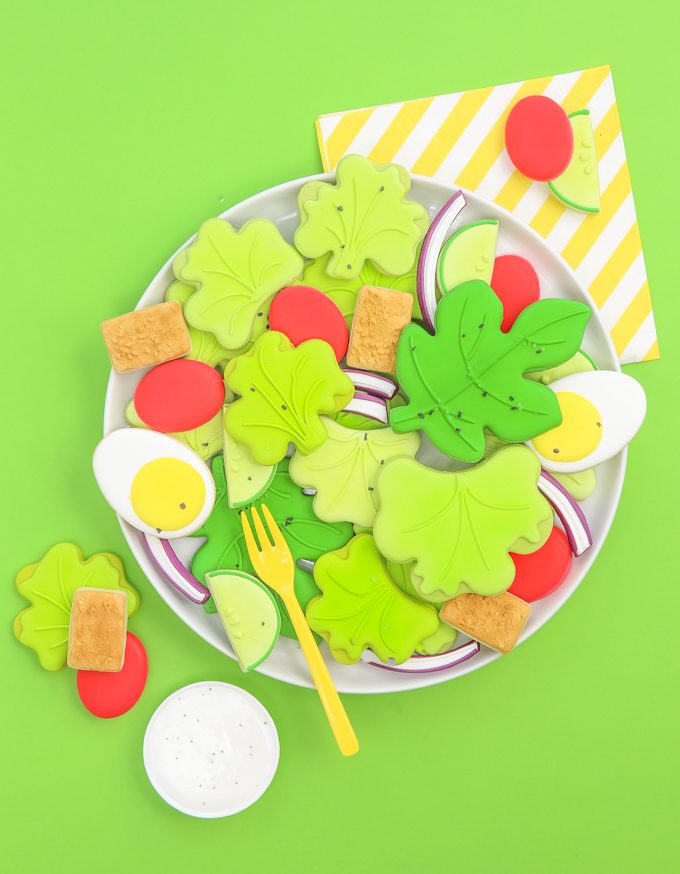
4. As you can see in the breakdown shot almost all of the cookies are decorated with a simple outline and fill then a simple detail on top once crusted over. The egg yolk, the leaves, onion lines, cucumber details and so on. I also tossed on a few clear + black sugar crystals here and there to give the salad a salt and pepper seasoning look. The croutons however, are the star here!. To get this textured look I first frosted the rectangle cookie like normal. A few moments after I sprinkled clear sugar crystals on top of the wet icing, waiting a few minutes keeps them from sinking in all the way but still sticking to the icing. After that layer dried for about an hour I piped on a blob of more brown outline icing and used a paintbrush to cover the sprinkles and create texture. Brilliant right?!
5. The final step was to give the lettuce pieces and the croutons just a little shading with an airbrush. If you have an airbrush – this final step gives is the perfect final boost but if not don’t sweat it. They still look great without that small detail.
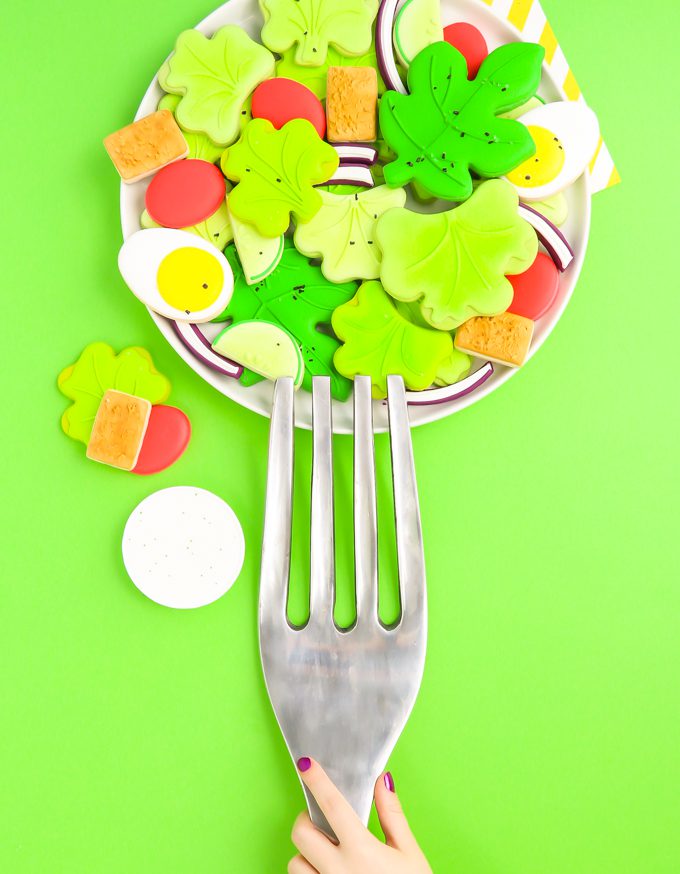
Once the cookies were done I couldn’t decide what on earth to do with them. Honestly I just wanted to keep the whole darn thing on my desk forever, for a quick laugh when I needed it of course. But since cookies don’t keep forever (though longer then real salad) I sent them off to the teacher’s lounge and the kiddos school without even a bit of explanation. Who know’s what they all thought, but for sure…they made them smile.
Heads up! To keep those legal gurus of the world happy, I need to inform you that some of the links in this post are affiliate links. In short – I may earn a small commission from the use of said link with no cost to you! But don’t worry I only link to stuff I use, love, and know you will too!


