

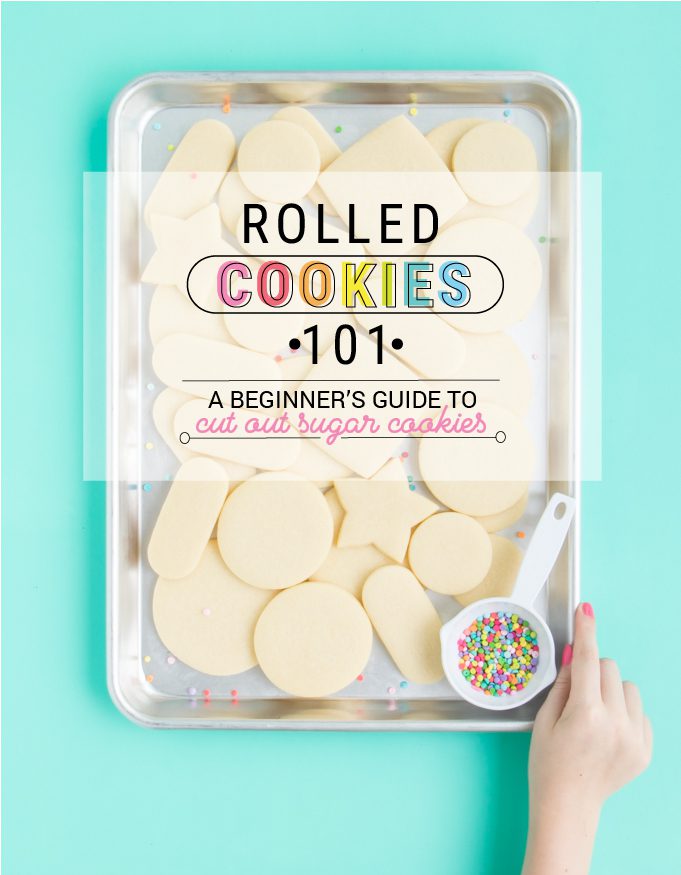
Hey hey hey there sweet friends! Looking to end your search for the best rolled sugar cookies? You’re in luck! I’ve got you covered with this comprehensive guide to my version of the The Best Rolled Sugar Cookies which will having you baking cut out sugar cookies like a pro in no time. This no chill + easy sugar cookie recipe is the perfect yummy canvas for decorated sugar cookies whether you’re a cookie decorator or simply looking for an easy sugar cookie recipe to create frosted holiday memories. Together we’ll dive into Rolled Cookies 101: making the sugar cookie dough, tips and tricks to easily perfect your cut out sugar cookies, as well as my must have cookie tools.
This baking 101 post has always been one of your favorite posts on my old site and I am bringing it over to the new site here better then ever! Over the years I’ve changed my go-to rolled sugar cookie recipe bit by bit until I got to the perfect sugar cookie recipe that’s super easy to make and every bit as yummy. No more out of shape sugar cookies that have spread into blobs in the oven. These roll out sugar cookies have very little spread. (I like just a tiny bit of spread to give it a smooth shape.) But wait for it, no floured counters necessary. YES! It’s true!
Ready to make the best rolled sugar cookies the easy way? Let’s roll!
UPDATE! For those of you asking for the original sugar cookie recipe from my old post, no worries! I’ve added the original recipe to the bottom of this post as well. The original rolled sugar cookies are a little softer and spreads a little more. Both recipes are great and I use them interchangeably when needed. However, the newest recipe you will find directly below is what I use most often use now when cookie decorating.
PART 1 TO ROLLED SUGAR COOKIE SUCCESS – A GREAT SUGAR COOKIE RECIPE
First things first. In order to nail those cut out sugar cookies like a pro you’re going to need the best sugar cookie recipe.
Let’s first address the giant sugar cookie elephant in the room? It’s that “best” word. How can a recipe be the best rolled sugar cookie recipe? What kind of sprinkle sauce are you drinking here Toni! Well first let’s talk about what makes the best rolled sugar cookies. It’s actually pretty easy. The best rolled sugar cookies are actually the sugar cookies that suits your needs in the absolute best way, best is subjective. Not exactly what you were thinking I was going to say is it? But it’s true guys, I can’t tell you if the the best sugar cookies are crispy or soft, spread, doesn’t spread, puffy, straight, heck maybe it’s Queen of Englands tea biscuit’s. I can however share my best sugar cookie recipe that I use for my cut out sugar cookies.
This sugar cookie recipe is soft yet can have a bit of crunch (with longer oven time), almost a mix of shortbread and sugar cookie. It requires very little prep yet becomes the most beautiful canvas for cookie decorating with very little spread, and it’s not too sweet. Which is important to me as were typically going to layer royal icing over the entire thing.
Have I convinced you this is the best sugar rolled sugar cookie recipe? If so let’s dive right into Rolled Cookies 101, I’ll wait while you grab a warm beverage….
THE FIRST STEP TO GET THE BEST ROLLED SUGAR COOKIES – WEIGH YOUR INGREDIENTS!
You will notice below I list my dry ingredients in cups and grams. If you’re truly looking to perfect your cut out sugar cookies please weigh your ingredients! Like with any recipe weighing your ingredients is so much more accurate and will assure you get the exact same results each time. A cup of sugar or flour can vary greatly from person to person depending on how packed it is or even the cups you use. Baking scales are cheap and will save you lots of heartache in the kitchen! I really can’t stress this enough. My scale has been the key to success in my cut out sugar cookies.
THE BEST ROLLED SUGAR COOKIE RECIPE
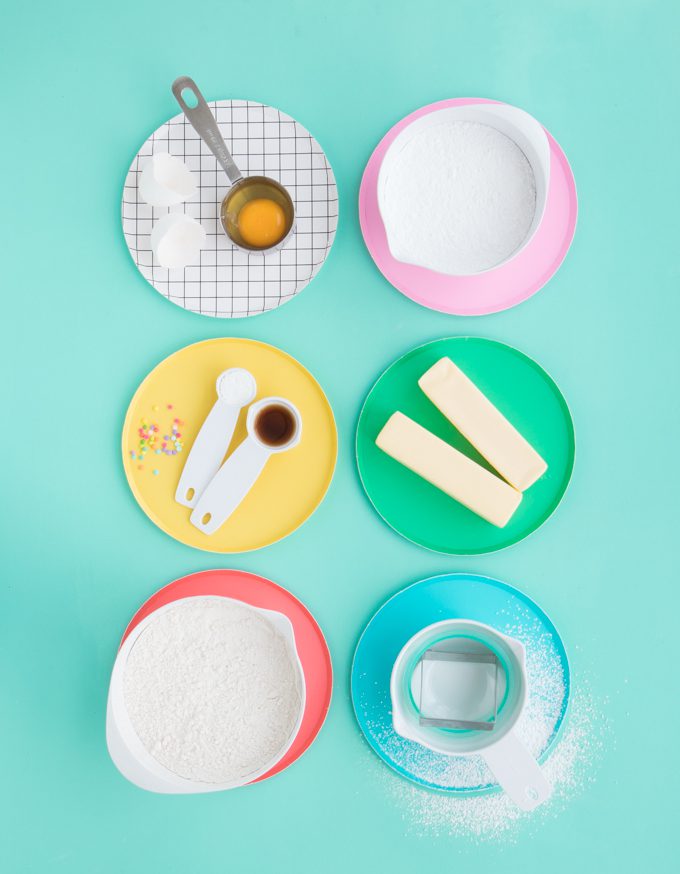
- 2 sticks unsalted butter (still cool) I like my butter to sit on the counter for no more then 20 minutes. But if I’m in a hurry I will use it straight from the fridge after chopping it up into small pieces.
- 1 1/2 cup powdered sugar / 200g (don’t pack)
- 1 large egg
- 2 tsp good vanilla
- 3 Cups / 400g all purpose flour
- 1 tsp baking powder
Step 1: In the bowl of an electric mixer, using the paddle attachment beat butter on low just until it’s broke apart and no longer in large chunks. We’re not aiming for smooth or creamy here! Sift the powdered sugar over the bowl, and beat again on low-medium until combined. (Sometimes my cool butter will stick to the paddle, I like to turn the mixer up high for a second to “throw” it off)
Step 2: Add in large egg and vanilla and beat on low-medium just until it’s combined and the chunks are for the most part gone.
Step 3: Sift in flour and baking powder into the bowl. Beat on low to incorporate all of the dry ingredients, then medium – high until all of the dough has gathered together on to the paddle.
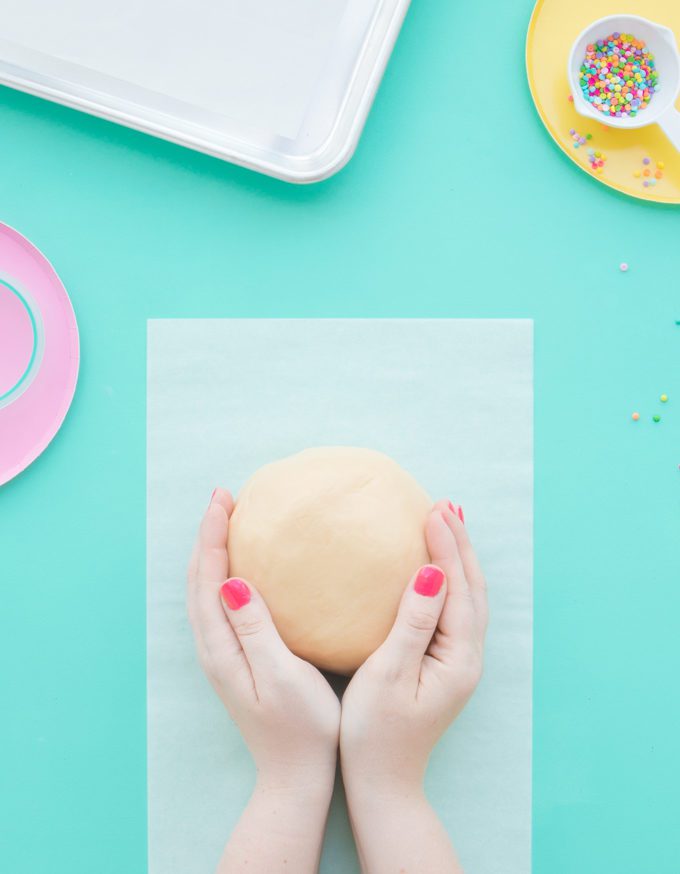
Step 4: Use a dough scraper or spatula to gather all of the dough and place on a plate or clean counter to rest about 5-10 minutes. (Give those glutens a break!)
Step 5: Kneed the dough by hands for a few moments until it’s nice and smooth. Guys this is the ticket to success here. I find this removes any extra air pockets. The dough should not stick to your fingers when you push into it. If it does kneed in a little extra flour until you get there (This could be from the use of a larger egg.)
If you want to roll the sugar cookie dough right away, you are good to go. But I have found this recipe is just fine chilled for a bit or even frozen for a few weeks if needed.
BAKER’S NOTE: Let’s take a moment to talk butter. Yes, you absolutely want to use real butter. I get so many questions asking about margarine and the answer is sure you CAN use it, but you won’t get the same outcome. It’s going to melt faster in the oven and spread a lot more. Unsalted is best because then you can tweak the amount of salt you want in the recipe, a good habit for bakers. Though I do not add it to this recipe.
PART 2 OF THE BEST ROLLED SUGAR COOKIES – A GREAT ROLL OUT ROUTINE
The best sugar cookie recipe + a solid routine of easy techniques. Even with the most perfectly prepared sugar cookie dough, you are going to need a great roll our routine before you can claim NAILED IT! Over time my process has changed time and time again as I was trying to make cut out cookies easier yet still killing’ it.. Part of this is because we move around the country + world. My ovens change, my climate changes, my supplies change. So I’ve worked pretty hard to get a method down that any baker, any where can follow. Of course my way may not be the perfect way for you, but it’s a wonderful starting point. And if cookie decorating is really your jam, over time my guess is you will develop a few tricks and habits of your own. Share them in the comments below!
Step 1: Before we get started I want to reitterate one more time. Knead that dough! I know, I know I’m repeating myself but guys. Like Nike says, JUST DO IT. I knead my dough by grabbing the top of the chunk with one hand and rocking the bottom while pressing it into the counter and repeating until the dough looks silky smooth. After lots of hair pulling testing, I have come to the conclusion this is the reason for “crinkled tops”. Though crinkled tops seemed to be the unsolved mystery of cookies, I’m telling you for me the times I’ve had those dreaded crinkled tops come up, it’s un-kneaded dough, possibly too much air when mixing or just ingredients not combined well. If ever I’m baking rolled sugar cookies and my first tray comes out crinkly tops, I stop and knead the dough again and continue on with the cookies. It always fixes the issue. Most likely I was in a hurry. But then again, with four kids…when am I not?
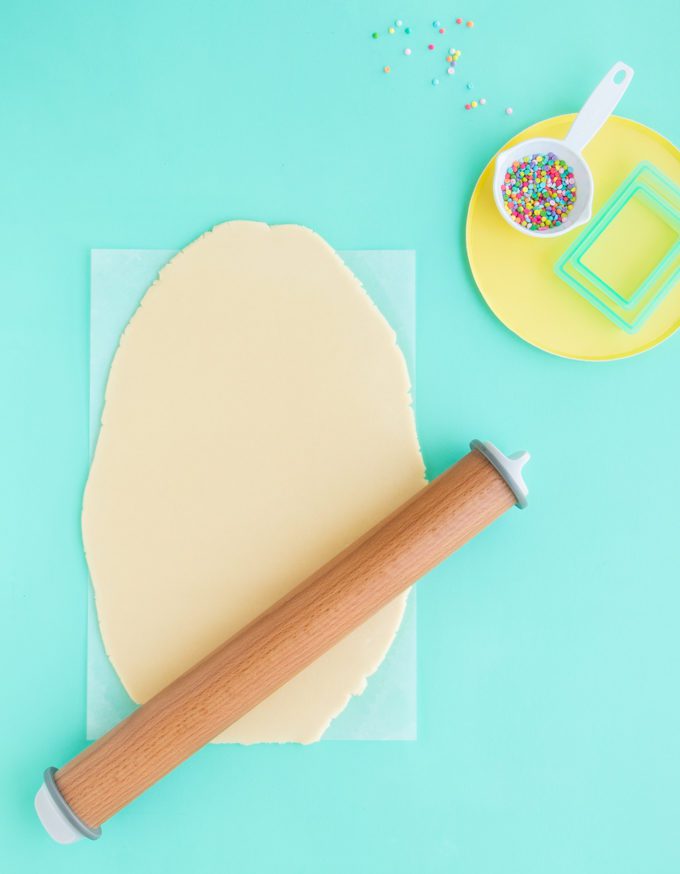
Step 2: Next I divide the dough in half and roll out the first half of the dough on to the parchment paper. If prepared right, this dough takes no added flour. Depending on my mood sometimes I stop after it’s no longer a “ball” and I add a second piece of parchment paper to the top then roll over that to keep it smooth. I find that this may help on particularly humid days. To keep things easy I use precut parchment papers, and to keep the dough even I use a guided rolling pin. If investing in a rolling pin isn’t an option your can make super cheap guides with items like dowel rods, or paint stirrers. But once you get a guided rolling pin , #gamechanger.
BAKER’S TIP: One way I make sure my dough is perfect is how the edges of the dough look when I roll it out. If it is super smooth I need to add more flour. My “just right” is when the dough cracks just slightly around the edges when rolled.
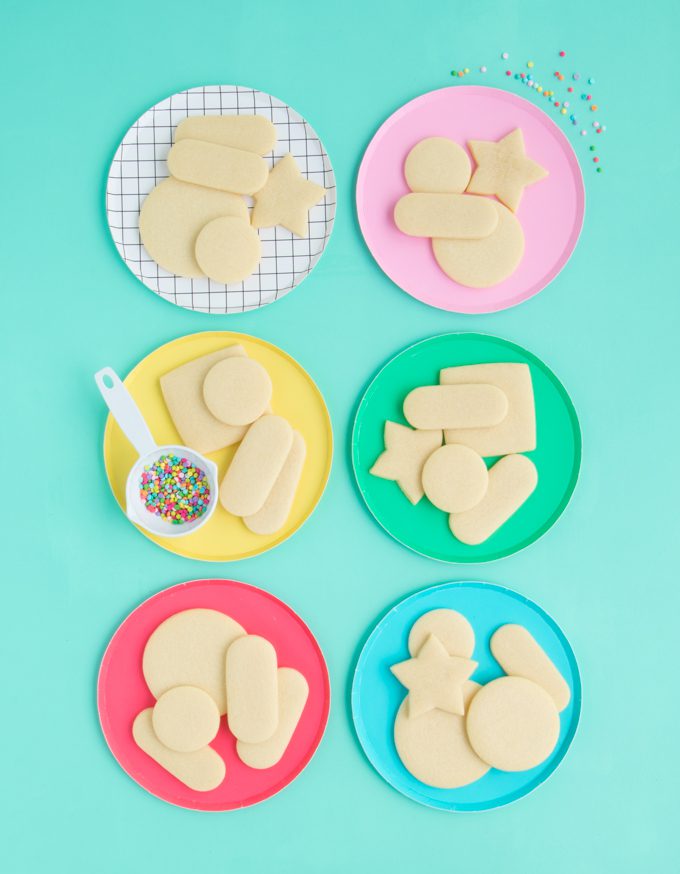
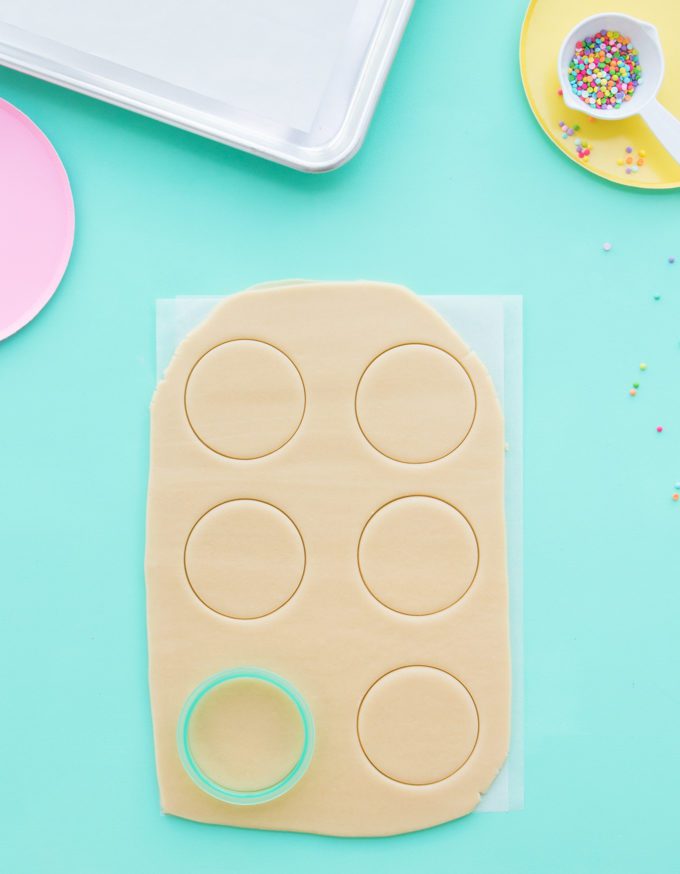
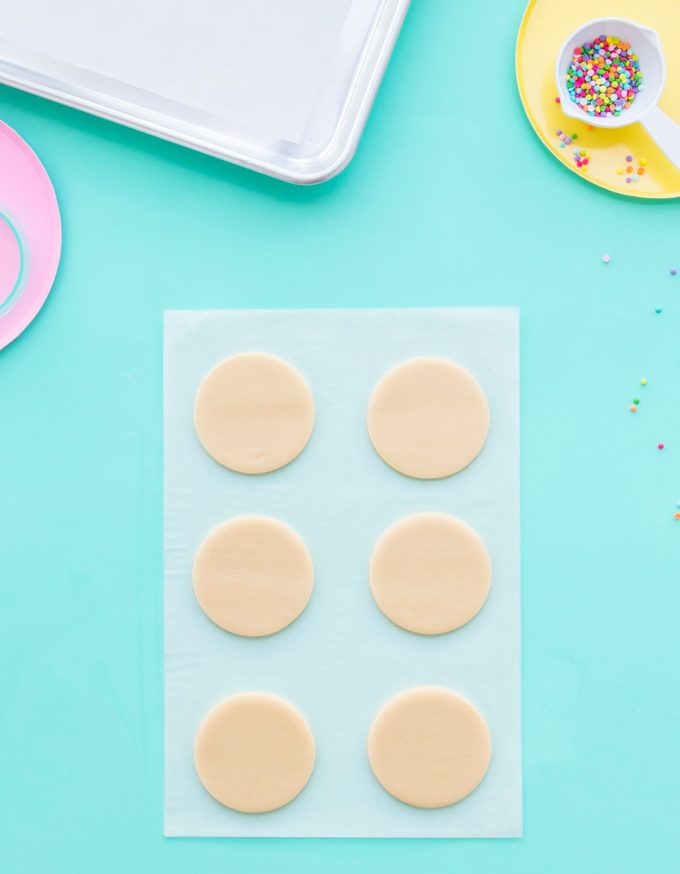
Step 3: Cut out your sugar cookies. I like to cut out my cookies exactly where they are going to be when they bake, so I’m mindful that they have a little breathing room between cookies. Then I carefully remove any excess cookie dough from around the cookies. I find not having to move the cut out sugar cookies keeps the exact cutter shape, vs. stretching or slightly manipulating the shape when you move them. When I do need to move the cookies, like with the last of the dough, I gently lift the parchment to raise the edge of the cookie so I can get a nice flat spatula under it to move – or even a flip of the paper and my hand if I’m feeling confident.
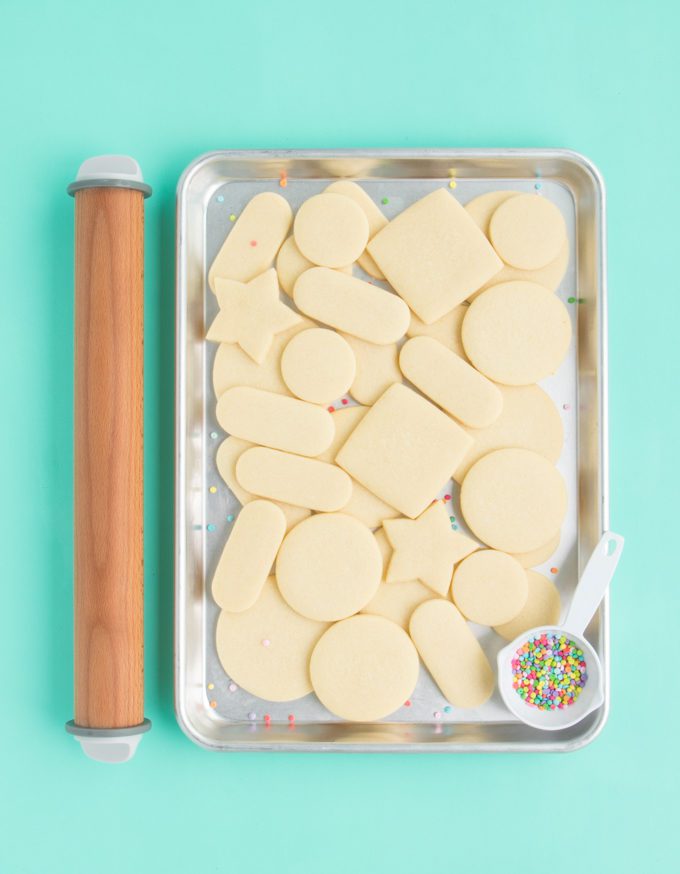
Make sure you don’t try to put too many cookies on your tray. I generally bake 6 large, 8 medium, or 10 small cookies at a time. (8, 10, 12 in my American oven.)
Step 4: As soon as they are cut I place them in the center of the oven and bake at 400F. Time will depend on the size of your cookies. Mine range from 6 minutes to 9 minutes, majority being 7 minutes. To make sure your cookies are properly baked, stay right by the oven when baking. You’ll probably be rolling out more sugar cookie dough any way! You will notice in the beginning your cookies have a “greasy” look. As they bake from the outside in it you will notice the “grease spot” getting small and smaller until it disappears. From experience I know that if the bottom of my cookie is turning golden from the outside of the oven, it’s going to over bake per my standards. But if your looking for a crisp cookie, thats where you want to stop.
BAKER’S TIP: In the past I use to place my cut out sugar cookies in the freezer for 2 minutes prior to baking. These days I find my recipe does not need it. However, this is a trick you may want to try if your needing help with your cookies not keeping their shape.
Step 5: Remove sugar cookies from oven and let rest on the cookie sheet. I like to let them come to a cool right on the cookie sheet. But if you don’t have enough cookie sheets and you need them to bake more, let them sit for about 2-4 minutes then use the corners of the parchment paper to gently slide the parchment paper right on to a cooling rack. Then when the sugar cookies cool you can use a spatula to move and stack. The cookies will look even better after a few minutes out of the oven.
Step 6: Bonus step! Because I just can’t leave good enough alone, once the cookies are out of the oven I take a small metal cake icing spatula and “shape Up” any flaws and gently smooth the tops.
Your process may look a bit different from mine. But it you were to peek inside my kitchen while I’m baking rolled sugar cookies you will notice three stations. One where I am rolling out the cookies, cookies baking in the oven, and one area why my cookies are cooling. I move them from station to station in rotation as I complete a set of cookies.
A FEW MORE HELPFUL THINGS FOR THE BEST ROLLED SUGAR COOKIES
- Bake similar sized cookies together. If you have a tiny cookie and a large cookie the smaller one is sure to over bake or vice versa.
- Cutter sticking? If you have a cutter that’s sticking especially due to small parts, dip it in a bit of flour.
- If you are in a time pinch, but you prefer to work with chilled dough, you can let the dough chill in the freezer for about 5 minutes.
- When using royal icing to decorate cookies, it’s best to wait a day after they are baked, as sometimes oil leaks through to the icing.
- Crinkled tops are often a sign of:
- too much sugar in your flour to sugar ratio
- not enough kneading prior to rolling.
- Store sugar cookies in an airtight container, and decorate within a week.
- Do your cut out sugar cookies cookies rise perfectly in the oven then sink while cooling? Chances are they are under baked. First check to make sure your oven temperature is correct then add a little more time to your bake time.
- To freeze sugar cookies simply stack in an airtight container with layers of parchment in between, wrap entire container in plastic wrap, and freeze for up to a month. Let the entire wrapped container come to room temp on the counter before unwrapping and decorating.
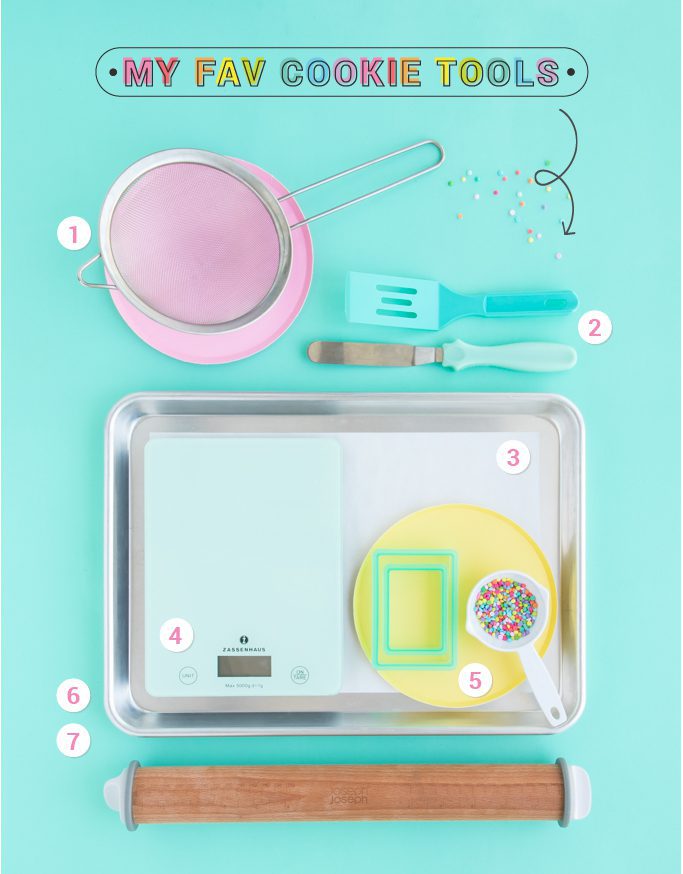
MY FAVORITE TOOLS FOR ROLLED SUGAR COOKIES
For real guys, I couldn’t make cut out cookies without these all stars!
- mesh strainer for sifting
- icing spatula/small cookie spatula for smoothing
- precut parchment papers
- kitchen scale
- sharp cookie cutters
- cookie sheets
- guided rolling pin
NOT PICTURED, BUT I WOULDN’T MAKE SUGAR COOKIES WITHOUT!
- oven thermometer
- cookie cooling rack
- dough scraper
- kitchen aid paddle attachment
READY TO DECORATE YOUR ROLLED SUGAR COOKIES?
Here are a few more informational posts to get you started on decorating royal icing sugar cookies.
CHECK OUT THE COOKIE SECTION FOR IDEAS TO DECORATE YOUR ROLLED SUGAR COOKIES
There are many awesome cookie decorators out there, for more information on cut out sugar cookies and lot’s of help decorating visit some of these decorators which I totally love and admire with all the puffy heart emojis in the world:
Heads up! To keep those legal gurus of the world happy, I need to inform you that some of the links in this post are affiliate links. In short – I may earn a small commission from the use of said link with no cost to you! But don’t worry I only link to stuff I use, love, and know you will too.
THE BEST ROLLED SUGAR COOKIE RECIPE
THE BEST ROLLED SUGAR COOKIE RECIPE
- 2 sticks unsalted butter (still cool I like my butter to sit on the counter for no more then 20 minutes. But if I’m in a hurry I will use it straight from the fridge after chopping it up into small pieces.)
- 1 1/2 cup powdered sugar / 200g (don’t pack)
- 1 large egg
- 2 tsp good vanilla
- 3 Cups / 400g all purpose flour
- 1 tsp baking powder
MY ORIGINAL SUGAR COOKIE RECIPE
Original Soft Buttery Sugar Cookie Recipe
- 3 cups flour (do not firmly pack)
- 1 tsp. baking powder
- 1 cup unsalted butter (leave on counter for 30 minutes)
- 1 cup sugar
- 1 large egg
- 1 tsp. vanilla extract
I GENERALLY AM ABLE TO MAKE 18-24 COOKIES PER BATCH OF DOUGH. HOWEVER, THIS VARIES WITH EACH PERSON DEPENDING ON THE THICKNESS OF DOUGH THEY USED AND THE SIZE OF THE CUTTER THIS RECIPE WORKS BEST MADE IN A KITCHEN MIXER, BUT CAN BE MADE WITHOUT


