I don’t know about you guys but I’ve been eagerly awaiting the “appropriate” time to start making Christmas treats, and it’s finally here! So let’s kick the month off right with some peppermint!
I was inspired to make these chocolate dipped peppermint meringues a few months ago during my trip to Duncan Hines. I love making meringues. I’ve had fun in the past changing their flavors, colors, and shapes. During chef joes baking demonstration he dipped them in chocolate – say what?! For the love of cookies why have I never dipped mine in chocolate!!


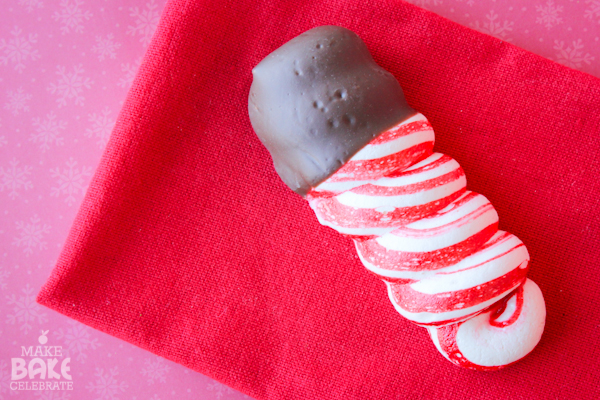
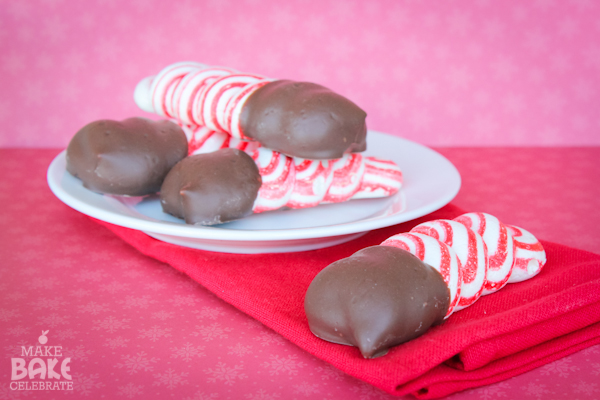
I started off by making a peppermint flavored meringue then adding red stripes and piping them into long swirly cookies. Once baked and cooled I carefully dipped them in warm chocolate. They are the perfect winter treat! Light and crisp with a peppermint flavor and finished off with a smooth milk chocolate – yum!
Here’s what your oing to need:
4 Egg Whites At Room Temp
1/4 tsp. Salt
1/4 tsp. Cream of Tartar
1 1/3 Cup Granulated Sugar
1-2 Drops Peppermint Oil
4-5oz Melting Chocolate
Red Gel Food Coloring
Makes approx. 36 cookies.
Step 1: Preheat oven to 150-170 degrees F and line 2 large baking pans with parchment paper.

Step 2: In the bowl of an electric mixer beat egg whites on low until they become white and foamy.
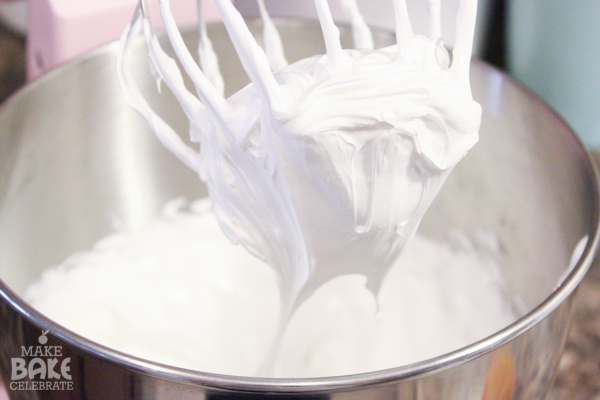
Step 3: Add in salt and cream of tartar, beat until soft peaks form.
Step 4: Set timer for 7 minutes and beat on medium-high the entire time. Throughout the 7 minutes gradually add in granulated sugar taking the entire 7 minutes to do so.
Step 5: Add in 1-2 drops peppermint oil, mix for a few moments until fully combined.

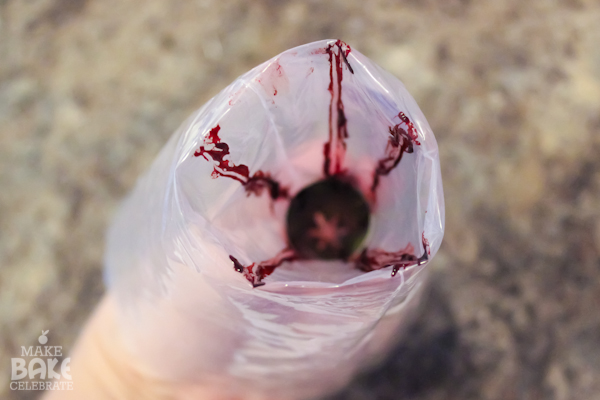
Step 6: Prepare a large piping bag with a large round tip. To make the red striped use toothpick to paint red stripes inside the piping bag starting down at the very tip. You’ll notice I played around a bit with the amount of red in my cookies. The ones with more red I used 5 heavy stripes of gel coloring in the bag. The ones with less red were made using only 4 light stripes of red. It’s up to you how you would like yours!

Step 7: Fill piping bag with meringue. Pipe 3.5in-4in “coils” onto parchment paper. I also played around with a few different ways to pipe these cookies. For the cookies shown in the photos I simply started at one point and coiled the tip around in a circular fashion. (make sense?) For the others I did a side by side “S” motion. Both came out very cool.
Step 8: Bake at 200 for 2.5-3.5 hours. Baking time will depend on humidity, difference in oven, and size of cookies. Mine took almost the full 3.5 hours to bake, longer then my normal meringues, however, much larger as well.

Step 9: Carefully slide parchment paper off pan and allow to cool.

Step 10: Once cookies have cooled, melt chocolate. If you would like more tips and tricks on melting chocolate check out Melting Chocolate 101.
Step 11; Gently dip one end of cookie into chocolate and place back on the parchment paper and allow chocolate to firm.

These are seriously such an easy and delicious treat that feeds quiet a few! I made these for the hubs office spouses night and they seemed to be quiet a hit, they’ve already been requested for the Christmas party! Weather your baking a little treat for coffee with the girls or a dessert to giveaway these are perfect and oh so festive! :)

Ingredients
- 4 Egg Whites At Room Temp
- 1/4 tsp. Salt
- 1/4 tsp. Cream of Tartar
- 1 1/3 Cup Granulated Sugar
- 1-2 Drops Peppermint Oil
- 4-5oz Melting Chocolate
- Red Gel Food Coloring
- Makes approx. 36 cookies.
Instructions
- Preheat oven to 200 degrees F and line 2 large baking pans with parchment paper.
- In the bowl of an electric mixer beat egg whites on low until they become white and foamy.
- Add in salt and cream of tartar, beat until soft peaks form.
- Set timer for 7 minutes and beat on medium-high the entire time. Throughout the 7 minutes gradually add in granulated sugar taking the entire 7 minutes to do so.
- Add in 1-2 drops peppermint oil, mix for a few moments until fully combined.
- Prepare a large piping bag with a large round tip. To make the red striped use toothpick to paint red stripes inside the piping bag starting down at the very tip.
- Fill piping bag with meringue. Pipe 3.5in-4in “coils” onto parchment paper.
- Bake at 200 for 2.5-3.5 hours. Baking time will depend on humidity, difference in oven, and size of cookies. Cookies will be crisp when broke, but melt in your mouth.
- Carefully slide parchment paper off pan and allow to cool.
- Once cookies have cooled, melt chocolate.
- Gently dip one end of cookie into chocolate and place back on the parchment paper and allow chocolate to firm.


Awesome idea. Thanks for sharing. I’m going to try these.
These look amazing and so fun, Toni! Perfect Christmas treat!
Love these, Toni! The stripes make them so festive!
Will definitely try these! Two of favorite things, meringue and peppermint! Thanks again for sharing your recipes. I’ve tried many of them and there always fantastic !
Thank you! And be sure to email me pictures!
This is such an awesome idea!! I am definitely going to try these before Christmas, though I suspect mine won’t look quite as pretty as yours!
FYI I just had to share them over here
https://www.facebook.com/EasyFreeSantaLetters
Thank you so much!
These are so cute. I loved the meringue cookies we had at Duncan Hines. I’d love to try this recipe.
Very adorable meringues!
How we’ll do these keep?
As long as they are fully baked and stored in a container they last for several week generally. :)
Made these this weekend. I’ve never made meringues before – but I was wondering about the cook time. The white in mine started to turn yellow/brownish so I removed them from the oven much before the approximated cooktime (just a few minutes over an hour I think). My oven was set to 200, so I’m not sure if I did something wrong with the recipe. Only thing I can think of is that I did more of a “ribbon candy” pattern than the coil (thought it’d be easier for my novice baking experience).
Anyways, I definitely think I’ll be trying the recipe again. Everyone is impressed with the look (great addition to the traditional Christmas Cookie tray), and they do melt in your mouth with just a hint of mint taste.
Certainly the most impressive looking cookie I’ve made – now to perfect them!
Hey there! My very first tray of meringues did the same thing..and so did my second! I was frustrated to the max but determined and managed to master them a few tries later. I REALLY believe that no matter the recipe you try meringues are very dependent on the oven and location. When we lived in NY I had to have them on the lowest possible setting to keep them from browning, and they seemed to take forever! Of course there was a lot of moisture in the air. Now that we’ve relocated to Texas they seem to bake so much easier. I have been abel to turn my temps up (even passed 200!) and arrange them in the oven differently, plus a faster bake time! Of course this is a much drier area. Try turning the oven down even lower if possible and maybe prop the door open just a bit to let some air escape and circulate. Hope that helps! P.S. Once you get them perfected they are definitely worth it!!
Can you use the extract instead of oil?
Absolutely!