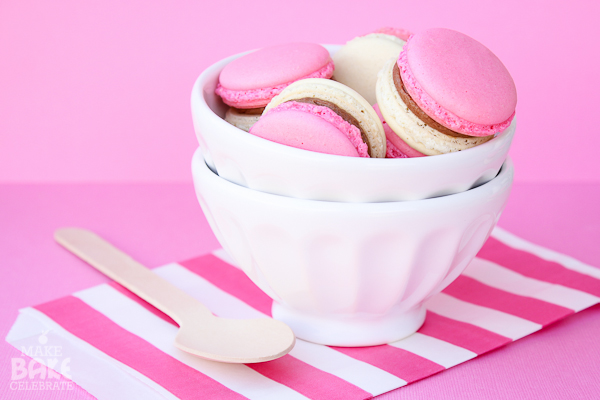
In my last post I shared with you guys Birthday Cake Macarons so I thought it’s only right to share some Neapolitan Macarons to go with! I mean cake and ice cream…really just can’t have one without the other! Am I right or am I right here? These macarons were actually born from my friend’s creative mind (Thanks Nancy!) after making a batch of strawberry and chocolate ones she said “Hey, why not neapolitan!” – a challenge I couldn’t resist. Funny how so much inspiration and ideas come from my “non-baking” friends…really they just want to test taste the goodies…but I’m pretending they just like to encourage me! Let me just think that ok…
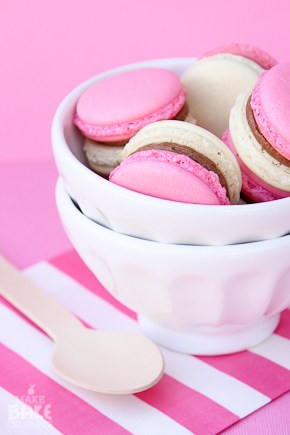
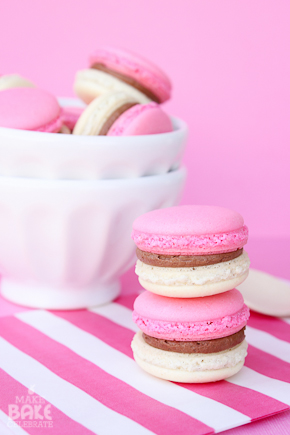
The end result was delicious and has already been dubbed as a fav by many of my friends. Strawberry, chocolate, and vanilla rolled into one really you can’t go wrong I guess! I debated if I wanted to split the recipe to create half vanilla shells and half strawberry but I decided it was easiest to just make two batches, plus hello twice the macaroons.They freeze so well also, so if you do have “too many” just place the rest in the freezer to serve later. Win, win. Again, I’ve been a total slacker when it comes to step by step pictures lately so if you would like pictures of my macaron making process check out this post with pictures. Macarons 101 is in the works and will be up within a week, I’ll be sure to link back here once it’s ready!
Here’s what your going to need:
Strawberry Macaron Shells
4oz Almond Flour
8oz Powdered Sugar
5oz Egg Whites
2 1/2 0z. Sugar
2 Tsp. Strawberry
1/2 Tsp. Salt
Pink Gel Coloring
Vanilla Macaroon Shells
4oz Almond Flour
8oz Powdered Sugar
5oz Egg Whites
2 1/2 0z. Sugar
2 Tsp. Vanilla Extract
1/2 Tsp. Salt
Chocolate Buttercream
1/2 Cup Butter
2 1/2 Cups Powdered Sugar
1 Tsp. Vanilla Extract
4 Tbs. Cocoa Powder
1-3 Tbs. Milk
Step 1: Measure out all of your macaron ingredients for the strawberry shells first. This really makes it so much easier when working with treats like this.
Step 2: In the bowl of an electric mixer, pour in egg whites, salt, and sugar. (You can do this with a hand mixer it will just take a little more work and careful attention.) Set timer for 3 minutes and beat at a medium speed using the whisk attachment (4 on my KitchenAid). Once the 3 minutes are up turn it up about 3 notches to speed 7 and beat for another 3 minutes. Once those are up turn it all the way up on high and beat one last time for 3 minutes.
Step 3: While your meringue is beating sift your almond flour and powdered sugar into a bowl. Once all is sifted you should have some small bits of almond that were too large to pass through. If there is a tsp. or less you just leave them out, if there is more you will want to send them through a food processor to grind them up before pouring into the batter.
Step 4: Add in strawberry extract and pink gel coloring then beat on high for about 30 seconds, stop and use a spatula to scrap all the unmixed meringue from the sides, then beat for 30 more seconds.
Here is where you really have to pay attention, you will need just the right consistency to get a good macaroon.
Step 5: Add in dry ingredients. Using a spatula “fold” the batter with about 25-28 turns of the spatula going around the bowl then across in a swooping pattern. By doing this you are deflating some of the extra air from the batter. Make sure to get everything off the bottom mixed in. At first it will seem really thick and clumpy but it will smooth out quick. You want a thickness that is still thick enough to hold a little shape but thin enough to fold back into itself. You can check this every few stirs by holding up your spatula with batter on it, the batter should “drop” off the spatula but then settle into the batter after a few moments. You don’t want to get TOO thin, you are not looking for runny here. (video will be coming next week)
Step 6: Using a small round tip (I used Wilton 10) and piping bag, pipe small 1-1.5 inch circles onto either a macaron mat or parchment paper. Again, I used a macaron mat and it REALLY made this process so easy. But you could simply pipe circles on to parchment paper and even pre-draw circles on the bottom as guides. Either way you need to remember you batter will spread a bit so you don’t want to pipe all the way to the sides or the circle. I find it best to pipe the circles by holding the tip straight up in the center and letting it “flow” out. You will have small peaks at first but the first tip should have already appeared after you’ve piped about 5 macarons. If not, you want to stick the batter back in the bag and deflate it a little more.
Step 7: Preheat the oven for 290-300 degrees F (mine was perfect at 295 you may have to play with your temps a bit). Then set your piped macarons trays on the counter and set the timer for 25 minutes. DO NOT place the macarons in the oven right after piping. Do your dishes, read a book, create list of future macaron flavors, but DO NOT place them in the oven. After about 25-30 minutes your macarons should have a slight “crust” over them. When you gently touch them they should not stick to your finger. Bake for 15-18 minutes, time will depend on size.
Step 8: After pulling tray from oven, carefully pull the baking mat OR parchment paper off the baking tray and on to the counter to cool. Let the cool COMPLETELY before attempting to remove.
Step 9: Repeat process with vanilla macarons shells adding vanilla extract instead and no coloring.
While your last shells are baking time to whip up some yummy chocolate buttercream to fill them with!
Step 9: In a large mixing bowl or bowl of an electric mixer, beat butter until fluffy add in 1 tsp. vanilla, beat until combined. Then add in powdered sugar and cocoa, beat until fully combined. Add in milk a little at a time beating in between until you’ve reached desired consistency.
Step 10: Using the same size tip and piping bag, pipe buttercream on one side of each macaron and then sandwich together.
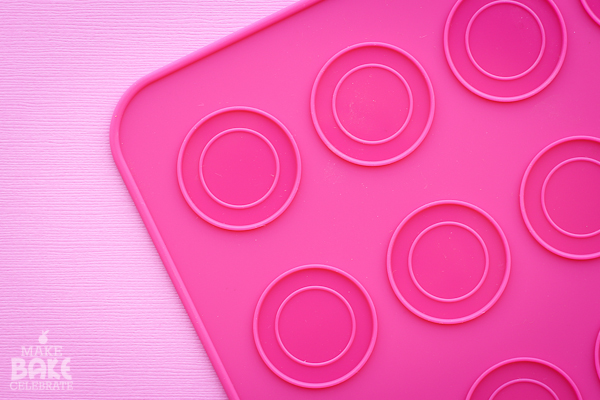
As I’ve shared before, I have been creating my macarons using this mat from World Market. I had read mixed reviews on macarons mats but when I really wanted to give it a try. While it’s true you certainly don’t NEED the mat I LOVE them! They make macarons so easy for me, a perfect item as a macaron beginner! Since I love my mat so much…I want to give one to my readers! I’ve decided to mix things up a bit this time and since Instagram is my FAV social media outlet I’m hosting a exsclusive Instagram giveaway! To enter click on over to my Instagram feed and comment what flavor of macarons you would like to try under the giveaway picture then tag two friends you think would also like to join in on the fun! Super easy! Sorry! Giveaway is now closed!
Don’t have Instagram…don’t worry..signing up is easy and trust me you won’t regret it! I could get lost scrolling through my feed full of sweet faces, places, and treats. Head on over and join in on the fun!

That’s all for today check back tomorrow for a little more chocolate fun!




I will take payment in the form of macarons! The strawberry and chocolate ones were so good, I can’t even imagine how delish they’ll be with vanilla :)
Oh man!!!! I just realized you did not even get to have any of these!!
Beautifull!! Toni, I recommend you in my blog, look: http://ideiascomsabores.com/encontreprodutosparasuafesta/dicas-para-leitura/
Congratulations, i love all your ideas :-).
Samira
Thank you!
i love the colors!
I can’t wait for your Macaron 101 post. I’ve been wanting to try to make them, but have been intimidated by it. I love your 101 posts and am sure you will help me get over the intimidation factor of making macarons!
Your pictures and treats are always so beautiful!
Where is macaroons 101?? My daughter wants an American Girl birthday party and I’m thinking some cute pink macaroons would be great! However, I have never tackled making these tasty treats, please help!
Oh no! Unfortunately this post slipped my mind and I don’t have Macarons 101 up…but it IS coming!