

Our twins celebrated their 5th birthday a few days ago…please can we not talk about how they are ALREADY five. Since we’re not celebrating with a party for another month yet, I had free roam when picking birthday treats for school. Well, as free roam as it gets when you have two opinionated 5-year-olds breathing down your neck watching the whole process. While I was brainstorming up what theme we should go with I came across a dress that was too small on them. A dress from a butterfly line at Gymboree that I loved and passed down through all three girls. Hey, let’s cookie the dress I said! Let’s recap, I just volunteered to make 80 butterfly cookies, with two five-year-olds. What was I think? Clearly, I was not thinking at all. Spoiler alert next time cupcakes are the class treats.
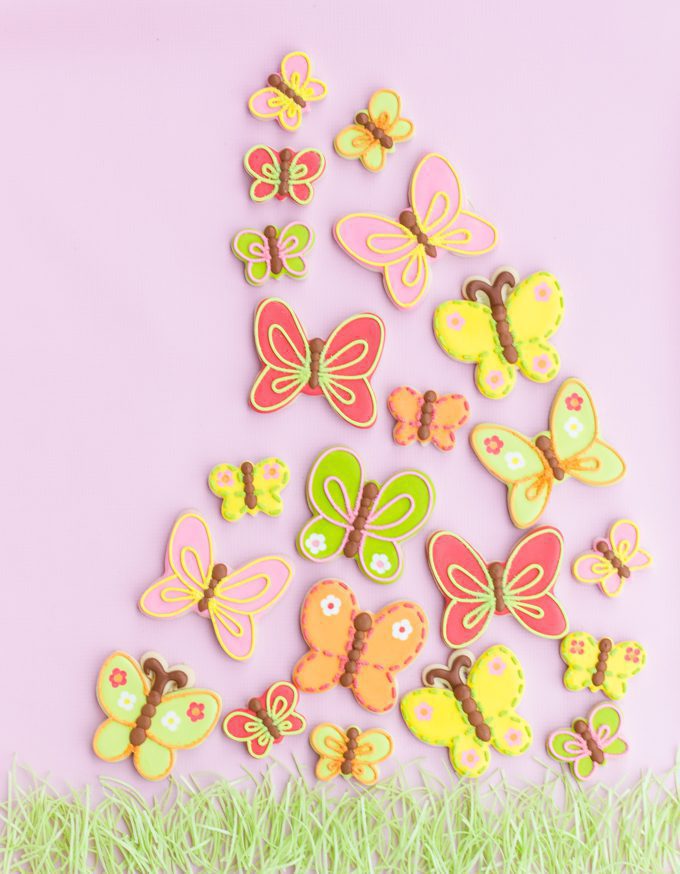
Chaos aside, I am so glad I spent the time making these butterfly cookies for my baby girls because these cookies were very sentimental to me. Their five now, such big girls, headed off to Kindergarten together soon. Not only do I think about them as tots covered in butterfly prints, I know our days in butterfly covered dresses are limited. Sigh. But let’s get back to the butterfly sugar cookies alright before I start sobbing here.
HOW TO MAKE BUTTERFLY COOKIES
NEW TO DECORATED COOKIES? BE SURE TO CHECK OUT THESE POSTS FOR THE BASICS:
ROLLED COOKIES 101 + ROYAL ICING 101
TOOLS
- butterfly cookie cutter
- piping bags
- #2 tips
- icing bottles
SUPPLIES
- white flood icing
- light pink flood icing + light pink outline icing
- orange outline icing + orange flood icing
- yellow outline icing + yellow flood icing
- coral outline icing + coral flood icing
- green outline icing + green flood icing
- light green outline icing + light green flood icing
- brown 20-second icing
- sanding sugar
COLORS
- light pink – AmeriColor Deep Pink
- green – AmeriColor Electic Green + AmeriColor Electric Yellow
- coral – AmeriColor Electric Yellow + AmeriColor Ivory + AmericColor Deep Pink
- orange – AmeriColor Coral Reef + AmeriColor Orange
- yellow – AmeriColor Electric Yellow
- brown – Wilton brown
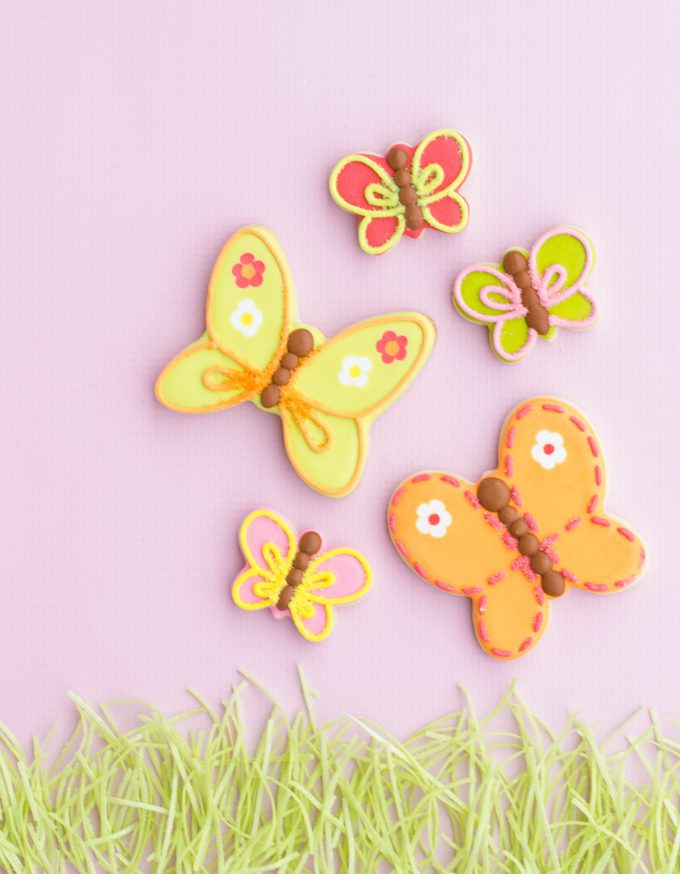
Step 1: Outline with piping icing.
Step 2: Fill with flood icing. Use a toothpick to gently pull the icing gaps together.
Step 3: Immediately pipe five small dots of an additional flood icing color into the wet icing. You can use the toothpick to drag the shape just a bit. Then pipe another dot in the center to create a flower. Quickly repeat on the other side, and on the lower wings if you would like.
Step 4: Once the top of the icing has crusted over, pipe a large brown dot for the “head” let it crust over for a few minutes and then pipe a slightly smaller dot just below. Continue to repeat this step until your butterfly cookie body is complete. You will need to make sure each dot is slightly crusted over before piping the next one or they will run together. To help move this process along I lined the butterfly cookies up in a row and piped one on each cookie then started over again with the second row.
Step 5: Pipe wing details on with an outline icing.
Step 6: Immediately cover with sanding sugar if you would like. Allow cookies to dry and brush off excess sanding sugar with a food-safe paintbrush.
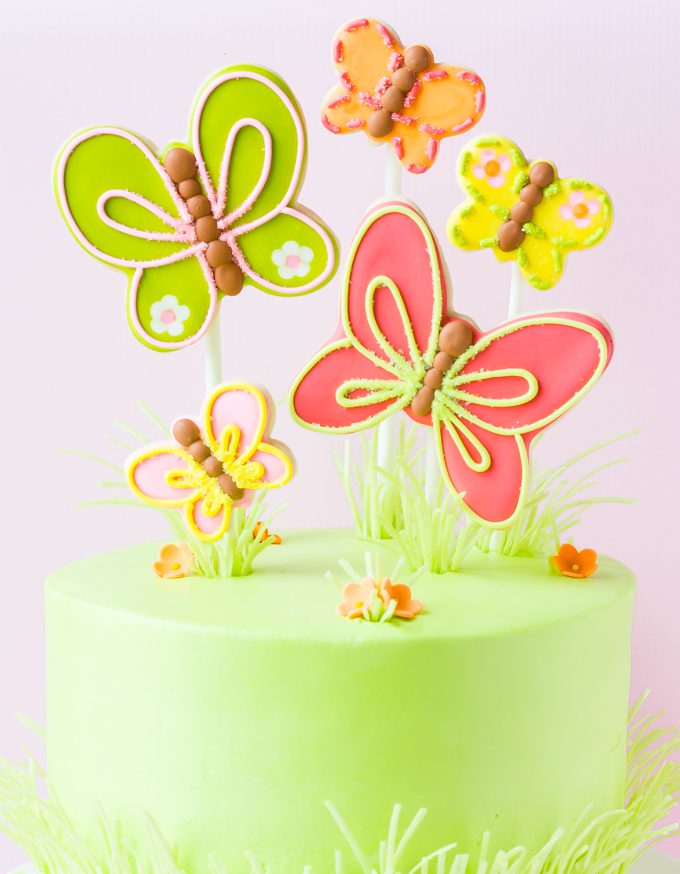
I finished this butterfly cookie set by adding some edible Easter grass to the platter, the perfect touch! I’m kinda in love with this combo. So much in love, I decided to make it into a cake? Check out the Butterfly Cookie Cake here.
LOVE THESE BUTTERFLY COOKIES? WANT MORE COOKIE TUTORIALS?! CHECK THESE OUT!
Heads up! To keep those legal gurus of the world happy, I need to inform you that some of the links in this post are affiliate links. In short – I may earn a small commission from the use of said link with no cost to you! But don’t worry I only link to stuff I use, love, and know you will too!


