


Call a shrink, I have dessert commitment issues. This weekend I was going to bake some yummy fall flavored treats…and today I was going to post all about buttercream neither of which I did. I laid everything out on the counter and even opened the can of pumpkin…but then these cookies popped in my head and I had to make them. I’m not a bit disappointed because these came out perfect! As for the buttercream blog, I’ll get to it. I know basics are a necessity but these swirled cookies are so much more fun……and the pumpkin treats will come sooner or later I’ll need something to do in November when were patiently waiting for the appropriate time to start baking Christmas goodies. Secretly, I’ve already got Christmas on the brain…no I’m not crazy, I’m a blogger :).
…opps back to these cookies. I stumbled upon some seussical swirly cookies awhile back on pinterest. I thought they were just about the cutest thing and would look super cute with different holiday colors. So I pinned them to make when the time come. But as I followed the link the instructions were not super helpful, lacking pictures, and it came from a cookie mix pouch…which I’ve never used before.
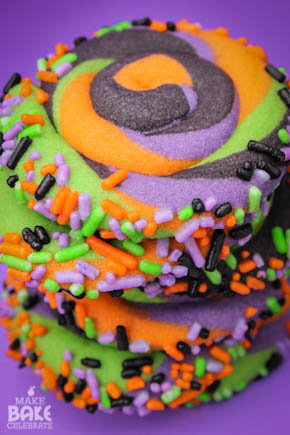
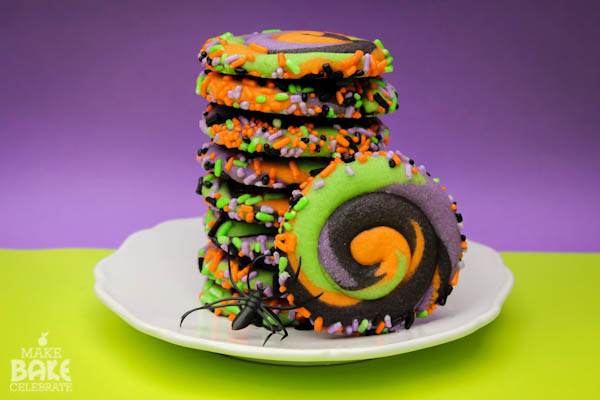
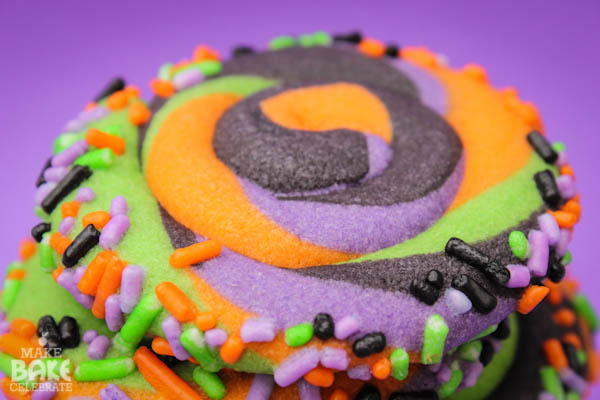
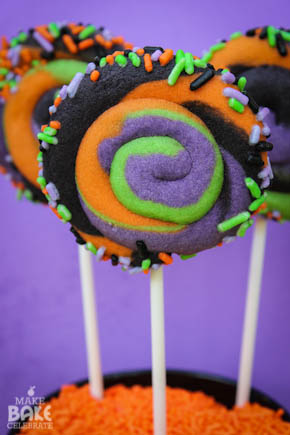
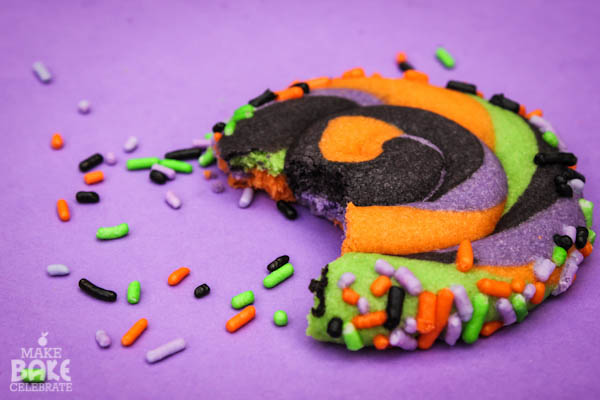
For these cookies I finally gave Sugarbelle’s rolled cookie recipe a try. I’m not sure this is what she meant by rolled cookies but they worked pretty well ;). I needed a cookie that spread just a bit and these did the trick. Even though this recipe is generally used to be iced and decorated, they stand alone just fine. Honestly, I couldn’t believe just how well the colors came out! They are vibrant and just plain fun.
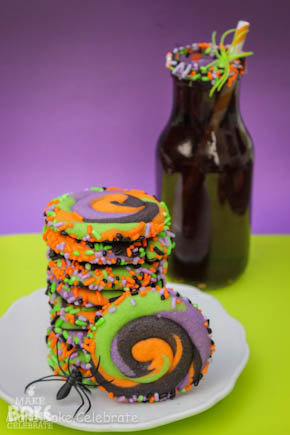
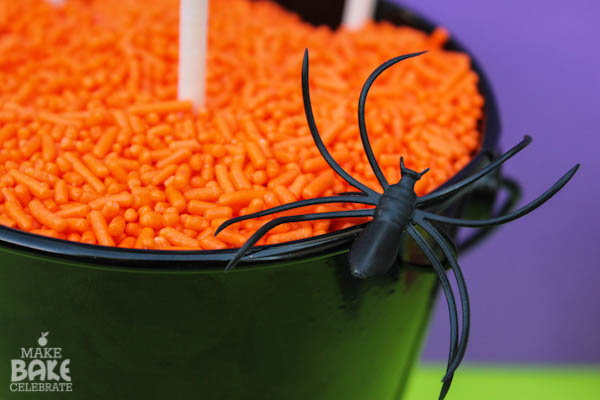
Normally, I would recommend you keep anything with more then two feet away from your treats…but in this case these spiders made the perfect little garnish. Just cheap spider rings that can be found about anywhere this time of year (and in the perfect colors too). But they are a perfect pair whether your packaging these up to give or sitting them out on a platter.
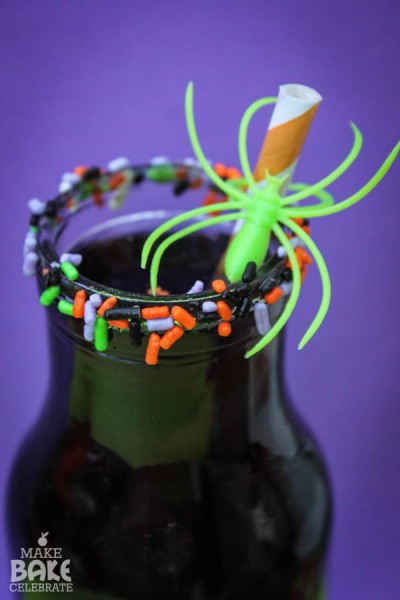
And serving them up with some Halloween edition blackberry kool-aid is a pretty cool touch.
Alright time to break it down barney style and show you just how I did it, so you can too. You can use your favorite sugar cookie recipe, even a store bought if you’d like. I really liked Sugarbelle’s which you can find here. It was really easy and rolled so well for this. With this recipe I was was about to make 2 dozen cookies. This method is a little more time consuming but hey think about all the time you’ll save decorating. (and all the cool points you’ll rack up)
Here’s what your going to need:
Sugar cookie dough
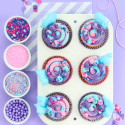
Orange, black, green, and purple gel food coloring
Sprinkles
Parchment paper
Wax Paper
Lollipop sticks (optional if you’d like to turn them into cookie pops)
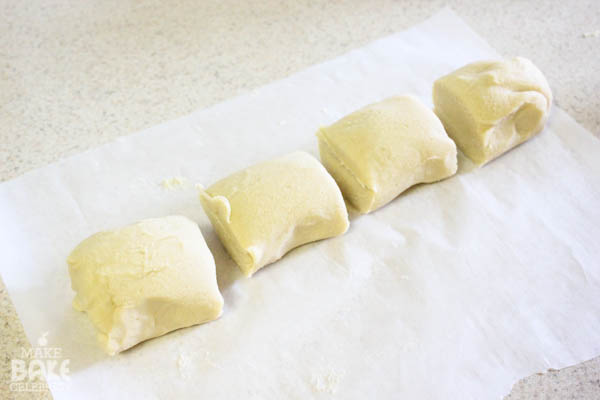
Step 1: Roll your cookie dough into a ball and then roll into a log.
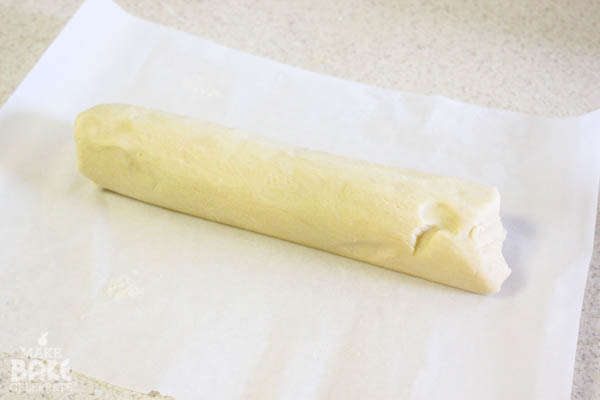
Step 2: Cut into 4 equal parts.
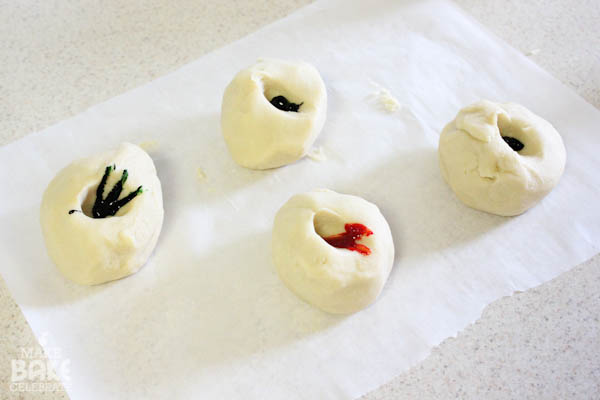
Step 3: Roll each piece into a ball and create a dent with your thumb, put some food coloring in each. If your wondering about the dent this will help keep the coloring on the dough and not on your hands. As you work the dough press the uncolored dough inside and push, roll, and gently work the dough as it colors from the inside out. Once you get good enough you won’t have a single spot of color on you. Trust me here, oh the places I have gone with colored hands (like the photo studio!)
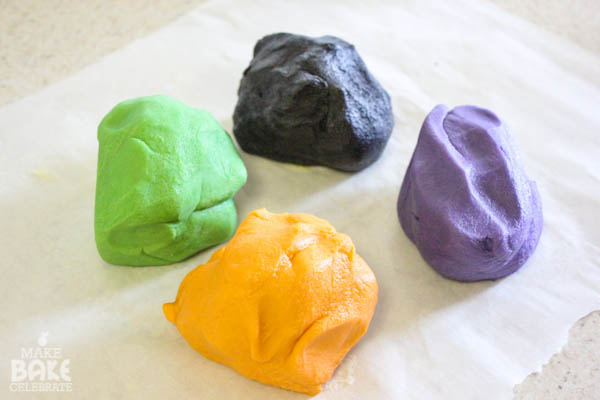
Ahhh….pretty dough, clean hands.
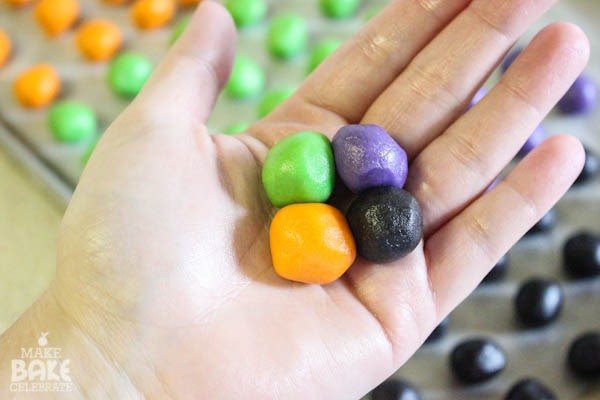
Step 3: Begin to roll each color into grape size balls. Somewhere between nickel size, and quarter size. Take the time and make sure they are fairly similar in size. Not only will this give you a good mix of color it’s going to keep your cookies about the same size.
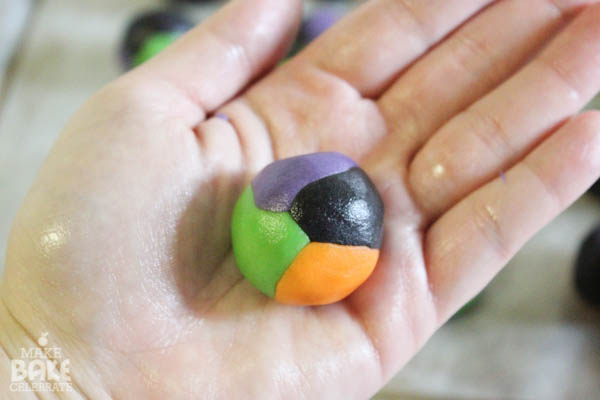
Step 4: Next take one of each color and very gently roll it together. It will kind of look like a beach ball.
Step 5: After all that rolling I found my dough was getting soft and warm, not good for coiling. So stick them in the freezer for a minute of two. They will chill just a bit and become nice to work with again. About half way through rolling the balls you may notice they are getting very soft again, just pop them back in the freezer for a moment and you’ll be back rolling.
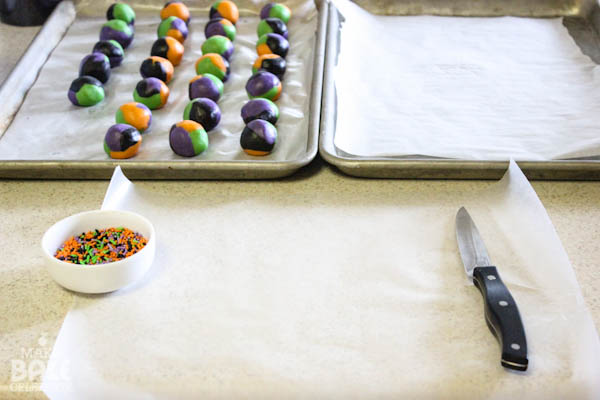
While your waiting set up your work station. You’ll need a cookie sheet lined with parchment paper to bake on. Some wax paper to work on and sprinkles and a knife near by. Also, go ahead and preheat the oven to 350.
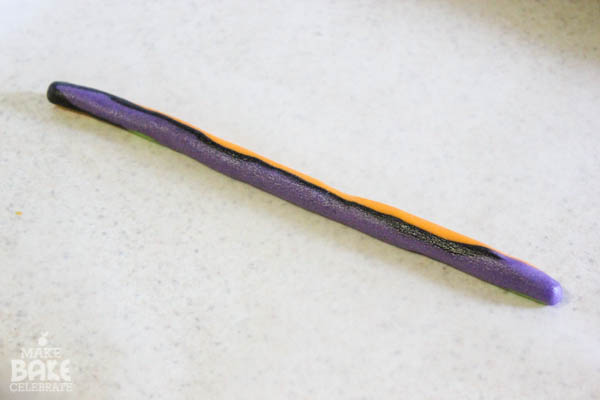
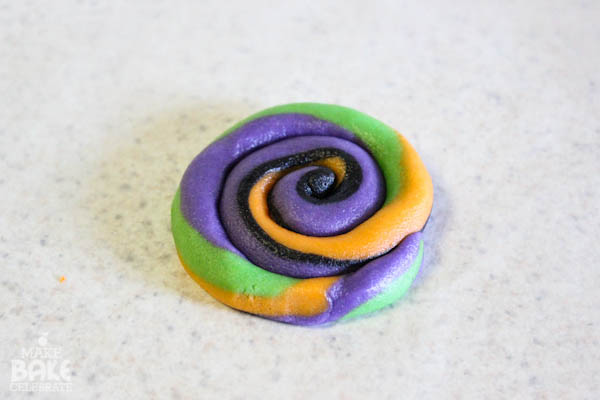
Step 6: To make the coil start out by gently rolling the ball between your palms and then place on the wax paper. Gently and evenly roll out the dough into a rope about 8 inches long. I do so by first starting to roll it out naturally with my hands facing front and then I turn one hand lengthwise to smooth out the bumps. (make sense?) See how the colors are all kind of straight below? Once your done give each end a gentle roll in the opposite direction to “twist” the rope reveling more colors. Particular I know but you want all the colors to come out.
Step 7: Start out by rolling in one end. If one end is thicker use that one.
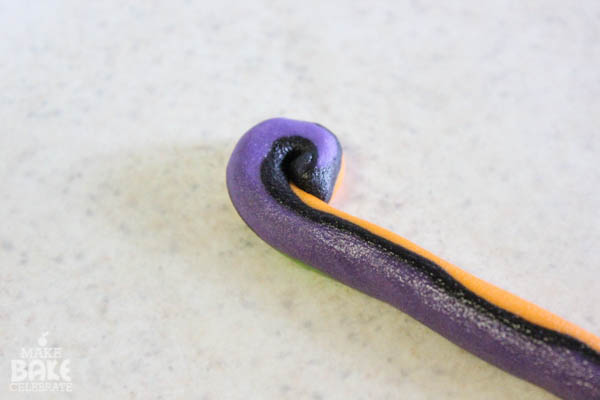
Step 8: Now coil up the rest of the dough. I found it was easier to gently pick up the dough and allow it to drop around the center into a coil. Rolling the dough flat on the paper by moving the center around resulted in bumpy cookies. If your end is kind of funky or pinched due to rolling, simply cut off the very end to smooth it out.
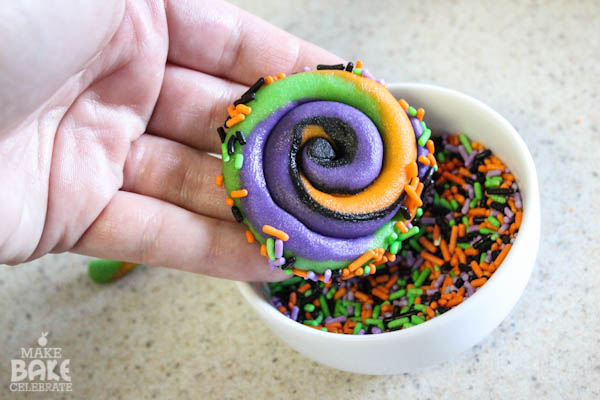
Step 9: Now gently pick up the cookie by lifting the wax paper and flipping it onto your hand. Roll the sides into the bowl of sprinkles.
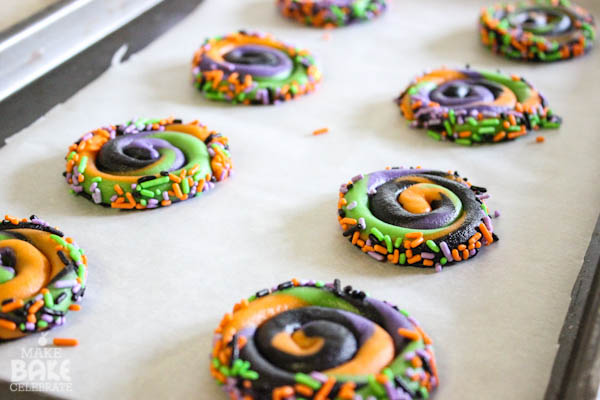
Step 10: Place on parchment lines baking sheet. Bake at 350 for 8-9 minutes.
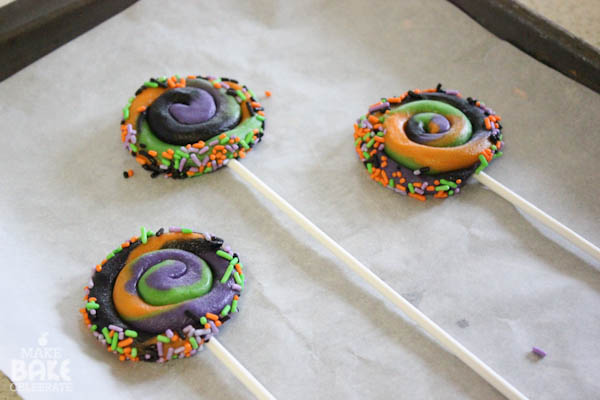
Want to make them into cookie pops? No problem! Just roll a few balls of left over cookie dough and squish flat. I used the little bits I cut off the coils. Lay on parchment covered baking sheet and gently press stick in.
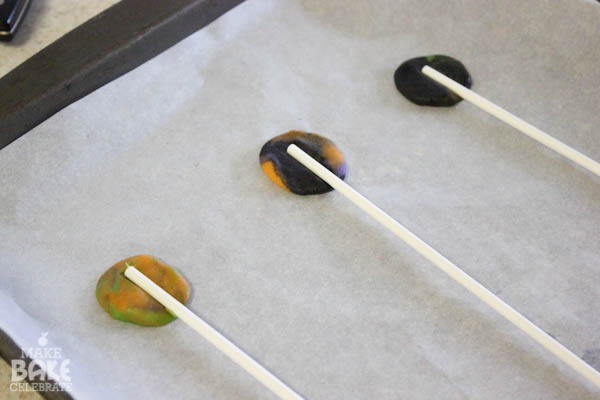
Now just lay your cookie coil over the stick and press ever so slightly to make it stick. Bake about 1 minute longer for a firmer cookie.
Let them cool on a cookie rack, be prepared you may want to just sit and stare at them cause they look just that cool. :)
I baked these during nap, but made the mistake of photographing while the kids were awake. They went crazy about these fun cookies and waited by the window watching me work. Can’t tell you how many times one of them poked their head out to let me know there was bugs on my cookies, thanks girls :). You can imagine their devastation when I told them I was actually going to freeze them and enjoy them when Halloween got a little closer. Their cute faces were better then my determination, I caved and they each got half a cookie.
Another fun spooky treat made, maybe tomorrow I’ll get to that buttercream? ;)


fantastic love them will give them a try for my little ones this halloween. thanks xx
Do you know if the swirl cookies can be frozen after being baked….I have a ton of baking to do and I would like to freeze them (including with them being frosted and sprinkled)
Absolutely!
Excellent tutorial, beautiful pictures and such fun cookies! Love ’em, girl!
So fun!
How many does this make?
These made 2 dozen cookies for me :)
I love the colors in these! SO fun. : )
thanks for sharing.
Looks great! Great instructions and photographs.
Thanks you! -Toni
This is fun….I’m making these for Halloween for sure!
Have fun! These were honestly one of the most fun cookies I have made :) -Toni
Excellent tutorial for fabulous looking cookies!! Thanks for your wonderful work!! I MUST do these for my granddaughter’s almost-halloween birthday!!
Awesome! Send pics! -Toni
Are you kidding me?!?!? These are amazing! I love the colors, I love the sprinkles, I love the pinwheel, there isn’t anything I don’t love about them! Trying these TOMORROW!!! :)
Awesome! Have fun they are a blast! Hope to see pics! -Toni
Other colors would be fun, too. Pastels for Easter! Red, white and blue for Fourth of July! You’re a genius!
I can’t wait to make these for other Holidays!! Easter would be seriously adorable…is it too soon to do spring baking ;). Thanks! -Toni
These are so pretty! I can’t wait to make them for my son’s 5th grade class. You know at that age, “if it’s not REALLY cool, don’t bring it to school”. Well, these will fit the “really cool” criteria for 10-11 year olds! Thanks! B
I think they fit into the “really cool” criteria too. They sure passed the test around here. Have fun making them! -Toni
I LOVE these! They look like so much fun to make! My SIL is making these for her party and I’m definitely thinking of doing the same!
I’ve featured your Swirly Cookies in a Halloween Sweet Treats Round-up. You can find the link here: http://beanbugcrafts.blogspot.com/2012/10/15-halloween-tasty-sweet-treats.html
Thanks,
Anna
Adding these to my cookie list for next weekend…along with Candy Corn Sugar cookies from Our Best Bites…can’t wait!!!
I attempted to make these with my niece and nephews today. They don’t look like yours. I’m including the link to my blog where I posted the end result…
http://dearlysweetlyloverly.blogspot.com/2012/10/cookie-timw.html
Unless I missed it somewhere… It would be very helpful if you provided the coloring ratios?! I am in the process of making these and IT IS NOT WORKING!!! I want them to look like your’s!! :-) And even using your thumb hole technique, my hands are still dyed :-( So, tricks for getting this off?! :-) I’m obviously more of a beginner to the baking world! :-)
Hey there. I’m sorry your having trouble with these. There really isn’t a specific amount because I often work with gel coloring from a container (Wilton) that uses a tooth pick to apply, and so there are no drop to measure. It may also change with different sugar cookies recipes. Just double checking…are you using gel food coloring? If you are just keep adding till you get the colors you want, don’t be afraid your adding to much. I’ve colored a LOT of treats and I don’t think I’ve ever had a case where I thought the coloring effected the taste ect. My guess with the coloring is that maybe you did it to fast? Try working with the dough slowly folding the uncolored dough into the colored dough. If your not careful the coloring will peak out the back and before you know it you have pretty hands! Unfortunately I don’t have a trick for removing the coloring other then scrubbing a few times with soap and water. I hope that helps!
Ooooohhhh, I saw all the gel coloring at the stores and thought it was the wrong stuff :-( Oh well, I’ll continue with the old fashioned liquid drops and try that next time :-) Thanks for the response!!
One thing I have found that helps when coloring is a) use gloves b) try coating your hands with Crisco before coloring, then wash well with soap and water when you finish.
Good luck :)
Any suggestions for the dough? I used a premise dough and it was too soft and was hard to roll them together and keep the colors pretty Znd swirly :(
I used Sugarbelle’s recipe..there is a link in the directions above (highlighted in blue) :)
These look great! I am going to try these for my next cake order as something fun to include. I have a good, stable, cookie dough recipe that doesn’t spread too much when it’s baked and its color is very light. http://dozenflours.com/2009/06/adeles-peppermint-heart-cookies.html
thanks for sharing.
I need your advice! I am making these cookies for my sons birthday party tomorrow in red, blue, yellow and green to match his Super Mario theme. :) I haven’t been able to find the sprinkles that you used in the colors I want…I have some red sugar that I thought about using. Do you think that would work??
I made mine tonight….I was so proud and everyone wanted to eat them before I cooked them they were so cool! When I went to bake them, I did as the recipe asked, 350 degree’s for 9 minutes….nope, that was way too soon in my oven…so I let them go another 3 minutes. Took them out and they were still mushy and flat :( what did I do wrong. I did just what you asked. Should I have not used the sugar cookie dough in the tube as it said? Help!! I spent all day kneading and kneading! I want this to work :( I don’t understand…
P.S. Use Gel/Paste, it washes off with soap and water.
Just made these for my little sister’s Christmas party and they turned out wonderfully! Used Christmas colors and sprinkles, and they look fabulous! She’s so excited to bring them to class, thanks so much for the recipe!
I just saw these on Pinterest and love them! I love the bright colors and swirly look, like Dr Suess or a Tim Burton movie. Thank you so much for the step-by-step instructions with photos. I need it all.
I love the swirl pattern. What an awesome idea. Love your pictures too. Looks like it is weekend baking in this house.
:)
For future reference, “rolled cookies” are cookies that you roll the dough out (typically more than one color) and then place one on top of each other and roll into a, well, roll. After this, you can just take a knife, them about an inch or so and bake them. You can wrap them in parchment or wax paper then put them in the fridge or freezer for baking at a later date, too. This way of dough placement makes a swirl effect with the cookies or you can, with the dough as separate balls, roll them together then roll them out and make them into the long roll, cut and bake for a marble effect. They’ll look like the cookies in your post (maybe a little thinner, though) and it’ll take less time (and work) to make them up.
Hello! The term rolled cookies is actually used to reference cookies that are made with the dough rolled out, and then cut out prior to baking, as opposed to drop cookies which are dropped onto the pan and spread as they bake. I was just making a little silly pun on the term “rolled cookies” since I roll these up in a whole other way! As far as actually rolling these cookies, you can certainly make them in the way you have described and they would be just as colorful and much quicker! I chose to bake them in this method for the really cool coiled look and 3-D texture – much like a cinnamon roll. Also, twisting and rolling the coil also creates a really cool color pattern within the cookie that you just can’t get any other way. That’s the awesome thing about baking, there is so much room to get creative! :)
It looks beautiful but I quite don’t understand how out of the 4 balls you are showing all these little balls? also once you got to the rope do you slice the rope ?and if so how thick?
I really wants to try can I use the cookie dough from a tube?
Thank-you
Irene
These are absolutely perfect for my daughter’s halloween 1st birthday but it’s not for another 3 weeks. Is there a way I can make these ahead of time? Either freezing the cookies pre baking or freeze them after baking? I want to make sure I have those sprinkles too ;)
Absolutely! When I made these I actually stuck them in the freezer for a future halloween treat! Just stick them in a zip lock or container with parchment paper (or wax paper) in between layers!
I made these this afternoon with my own sugar cookie dough and they are so awesome! My kids and the neighbor kids love them! However when I baked them they didnt hold the think swirly ridge as yours did. Maybe I rolled them too thin? Either way they are better than any cookie I have ever made. I also rolled the edge of the cookie in purple frosting then sprinkled. :]
This could be due to the temp of the cookie dough. I try to keep my cookie dough from getting warm by re-chilling it here and there as needed. (like after rolling into balls) :)
These cookies are simply gorgeous! I LOVE the colors! :)
Toni, these cookies look Amazing !! I have 4 kids, that will LOVE them and of course, so will their classmates !! The tutorial was expectional !!! Thank you so much for being so thorough !
You’re very welcome!