

Call a shrink, I have dessert commitment issues. This weekend I was going to bake some yummy fall flavored treats…and today I was going to post all about buttercream neither of which I did. I laid everything out on the counter and even opened the can of pumpkin…but then the idea for these Pinwheel Halloween sugar cookies popped in my head and I had to make them. I’m not a bit disappointed because these came out perfect! But between y0u and me, I’ve already got Christmas on the brain…no I’m not crazy, I’m a blogger :).
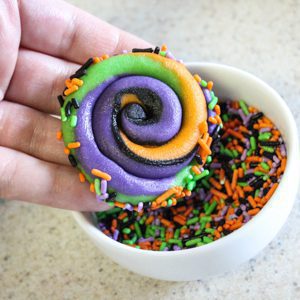
…opps back to these Halloween cookies. I stumbled upon some Seussical swirly cookies awhile back on Pinterest. I thought they were just about the cutest thing and would look super cute with different holiday colors. So I pinned them to make when the time come. But as I followed the link the instructions were not super helpful, lacking pictures, and it came from a cookie mix pouch. Which I knew meant nothing but the dreaded cookie spreading. I knew I could create my own version of pinwheel cookies, even better! And so these spooky Halloween Pinwheel Sugar Cookies were born.
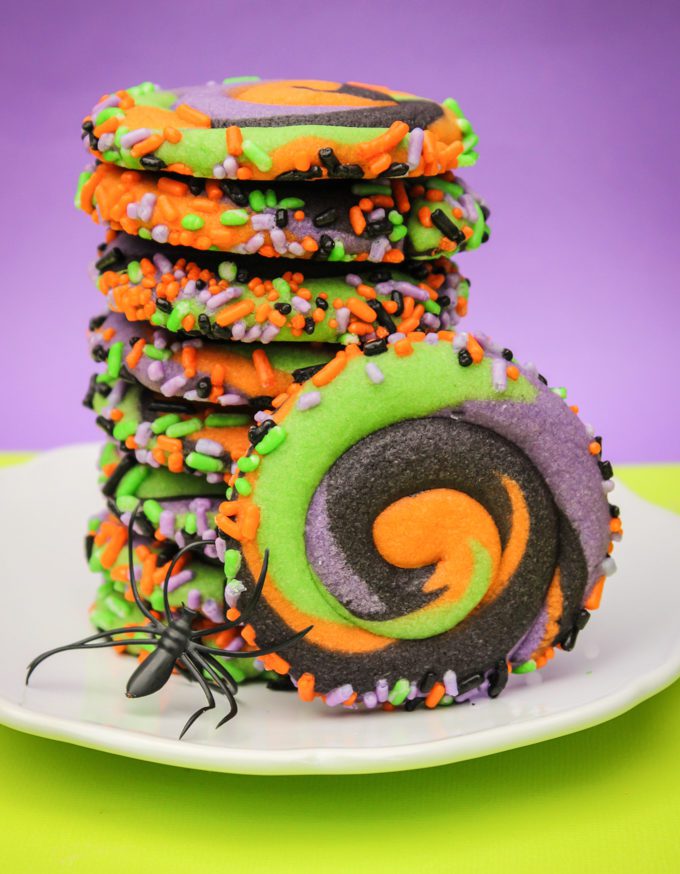
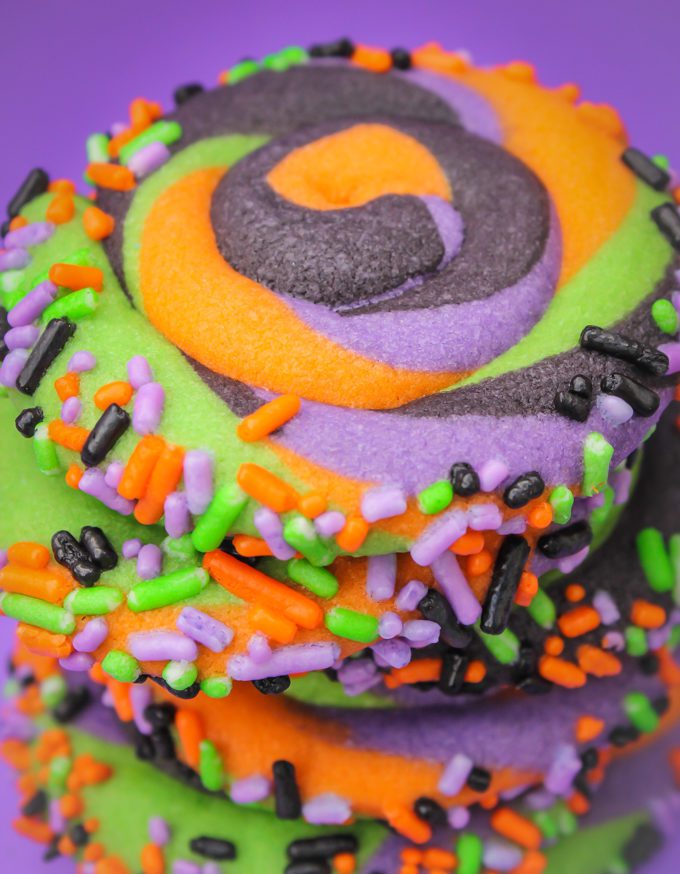
When making these cookies you want to make sure you are using a sugar cookie recipe that doesn’t spread much as well as colors well. For these cookies, I used my rolled sugar cookie recipe. Even though this sugar cookie recipe is generally used to be iced and decorated, they stand alone just fine. Honestly, I couldn’t believe just how well the colors came out! They are vibrant and just plain fun.
Normally, I would recommend you keep anything with more than two feet away from your treats…but with these Halloween sugar cookies, these spiders made the perfect little garnish. Just cheap spider rings that can be found about anywhere this time of year (and in the perfect colors too). But they are a perfect pair whether your packaging these up to give or sitting them out on a platter.
And serving them up with some Halloween edition blackberry kool-aid is a pretty cool touch.
Alright, time to break it down barney style and show you just how I did it, so you can too.
HOW TO MAKE PINWHEEL HALLOWEEN SUGAR COOKIES
SUPPLIES
- sugar cookie dough
- orange, black, green, and purple gel food coloring
- sprinkles
- parchment paper

Step 1: Roll your cookie dough into a ball and then roll into a log.
Step 2: Cut into 4 equal parts.
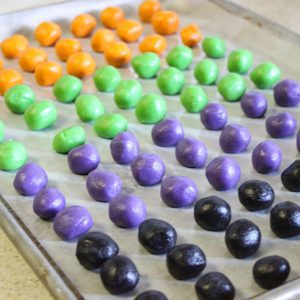
Step 3: Roll each piece into a ball and create a dent with your thumb, put some food coloring in each. If your wondering about the dent this will help keep the coloring on the dough and not on your hands. As you work the dough press the uncolored dough inside and push, roll, and gently work the dough as it colors from the inside out. Once you get good enough you won’t have a single spot of color on you. Trust me here, oh the places I have gone with colored hands.
Step 3: Begin to roll each color into grape size balls. Take the time and make sure they are fairly similar in size. Not only will this give you a good mix of color it’s going to keep your cookies about the same size.

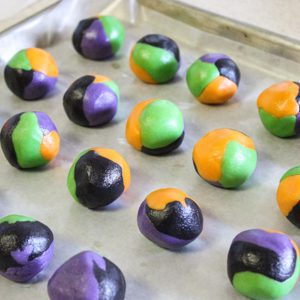
Step 4: Next take one of each color and very gently roll it together. It will kind of look like a beach ball.
Step 5: After all that rolling I found my dough was getting soft and warm, not good for coiling. So stick them in the freezer for a minute of two. They will chill just a bit and become nice to work with again. About half way through rolling the balls you may notice they are getting very soft again, just pop them back in the freezer for a moment and you’ll be back rolling.
Step 6: To make the coil start out by gently rolling the ball between your palms and then place on the parchment paper. Gently and evenly roll out the dough into a rope about 8 inches long. I do so by first starting to roll it out naturally with my hands facing front and then I turn one hand lengthwise to smooth out the bumps. See how the colors are all kind of straight below? Once your done give each end a gentle roll in the opposite direction to “twist” the rope reveling more colors. Particular I know but you want all the colors to come out.
Step 7: Start out by rolling in one end. If one end is thicker use that one.
Step 8: Now coil up the rest of the dough. I found it was easier to gently pick up the dough and allow it to drop around the center into a coil. Rolling the dough flat on the paper by moving the center around resulted in bumpy cookies. If your end is kind of funky or pinched due to rolling, simply cut off the very end to smooth it out.
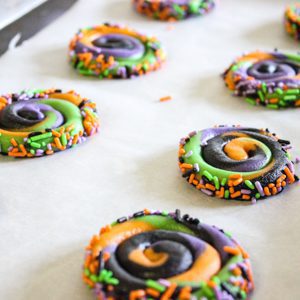
Step 9: Now gently pick up the cookie by lifting the parchment paper and flipping it onto your hand. Roll the sides into the bowl of sprinkles.
Step 10: Place on parchment lined baking sheet. Bake at 400 for 8-9 minutes.
Want to make them into cookie pops? No problem! Just roll a few balls of leftover cookie dough and squish flat. I used the little bits I cut off the coils. Lay on parchment covered baking sheet and gently press the stick in.
Now just lay your cookie coil over the stick and press ever so slightly to make it stick. Bake about 1 minute longer for a firmer cookie.
Let them cool on a cookie rack, be prepared you may want to just sit and stare at them cause they look just that cool. 🙂
I baked these during nap but made the mistake of photographing while the kids were awake. They went crazy about these pinwheel Halloween sugar cookies and waited by the window watching me work. Can’t tell you how many times one of them poked their head out to let me know there were bugs on my cookies, thanks girls :). You can imagine their devastation when I told them I was actually going to freeze them and enjoy them when Halloween got a little closer. Their cute faces were better than my determination, I caved and they each got half a cookie.
Another fun spooky treat made, maybe tomorrow I’ll get to that buttercream?
WANT TO SEE MORE VERSIONS OF THESE SWIRLY PINWHEEL COOKIES?


