

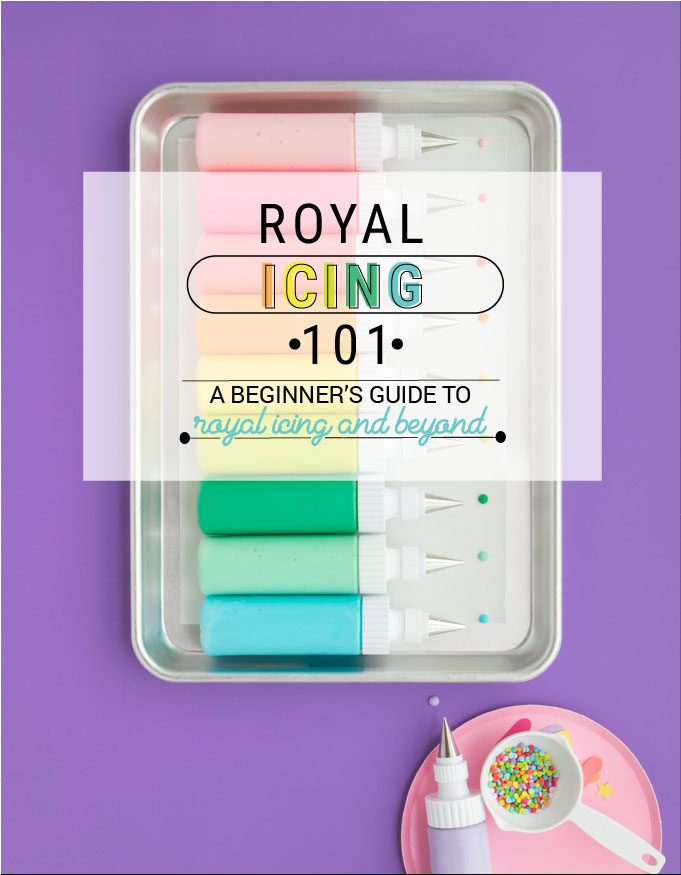
Super stoked to share I’ve updated another basics post, Royal Icing 101! This post is an updated version of one of my staple posts from my old brand. So if you’re coming over and see the different pictures, you’re in the right place. For those of you who are just wandering upon this post for the first time get ready to learn all about how to make royal icing!
Just so you know what you’re getting yourself into. This post is full of everything I’ve learned about royal icing while cookie decorating over the years. How I make it, color it, bring it to consistency, and even store it. While it’s true, you don’t have to be a cookie Picasso to create adorably yummy cookies, you will need a good understanding of royal icing and how to work with it to make even the simplest cookies.
If you’re looking for even more info I also have a Rolled Cookies 101 and a Decorating Cookies 101 if you want to see more of the entire process.
Like every great class, we’re going to need a little pump up to begin. I want to make it super super clear that there are a hundred no a million different ways to make and use royal icing. Really, they’re endless. Sometimes when I scroll through bit of online cookies chat is blows my mind at how each one of us have a way that totally works. We’re all so different! The goal of this post is as always to show you how I make it work, and give you a great foundation for your cookie decorating journey. Or maybe even a few tips in areas you have struggled in! Once you’ve got the basics of royal icing down you’re sure to tweak your process to perfection. But for now let’s get you started!
ROYAL ICING 101 – WHAT IS ROYAL ICING?
Royal icing is a white decorating icing made from the whites of eggs or meringue powder, powdered sugar, and water that hardens with air over time. This icing can be made in many different consistency from very thick to very thin and colors like a dream. For cookies, royal icing is mixed and colored then piped onto cookies using different consistencies. Once dry the icing is smooth and firm to the touch. Most often they can be easily stacked, stored, shipped, or packaged as favors and gifts.
And because every good story needs a bad guy, it’s important to note royal icing has a few “frenemies”:
- Oil will break down royal icing during preparation, so be sure to make sure all of your tools are super clean from oil.
- Water will dissolve royal icing. While you will do this on purpose to thin your icing just a small drop of water after drying will be like acid to the icing eating away at it.
- Air is needed to dry the cookies once complete. Be careful to cover any icing while working with it or it will dry and crust over mid process.
INGREDIENTS
- 4 tbsp meringue powder
- 1/2 cup + 2 tbsp of room temp water
- 4 cups of powdered sugar
- 1-2 tsp vanilla or alternative oil free flavoring
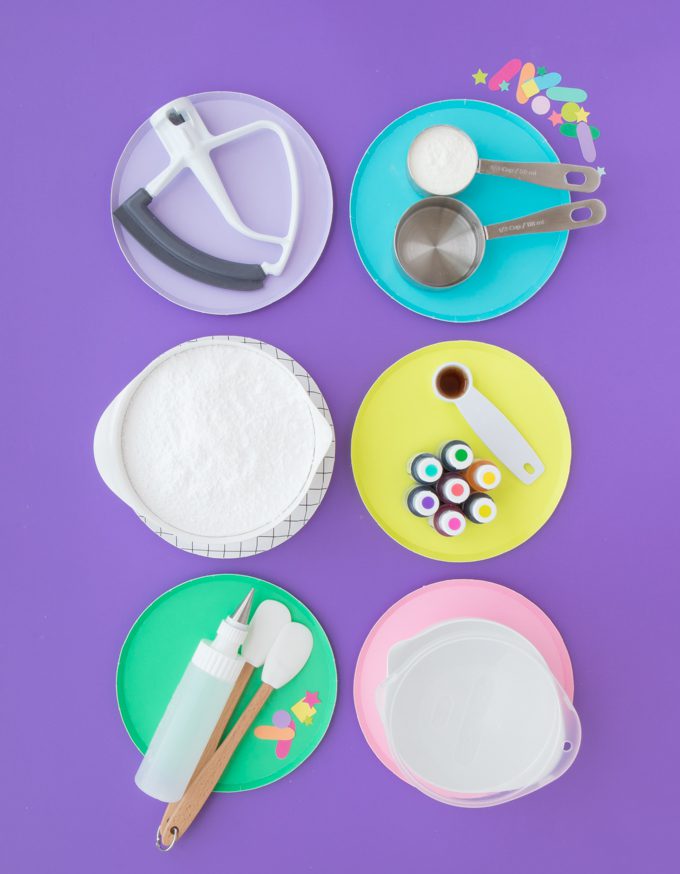
TOOLS + SUPPLIES
- kitchen mixer with paddle or whisk attachment
- gel food colorings
- small water bottle or spray bottle
- small spatulas
- little mixing bowls with lids or cling wrap to cover
Like I said above, there are many different recipes and even ways to make royal icing. Keeping it simple, I use an easy recipe that has always worked great for me from the beginning. I love it because not only is it easy to make, it’s yummy. Basically I use 1 cup of powdered sugar for every 1 TBS of meringue powder. Because I’m a creature of habit and I’m often teaching beginners I always use Wilton’s meringue powder. It’s always available to everybody. You can find it online here or in the cake decorating section of your local store.
There are a few tools that come in super handy when making royal icing. First of all my Kitchen Aid mixer. It’s not impossible to make royal icing without an electric mixer, but I wouldn’t recommend it. Unless you’re the most buff baker in the entire world. I always get the best result by using the a kitchen mixer with the paddle or beater attachment. Either work just fine, but I really love my paddle with the edge. It really gets everything mixed in. Also helpful is the KitchenAid shield, that keeps the powdered sugar from flying everywhere. But don’t worry, if yours doesn’t have one. A piece of saran wrap wrapped around the mixer is a quick fix that helps a ton with keeping the powder from getting everywhere if that’s an issue for you.
I also keep lots of these spatulas on hand. I LOVE these little guys and use them for everything. They make coloring small amounts of royal icing and pouring it into bottles so much easier. I often pick up mine at Target in their holiday items. They almost always have a different version for each holiday.
A small water bottle or spray bottle really makes thinning the royal icing (will talk about that later) super easy. Like many cookies I use to use a spray bottle but one day I realized…why not use the icing bottle I’m already using? A small squeeze of the bottle easily adds water and keeps me from adding too much at a time.
Another simple little tool I keep on hand is these booboo sticks that I found in the food coloring section at Sweetart Country Kitchen. They are so helpful with getting coloring out of a bottle, testing the icing consistency, and scraping off mistakes made on a cookie. I have so many of these little guys! If your really getting into cookie decorating I’d really recommend picking some up, but of course toothpicks will serve the purpose too. 🙂
Alrighty enough prep talk, let’s get mixing!
HOW TO MAKE ROYAL ICING
Royal Icing
- 4tbs meringue power
- 4 cups powdered sugar
- 8 TBS room temp/slightly warm water (not HOT!)
- 1tsp vanilla
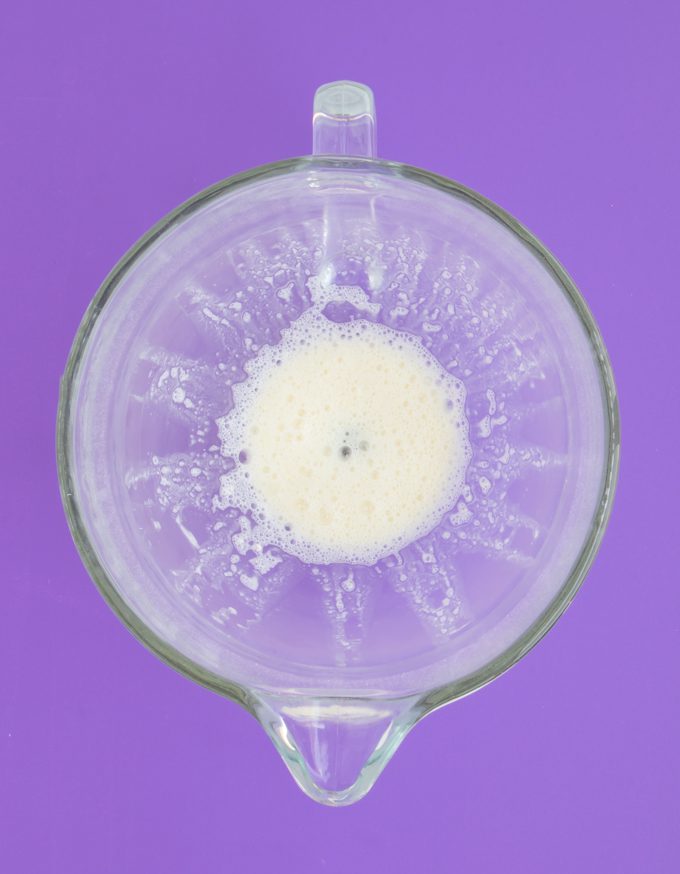
Step 1: In the bowl of an electric mixer, add 4 TBS of meringue powder and about 4 tbsp of room temp water to start, turn the mixer on medium-low until it’s foaming and light yellow.
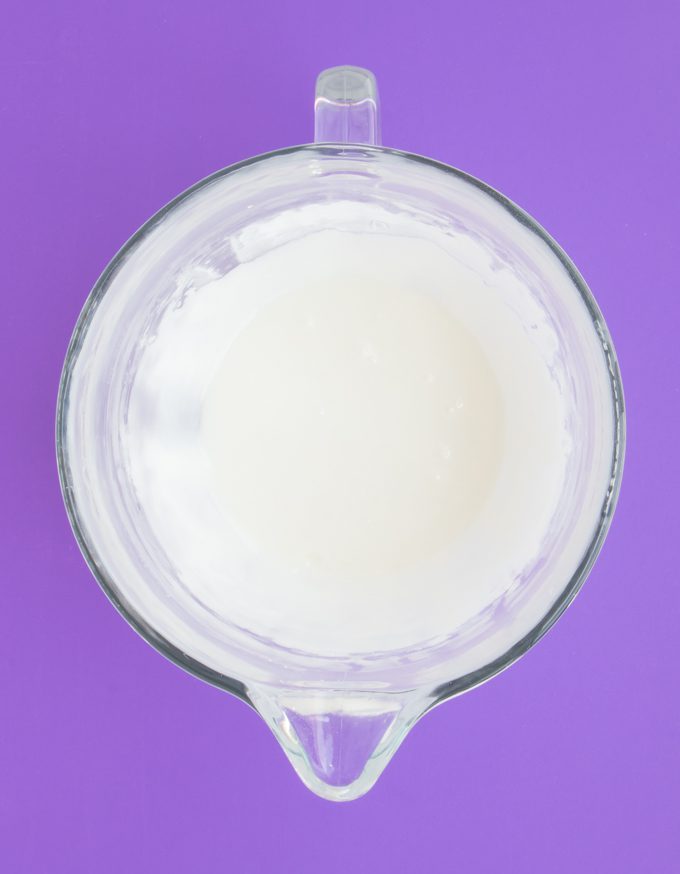
Step 3: Add in the powdered sugar and the rest of the water. Give it a couple quick flips of the switch to incorporate the water and sugar so it doesn’t fly everywhere. If this sounds too risky for you feel free to add in half of the powdered sugar at a time. Mix on low until it’s fully combined. At this point your icing should be smooth, a shampoo like consistency. If your icing is not smooth continue to add small amounts of room temp water stirring in between.
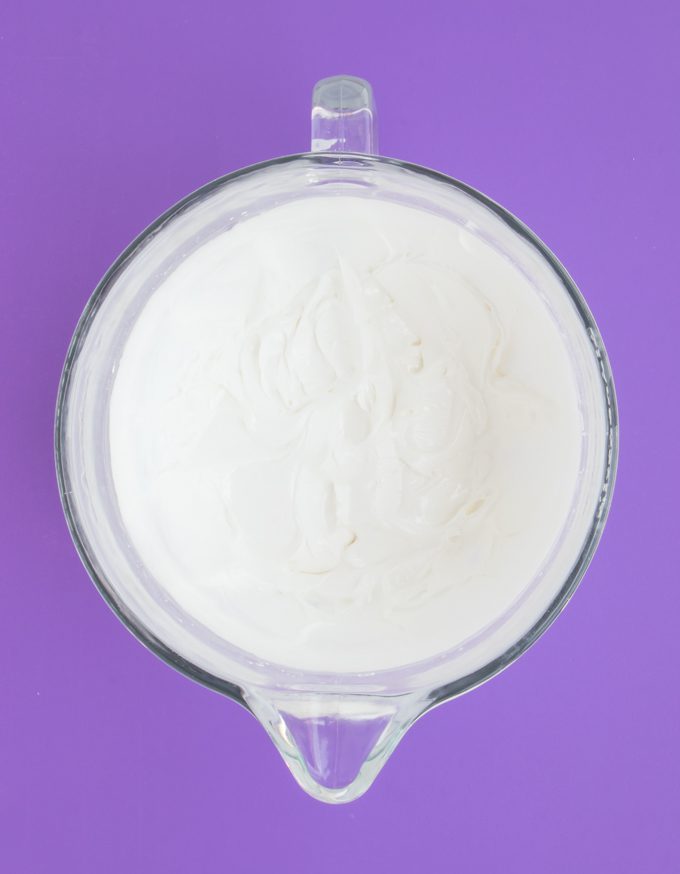
Step 4: Begin to mix your royal icing on medium high. After a minute or too it will begin to get fluffy and come to a “soft peak stage”.
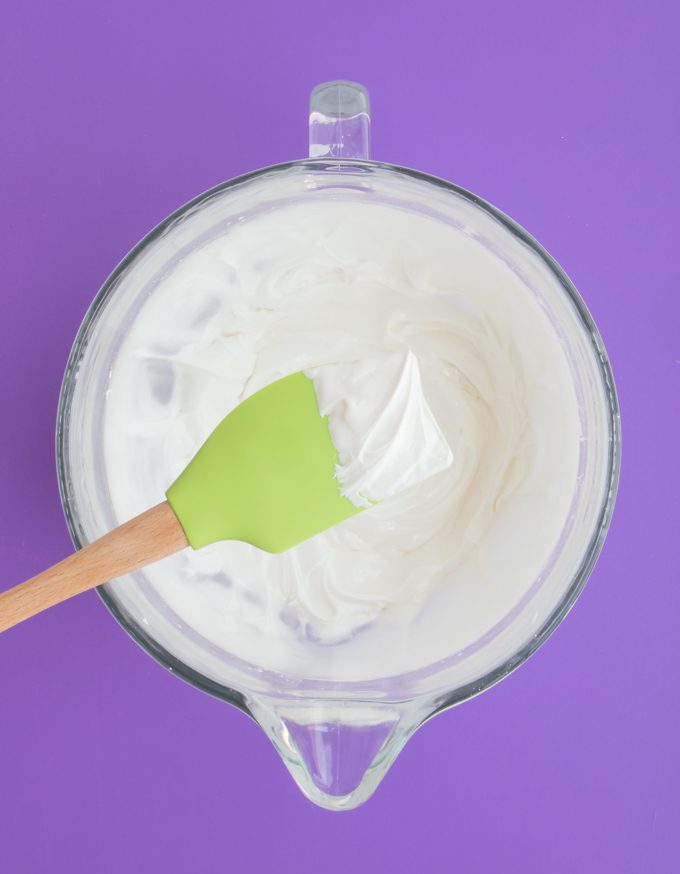
Step 5: Continue to whip your icing until it comes to a stiff peak stage or very near it. If you’re not planning on using a really stiff icing (it’s rare) you won’t need it to be super still. When you stick a spatula in the icing and pull out it should create a peak and stay in that peak not fold back onto it’s self and into the icing.
Step 6: Now it the time to add flavoring, just a quick whip will do. If you’re coloring all of you’re icing one color, you can also do that now.
Separate your icing into smaller bowls, number depending on however many colors you will be making. Cover each bowl quickly. It’s important to remember. While your working with one bowl, keep the other bowls covered in saran wrap. It will begin to crust and harden if left open.
BAKER’S TIP – Once your icing is separated into covered bowls. Grab all of your used tools and put them in the now empty mixer bowl. Run hot water to the top of the bowl and let it sit in the sink while you are working. As you dirty more pieces you can toss them in. Keeping it all wet will make clean up easy when ready, dried royal icing is really no fun to scrub!
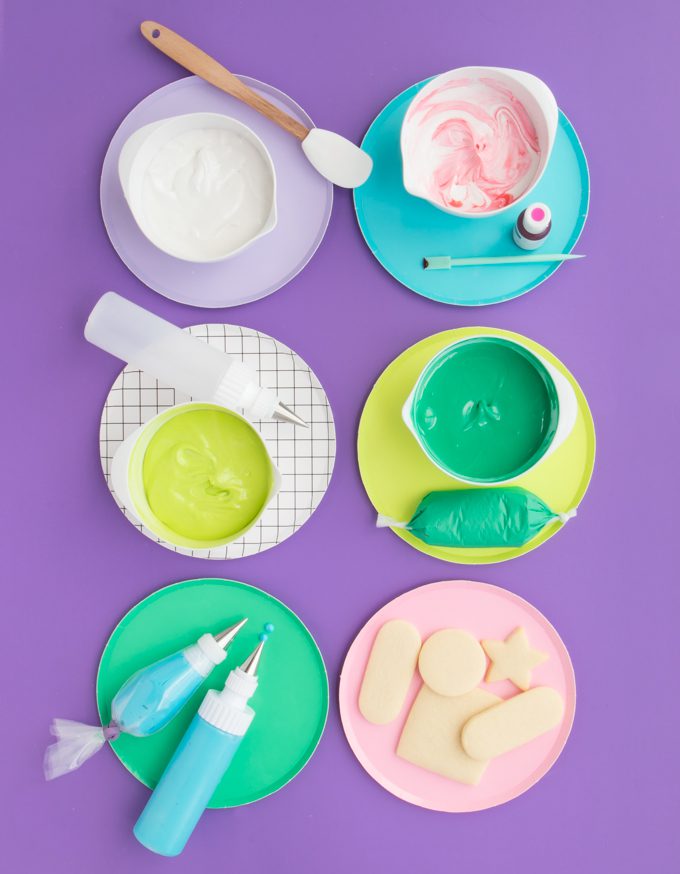
HOW TO COLOR AND THIN YOUR ROYAL ICING TO CONSISTENCY
Now that you’ve got your royal icing ready it’s time to talk coloring and consistency the two go hand in hand when prepping your royal icing for decorating cookies. Coloring is super simple, but royal icing consistency is key to decorating even the simplest of cookies. To give you a super quick decorating tutorial cookies are generally made from outlining then flooding a cookie with icing. In order to do this your icing consistency needs to be just right. If your icing is too thin, it may run right off the sides of the cookies. If your icing is too thick it won’t smooth out over the cookies. Once you’ve got your icing consistency down you can play around with many different techniques to create some awesome cookies, or you can keep it simple if you’d like.
COLORING ROYAL ICING
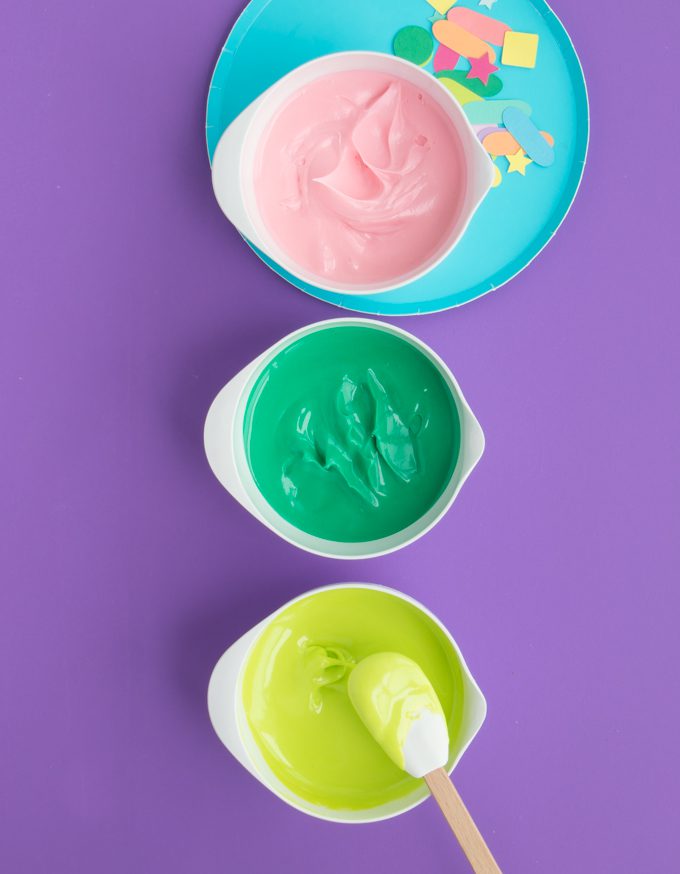
Before adjusting your icing’s consistency first you need to do is color your icing. The reason why icing is colored first is because coloring can actually make your icing more runny depending on the amount you need to put in especially when dealing with dark colors like black, purple, red, blue, and brown. Add in a few drops of coloring and stir, (this is where those little spatulas really come in handy) continuing to do so until you’ve reached a shade or two lighter then the desired color. Colors will darken a bit as they dry.
BAKER’S TIP – If possible I recommend preparing your icing the day before (when you bake your cookies) so the colors have a full day to develop. I also like to keep a little extra white icing extra just incase my colors became to dark I can then add white and lighten them back up.
THINNING YOUR ROYAL ICING TO CONSISTENCY
Now this is where things get just a little bit tricky. Basically your royal icing failure or success will totally rely on these next steps. But you know, no pressure. Just kidding – you’re going to do just fine!
Remember I said above the gist of cookie decorating is using different consistencies of royal icing to outline, fill, and decorate. Each consistency will allow you to achieve different results. Essentially you get to these different consistencies by adding a little room temp water at a time, making the royal icing thinner and thinner. Let’s take a look at a few of the typical icing consistencies.
Outline/Piping Icing is a toothpaste like consistency used to create a dam around the edge of your cookie that holds in the flooding icing. It is also used for details on a cookie, such as lines, eyes, bows, etc. It is piped onto cookies using a piping bag and most often small round tips. You can see in the above photo that when poked with a spatula it leaves small peaks that keep a point to them.
15/18/20 Second Icing is basically the do it all icing that many decorators like to use for an easy all in one cookie covering icing or a puffy look. When poked with a spatula it will make small peaks that then curl over onto itself. A few shakes of the bowl and that icing would eventually come back together. It also is piped from a bag of a bottle. The down side to this consistency is it’s not as easy to control, and small details can not be made with it but it is super quick to outline and flood a cookie.
Flooding Icing is a more fluid like icing with a shampoo like consistency that is piped inside the outline icing that smooths itself out and covers the cookie. It is most often piped on with a decorating bottle as it would leak out of a piping tip. Flooding royal icing can range in just how thin is it, as long as it comes back together
After years of mixing icing I can pretty much make each consistency by just the feel of the spatula and how it runs off, or doesn’t run off, the spatula. However for very beginners I highly recommend learning icing consistencies by using the seconds “count”. In order to do this grab your phone or a stop watch and a tooth pick. As you draw a line in the icing start your stop watch. The moment the line disappears into the icing that is your royal icing count. Neat right?!
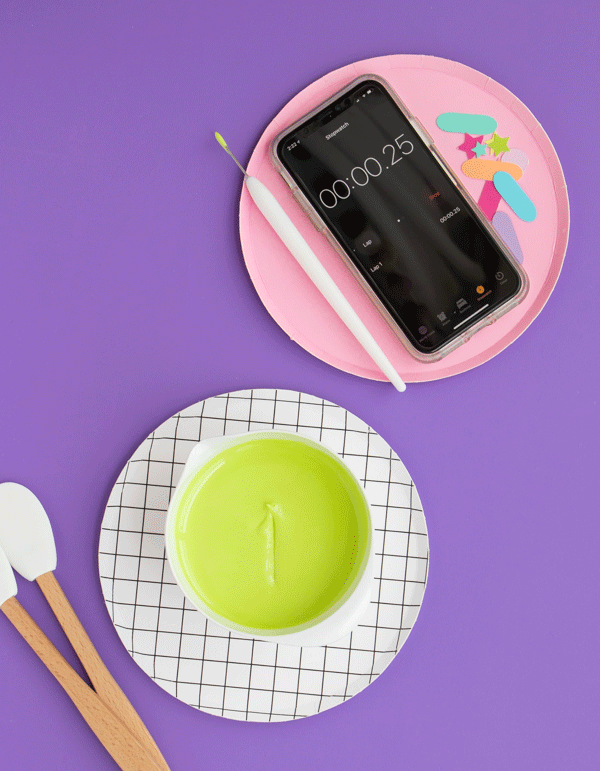
You can see in the GIF above the icing line dissapears right around the 18 – 20 second mark.
Outline/Piping Icing – won’t come back together.
Flooding Icing – 6-8 seconds.
All In One Icing – 15-18 seconds.
A FEW MORE HELPFUL ROYAL ICING TIPS
- Outline icing should be able to pipe smoothly without breaking. If breaking it is not moist enough.
- The tips of your piping bags will need to be covered. I often stick a toothpick in the tip for a good seal. Without it the icing dries inside the tip.
- Royal icing can be stored airtight on the counter for several weeks. Mix well before using as it will seperate.
- If lots of air bubbles are apparent when mixing, tap bowls on the counter several times to help remove bubbles.
Now that you’ve learned how to make royal icing, it’s time to decorate with Decorating Cookies 101…easy breezy steps to simple yet impressive cookies!
Heads up! To keep those legal gurus of the world happy, I need to inform you that some of the links in this post are affiliate links. In short – I may earn a small commission from the use of said link with no cost to you! But don’t worry I only link to stuff I use, love, and know you will too!


