


Hey there! Previously, I shared with you guys all about royal icing Royal Icing 101, today we’re moving on to the fun stuff…welcome to Decorating Cookies 101! As I explained yesterday, I love decorating sugar cookies but I like to keep it simple cause let’s face it (unless you’re a professional cookier)...ain’t nobody got time for that. ;) So in this post I’m going to break it down step by step to show you guys the basics on how I decorate cookies, and a few easy ways to make them sparkle. If you are new to royal icing hop on over here to read all about it, and if you’re needing to learn how to bake lovely sugar cookies perfect for decorating head on over here.
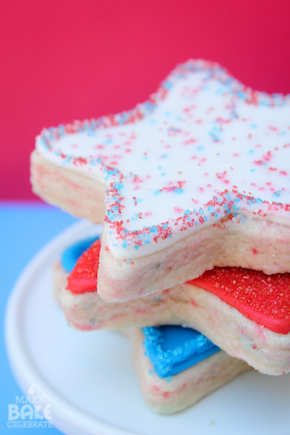
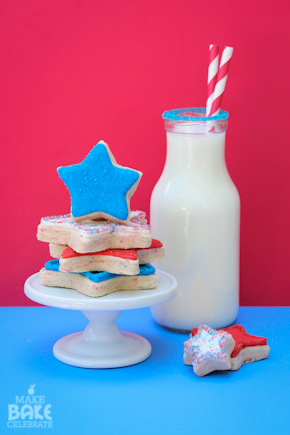
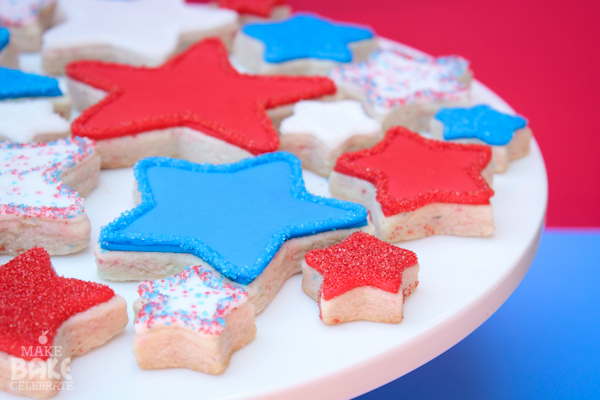
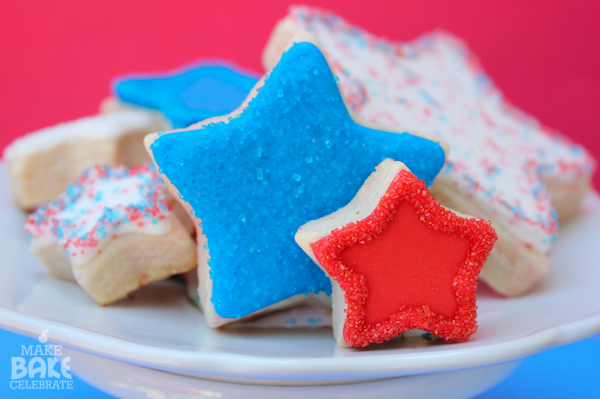
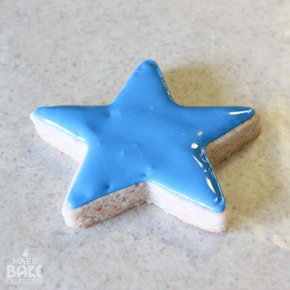
With the Fourth of July right around the corner I though some fun star cookies would be perfect to demonstrate. With a few simple techniques you can make a beautiful and easy platter of cookies, that are sure to create fireworks of their own. :)
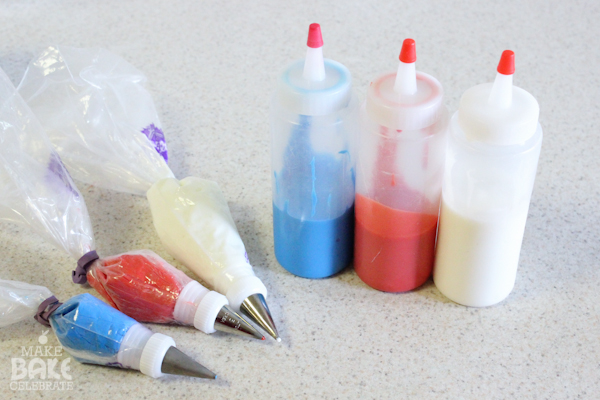
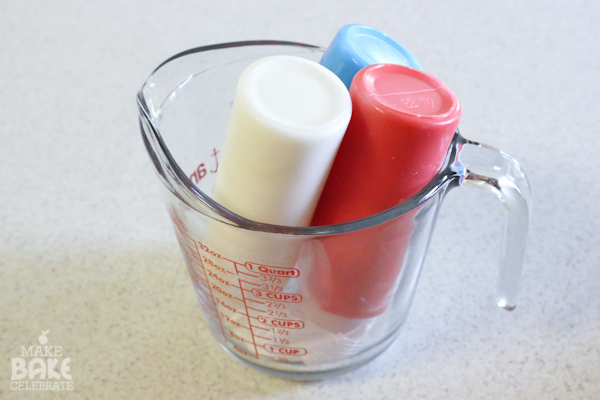
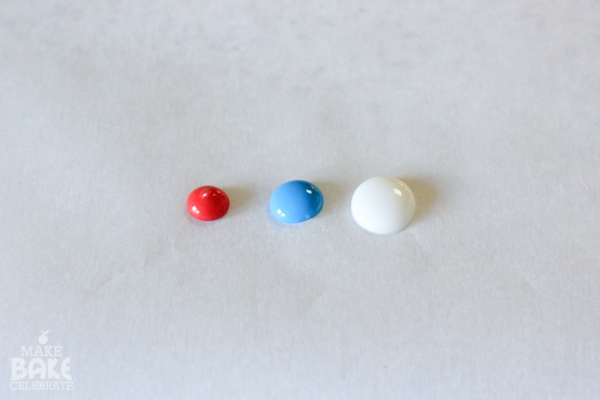
Let’s get started! First you’re going to need your royal icing mixed, colored, at the right consistencies, and ready to go. (Check out Royal Icing 101 for more info) Here I have each color in my outline/piping icing and a flood icing. I also have a blue 15 second icing as well.
For these cookies I used this recipe and technique, and mixed in a bit of red, white, and blue sanding sugar.
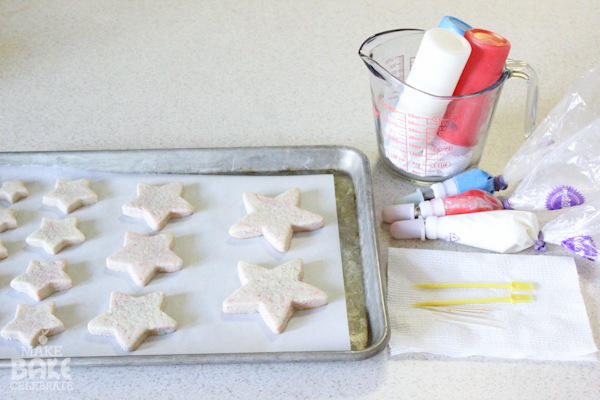
Step 1. Organize your work station. This is SO SO SO important! When decorating cookies you have to move quick with each cookie, because the royal icing begins to dry as soon as it is exposed to air. So you want to make sure you have everything you need within reach. I lay all of my cookies out on a baking sheet with parchment paper. This makes it easy for me to move them. I always keep toothpicks, several sheets of paper towel, and sprinkles close by. You will need to wipe your tips constantly, so the paper towel comes in really handy. Also, make sure to cover up the tips of your piping bags. Here I used tip covers, but I often just stick toothpicks in them to keep them sealed.
I also keep all of my bottles upside down. This keeps all of the icing at the tip and ready to go. It also helps eliminate pesky air bubbles in the icing.
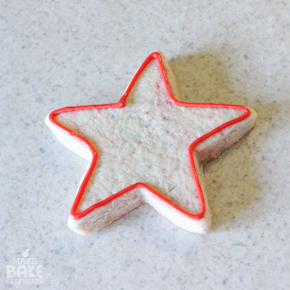
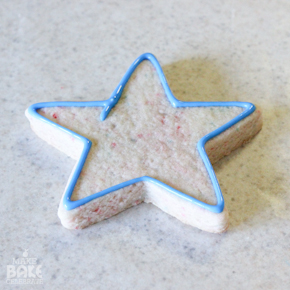
Step 2. Outline your cookie using your outline/piping icing and a small round tip. I used Wilton tip #3 here.
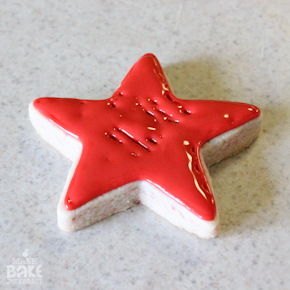
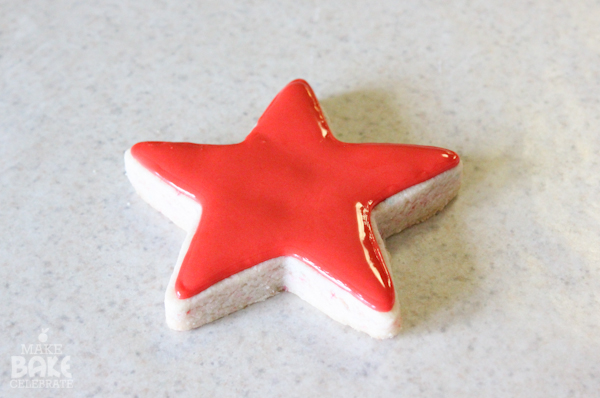
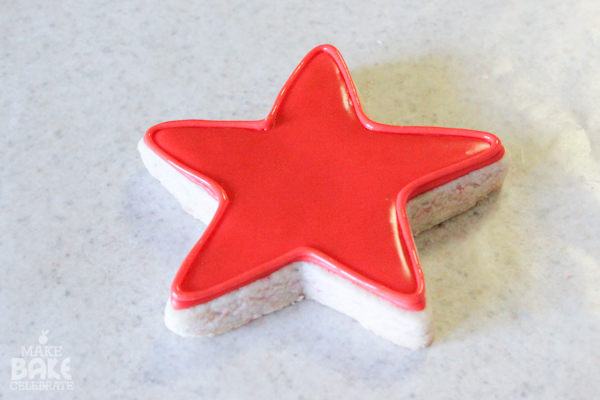
Step 3. Right after piping your outline, fill in, or “flood” your cookie with the flooding icing in the bottles. Remember the icing will spread a bit and settle together so you don’t have to fill every single spot on the cookie. If you put too much flood icing in it can break out of the outline and run off the cookie. Also make sure you do this one cookie at a time. When I was learning to decorate cookies, I actually was outlining them all then flooding them all together. In the end I had these very appearant edges that never looked good. Eventually I realized that I had to do it at the same time so they could “flow together”. Doh!
Step 4. Immediately, take a toothpick and help the icing spread around where there are spots. Make sure your not scraping the cookie surface while doing so or your cookie crumbs and oil may rise up. Once the cookie settles for a few moments it will smooth out and soon begin to crust.
There’s actually another way of doing this that takes a little less work with a “15 second icing”. Since I usually only share simple cookies on MBC I often use this. Basically it’s the same concept except it’s outlined and filled with the same icing or even without an outline at all! The icing is thicker then a flood icing yet thinner then the outline icing. (more info at Royal Icing 101) You might be thinking well why wouldn’t we always use that? It is easier and faster, but it doesn’t always create as nice as look as you want, and you have less control. But if your not trying to make a difficult cookie it’s the way to go!
Here, I gently outlined the cookie and flooded the cookie with the same 15 second icing from a decorating bottle. I put very little pressure on the bottle to create the thin line. However, sometimes when I’m making small cookies for example, I just squeeze out the icing onto the cookies getting as close to the shape as I can, without outlining. It’s hard to see in pictures but it’s actually very different in consistency from outlining and flooding icing. Since it’s a bit thicker, it takes a little more time to smooth out then the flood icing. I learned this little trick from Sugarbelle of course.
Here’s a example of the difference from the previous post Each icing was squeezed for 1 second in the order of outlining/pipping, 15 second, and flood icing.
OK now let’s talk about a few easy ways to spruce these cookies up without needing any different icing or too much time!
Cookie decorating is done most often two ways wet on wet icing, and wet on dry icing. Wet on wet decorating is when you drop wet flood icing into the wet icing you flooded the cookie with, right away. This will give you a flat smooth design. Wet on dry is when you allow the cookie’s icing to dry or crust over first before decorating with a second icing. This will give you a 3 dimensional design.
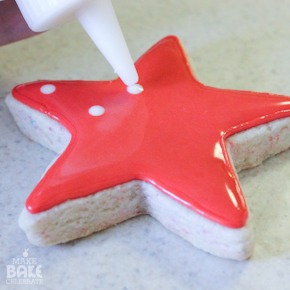

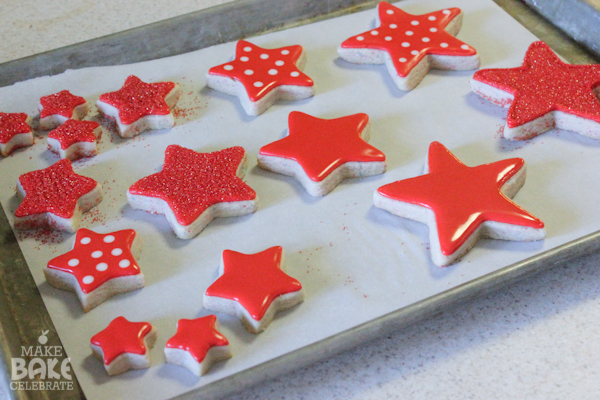
Here’s an easy example of wet on wet, polka dots! As soon as I was done flooding the cookie and let it settle for just a second I used my white flood icing to pip on dots, right into the red flood icing. Make sure this is done right away before the icing crusts. To keep my dots a similar size I try really hard to use the same amount of pressure and I count how long I’ve held it. For example, on these cookies I would stick the tip right above the red icing and apply pressure while saying “one one thousand pull” then pull the bottle straight up. If I say this every time in a rhythm and apply a similar amount of pressure my dots are about the same size. Also, be sure to wipe your tip each time you pull the icing bottle up.
Another easy way to decorate with wet on wet is to use a tooth pick after dropping the icing to create designs. (like fireworks!)
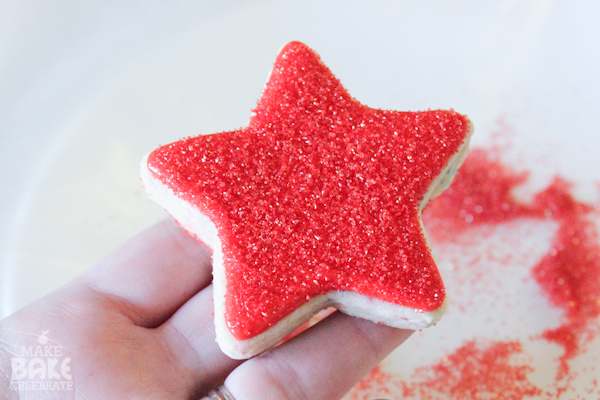
Here’s a REALLY easy way to decorate your cookies using wet icing! Grab a plate or bowl and pour sanding sugar over your cookie right after icing it. Turn the cookie upside down and then lay it on the pan to dry. Super easy and adorable.
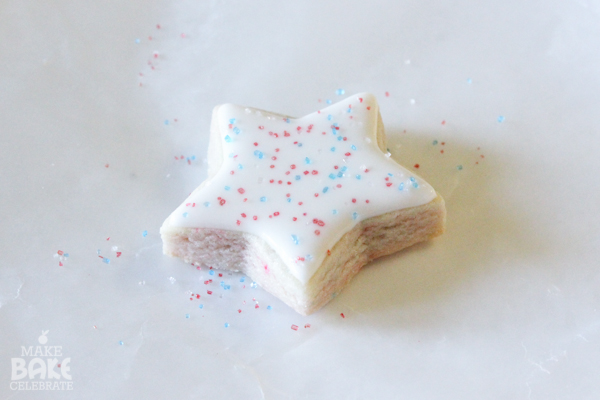
You can also sprinkle just a little bit of sanding sugar on the wet icing. It sinks in just a bit creating a cool speckled effect.
Here’s an example of using wet on dry icing. After the cookie icing has begun to crust over you can pipe an outline around the cookie using outline/piping icing. You can tell your cookies are crusted over because they will loose their wet shine. I normally let mine sit for an hour or two before moving on to this step. Often when I’m decorating by the time I finish flooding my last cookies, my very first cookies have already been crusted over. Just remember that it’s not completely dry yet, so don’t touch the icing, it will break!
Of course you’re not limited to just an outline, but it’s an easy way to finish up a simple cookie. :)
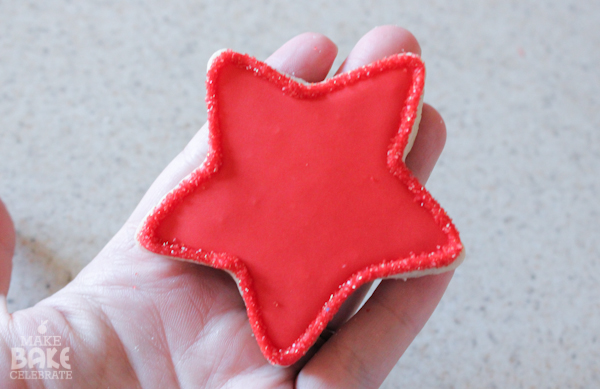
You can also combined wet on dry with sanding sugar, here I piped on the outline and then used sanding sugar just on the outline. Just make sure you cookie is good and crusted over before doing this. Also, there may be some sprinkles left over on the cookie, just leave it there until the cookies are completely dry. Then you can use a dry paint brush and gently brush away the run away sprinkles.
Once your all down leave the cookie out for at least 6 hours to dry completely. Your time may depend on the temperature and humidity of your house. I generally just leave mine out over night while we’re sleeping. Once they are dry you can stack them and package them up however you would like! Decorated sugar cookies are actually good for a couple of weeks when sealed in an air tight container. :)
A Few Helpful Tips:
Sometimes air bubbles settle in your icing while flooding. Take a toothpick and pop them right away.
Try as much as possible not to move the cookies once they are done, and be gently when moving. The slightest touch of the royal icing will mess it up, often hard to fix.
Many bakers like to let bake their cookies at least a day before decorating to prevent oil spots.
Sometimes when using two different icing colors the colors will bleed, especially with black. When your using really dark colors to help prevent this make sure to give plenty of drying time before applying the next color. Keeping a rotating fan on the cookies while you work also helps loads!
It’s really important to keep your tips clean. I wipe them off with a paper towel between every single use.
Bakers seem to have different experiences with freezing cookies. With this particular icing I have had great experiences in freezing. Once I pull them from the freezer I take them out and lay them on a paper towel (to soak up the moisture) to thaw and I hardly ever have any spots.

And now your all set to impress! Can’t get enough cookies? Check out some more yummy and easy to decorate cookies here!
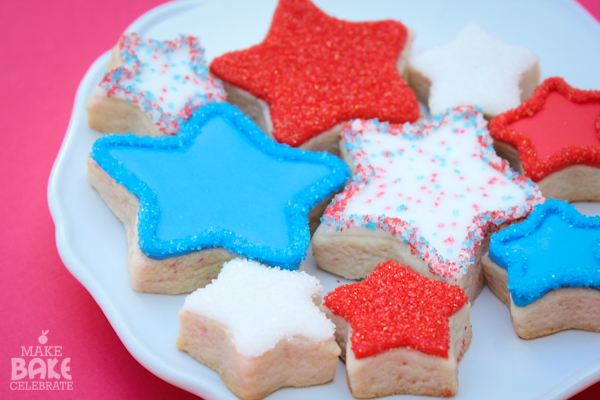


These cookies are such a great example of how even a simple cookie design can be beautiful! Especially with the addition of sprinkles!!