


It’s burger season! Can I get a whoop whoop? Whoop whoop!
Hello daddy’s cooking dinner again – and enjoying it! Ohhhhhhh you thought I was excited about the burgers, and the food. Oh, yea, yea right. I mean the foods great and all, heck the hubs can grill a mean burger. But the real excitement for this mama is the fact that I won’t be cooking dinner multiple times a week. My responsibilities are down to a simple side salad and some veggies. And if I’m feeling really wild, I might even buy paper plates to get me out of dishes too.
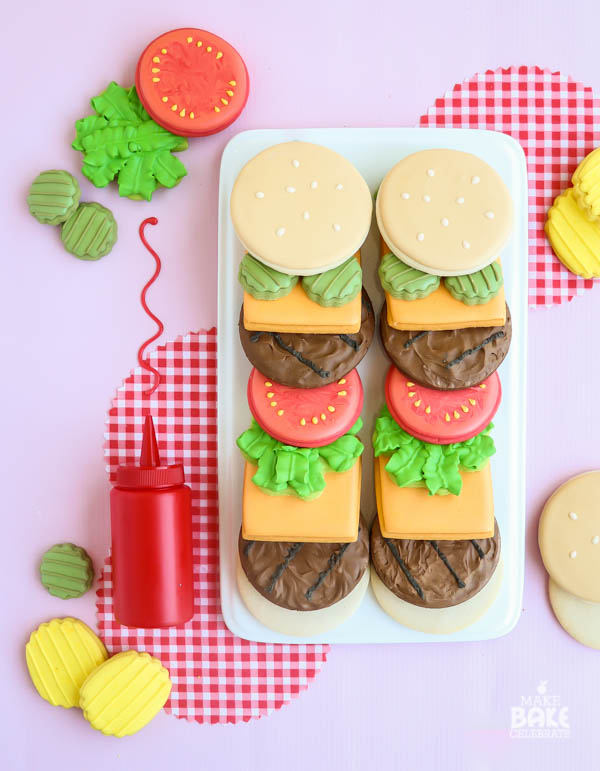
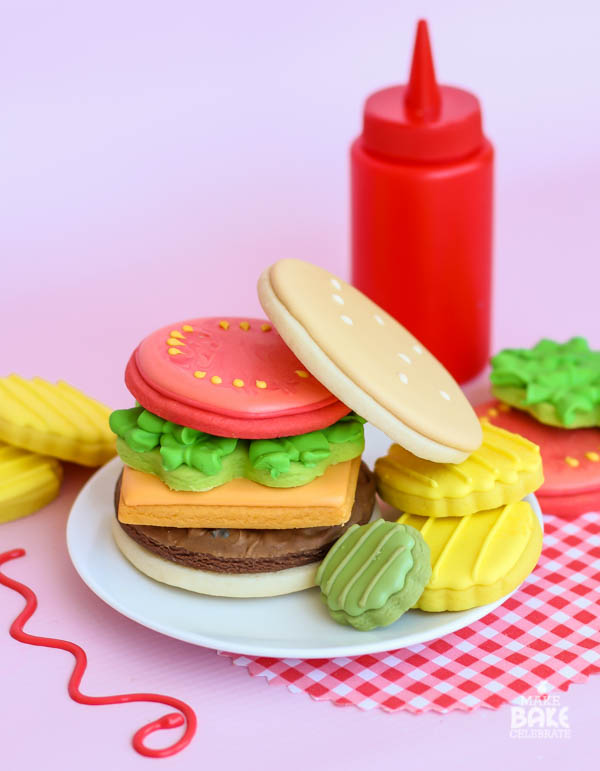
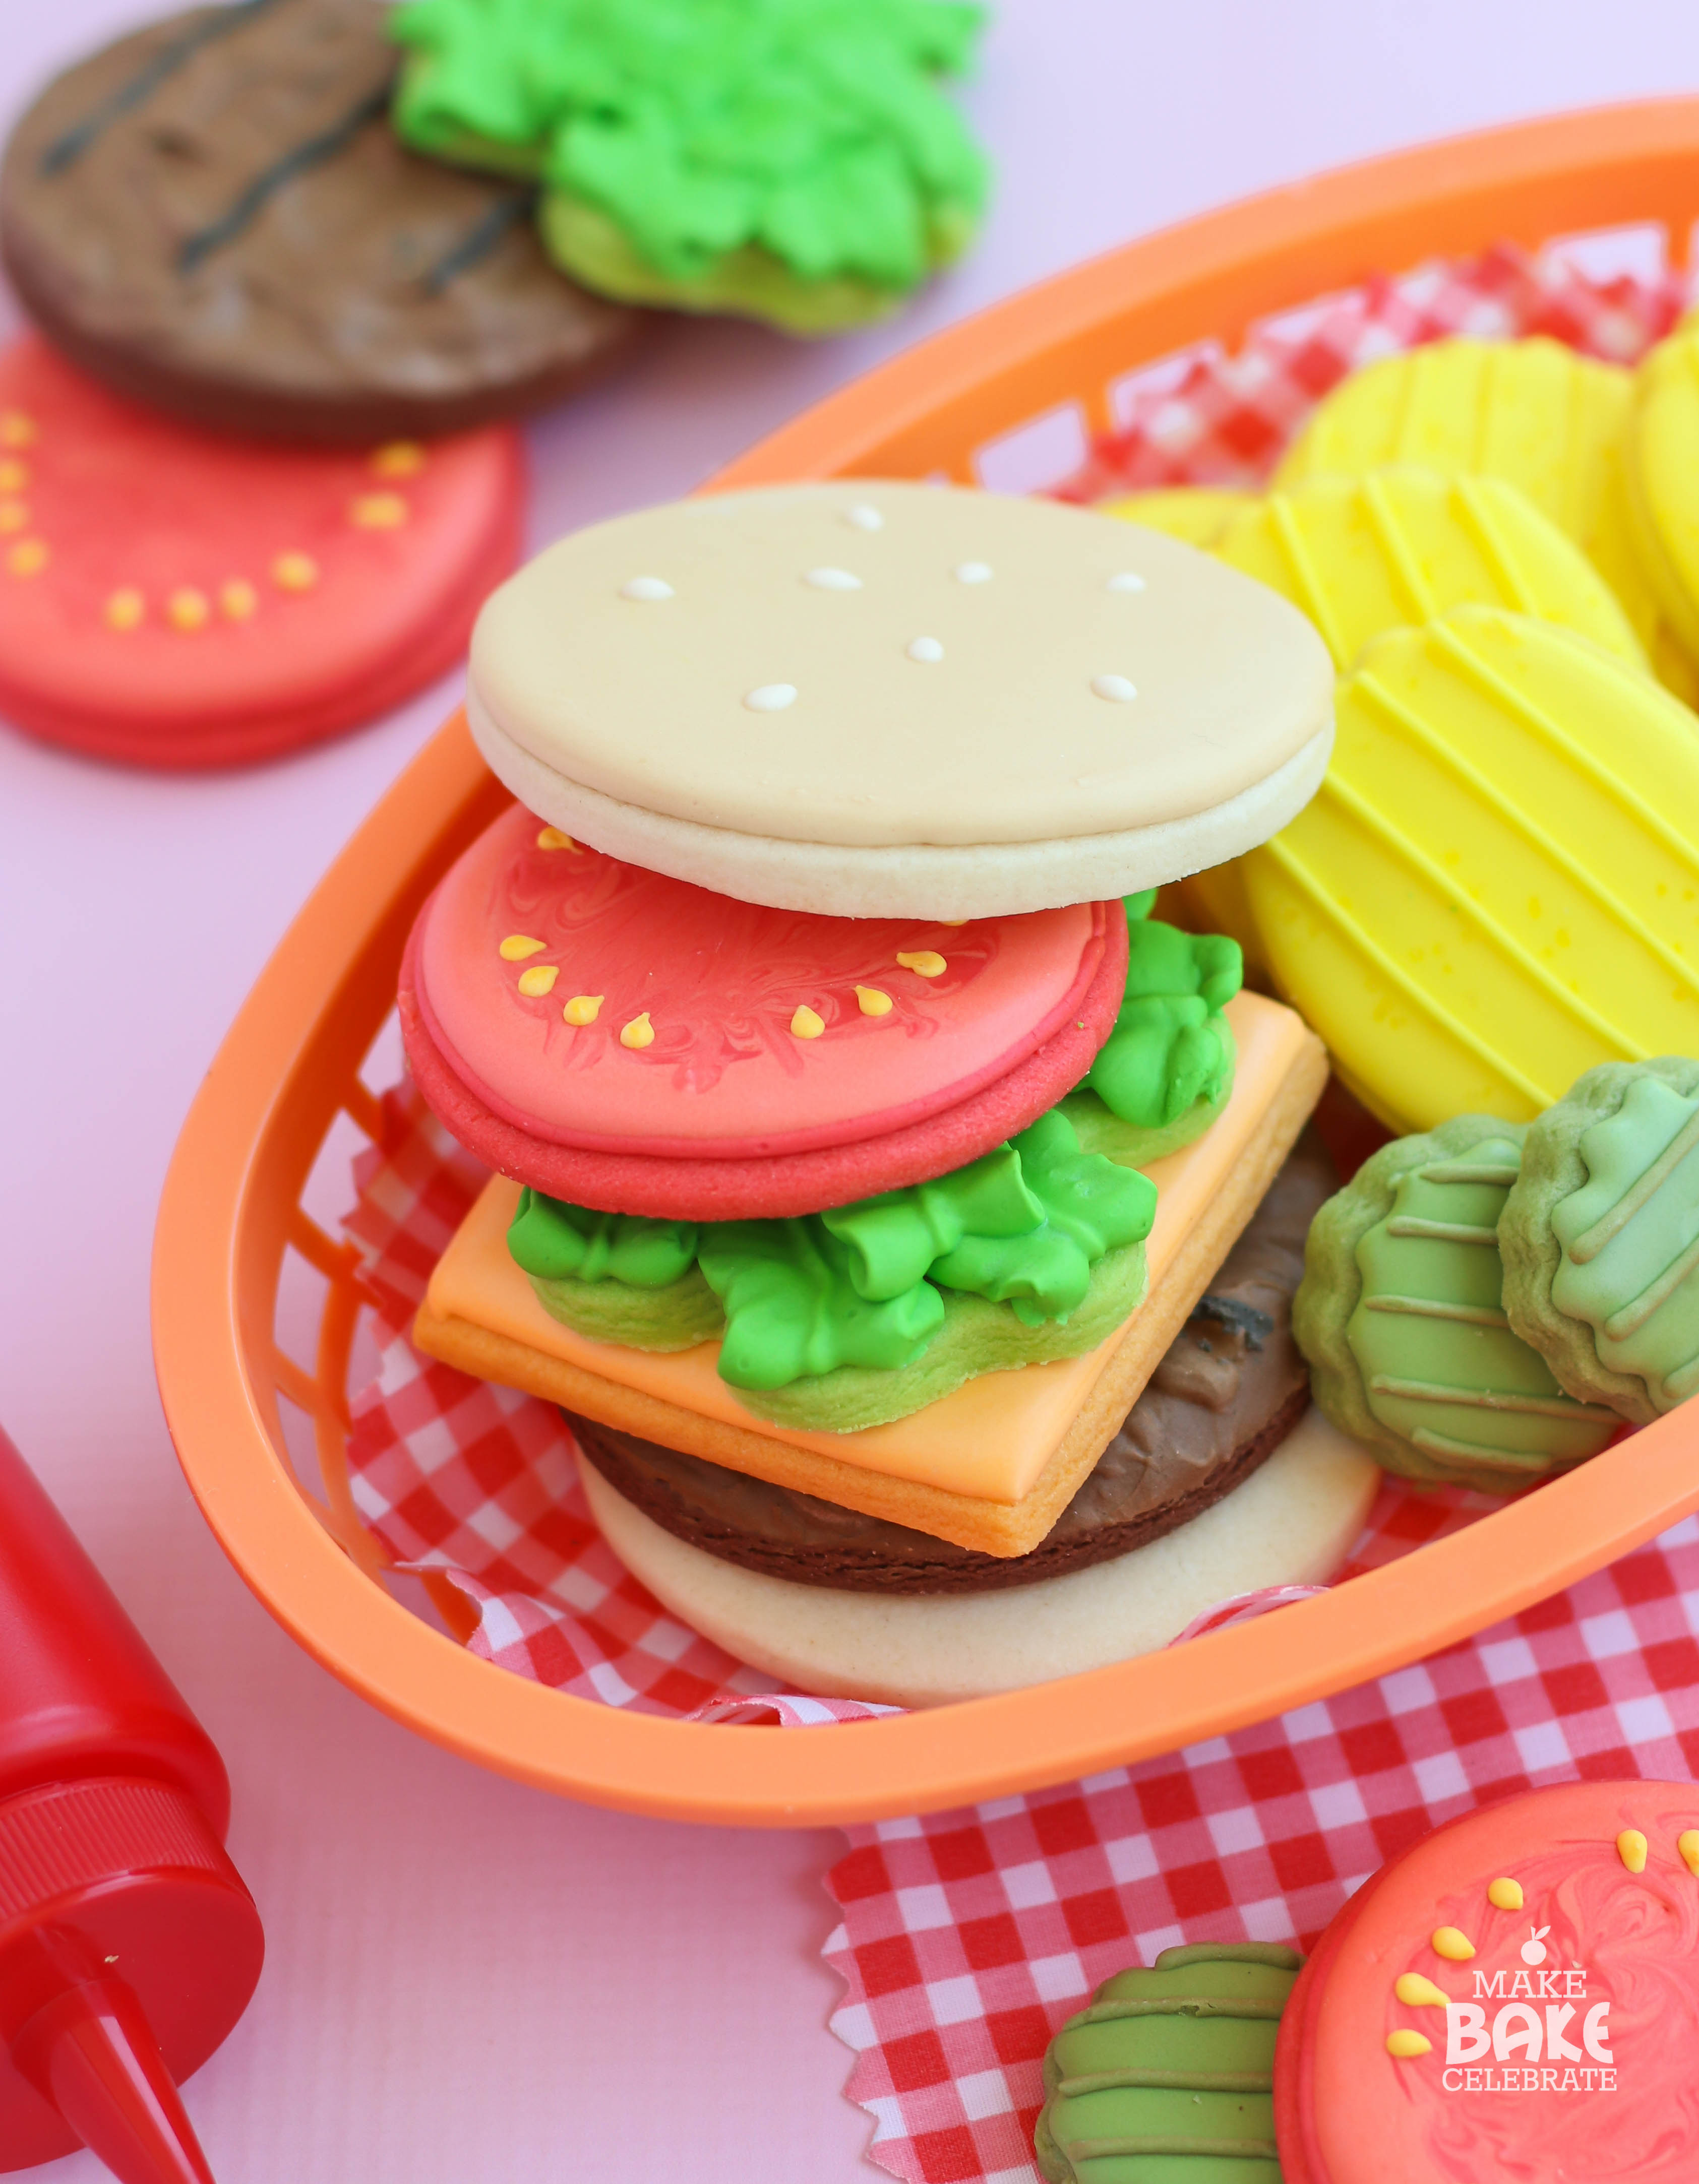
Speaking of burgers, I have finally found the perfect vegetarian burger that everybody will totally love at ALL of those BBQ’s this summer. Totally completely meatless, I promise. These burgers are 100% pure dessert. (hey don’t judge they have eggs and eggs = protein) So if your firing up the grill and prepping an awesome sauce BBQ these are the burgers, I mean cookies for you. And let me let you in on a little secret…these cookies are SO simple. For reals, the fun presentation really distracts you from looking at how simple each cookie is. They are the perfect set for a beginner. Before you know it you’ll be deemed King of The Grill AND Queen of The Oven.
I didn’t take step by step photos this go around because they are really just THAT simple. For those of you who have made royal iced cookies before you won’t even need any info. For those of you brand new to cookies I will list out the steps below. But first I suggest you stop by and read all of Royal Icing 101 and Decorating Cookies 101 first so you’ve got the details.
Before we get to the nitty gritty details I’ll share a bit of info first.
COOKIES
To make these cookies I used both rollout vanilla cookies and rolled out chocolate cookies. For the vanilla cookies I was feeling like trying out Sugarbelle’s awesome recipe which you can find here. I also have my own recipe I use frequently as well as the nitty gritty of how I bake all my cookies here. For the chocolate cookie I used a half batch of my very favorite chocolate recipe from Lila Loa which you can find here. I will explain in the step by step directions exactly how I divided up the 1 batch of sugar cookies to make it work.
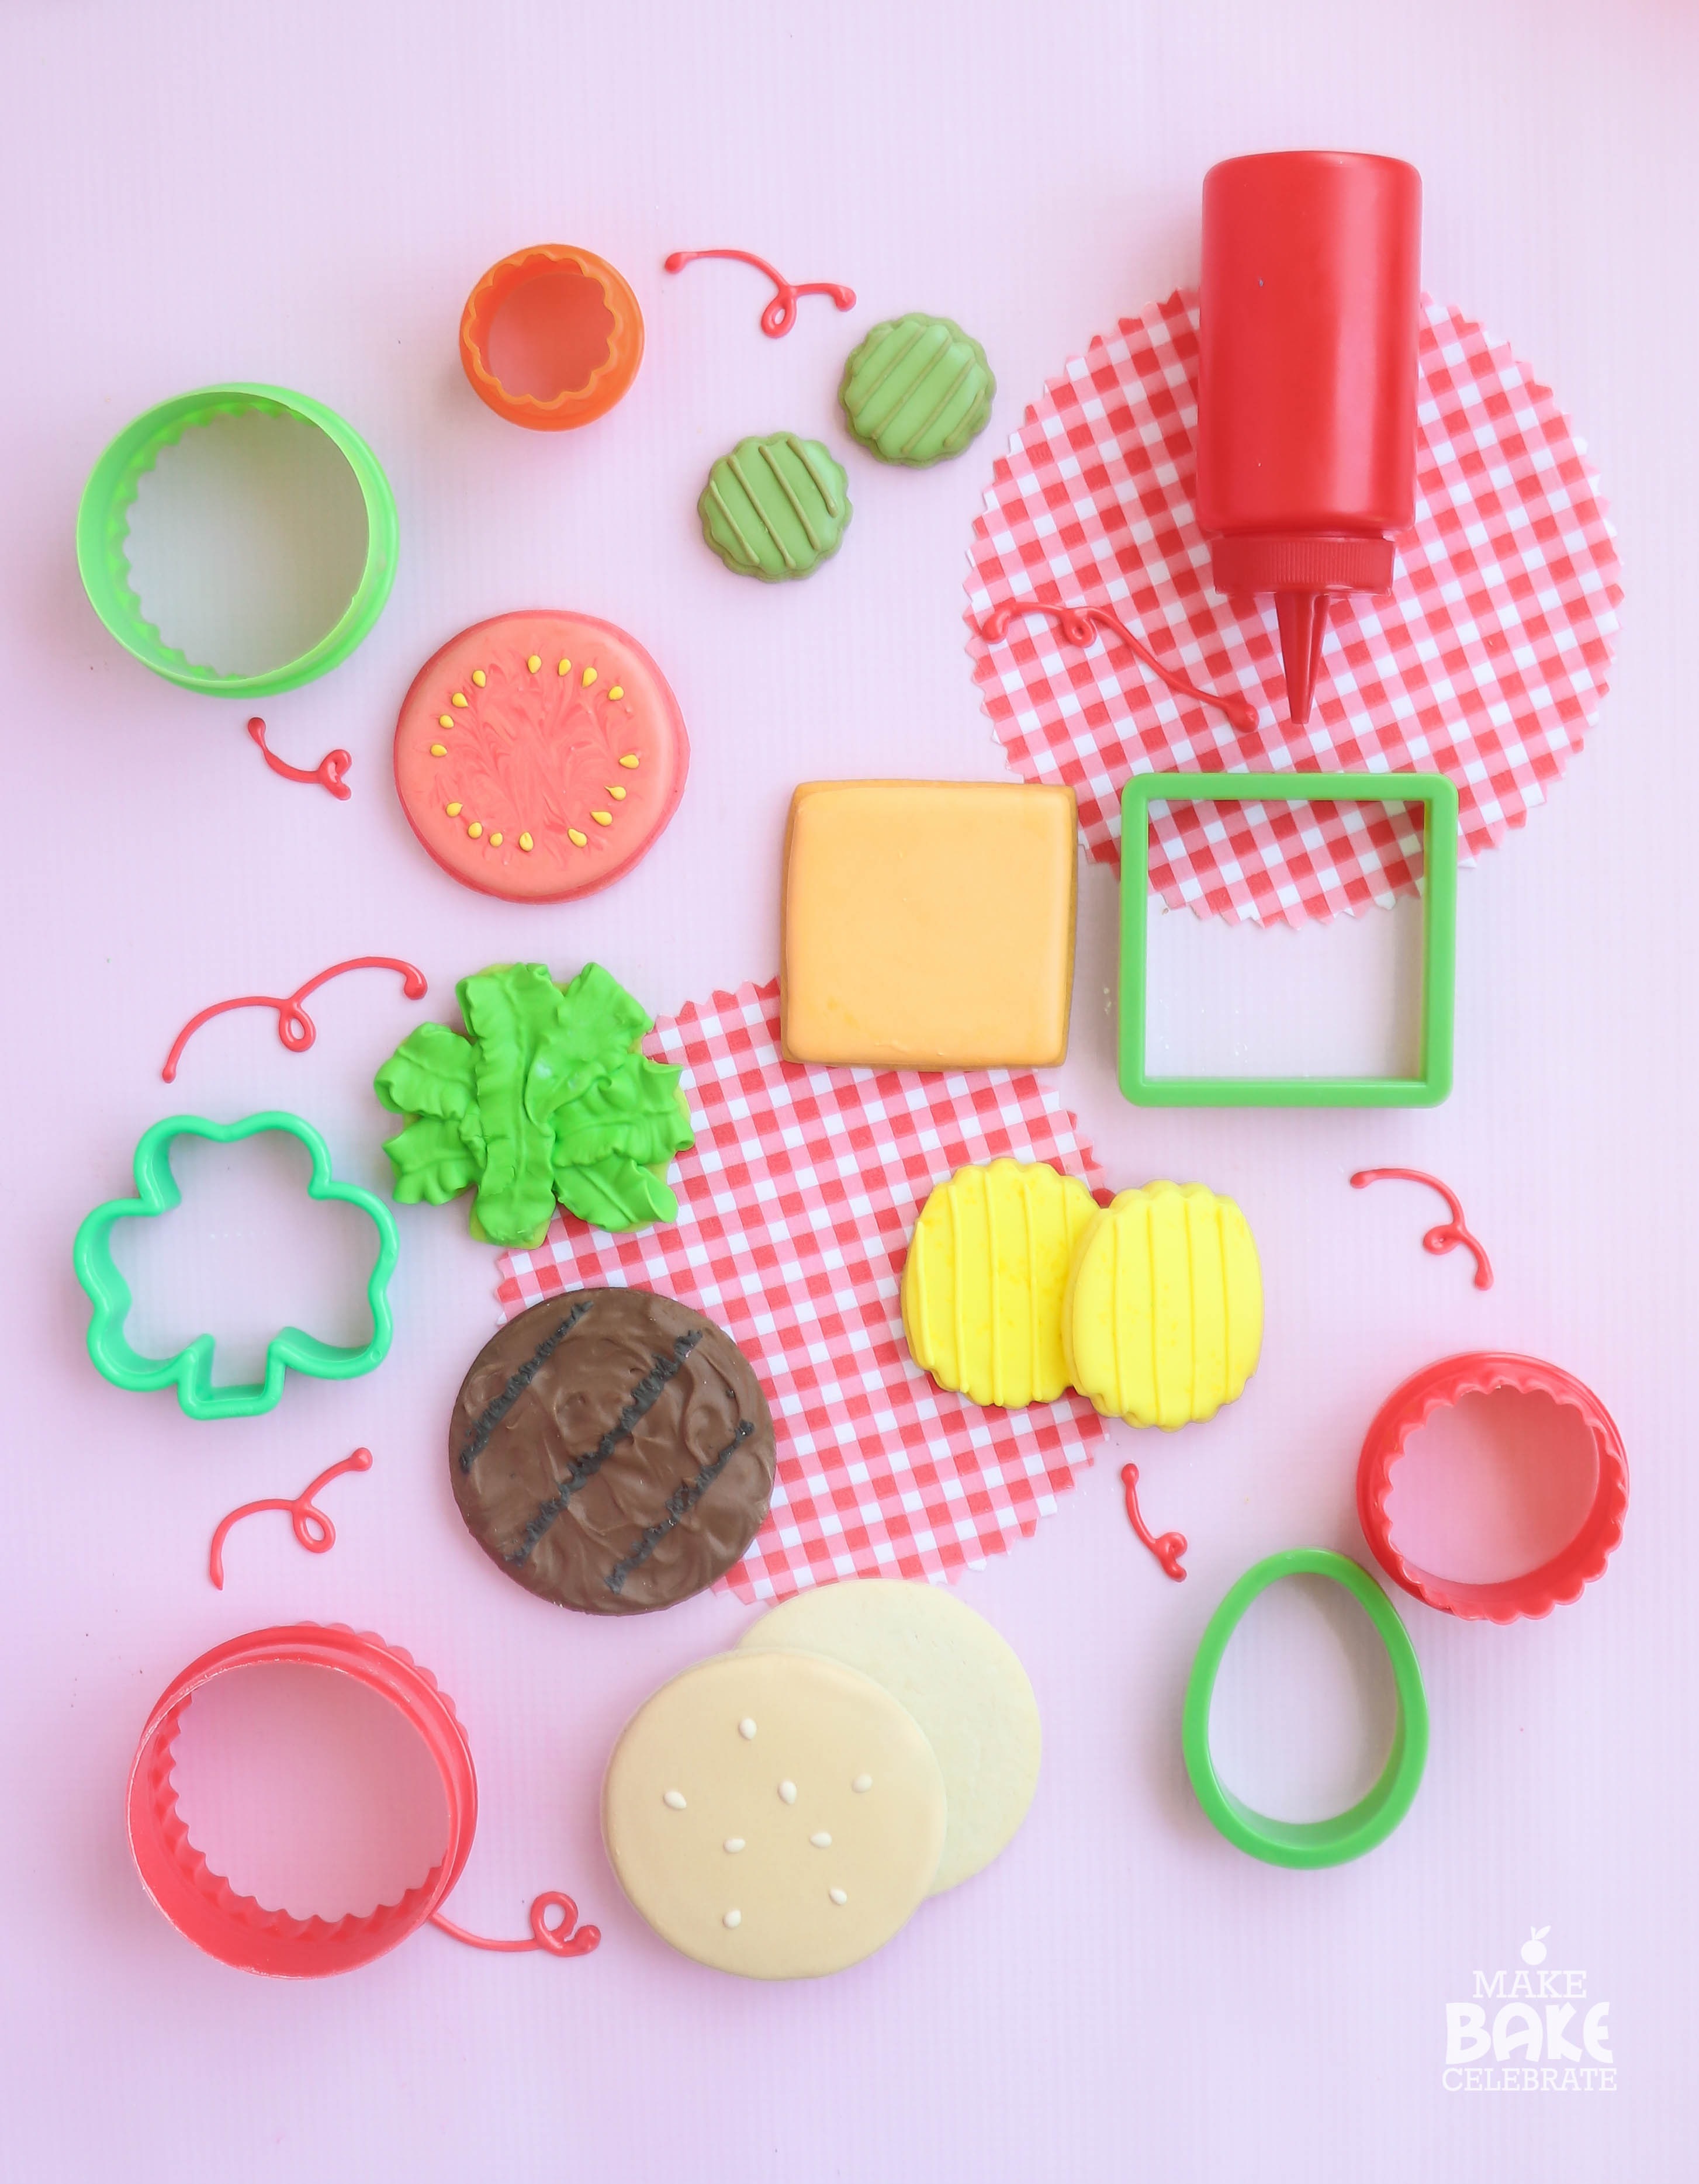
Here are the cookie cutters I used. Aside from the clover cutter, you probably already have all of these on hand. All of the circle/scalloped cutters came from a cheapo stacking set from Wal-Mart, but you can find them in many different stores. (The best 3.88 I’ve ever spent!) For size reference the buns are 3in and the pickles are 1.5 inches.
ICING
To color these I used the Wilton color right system. I used the exact same ratios for the dough and the royal icing.
Cheese: 4 drops orange to 3 drops yellow (1/2 cup icing)
Tomato: 5 drops red to 1 drop orange (3/4 cup icing)
Lettuce: 5 drops yellow to 3 yellow 3 blue (3/4 cup icing)
Pickles green: add small bits of left over tomato red to left over lettuce green (leftover icing)
Bun (icing only): 4 drops yellow to 1 cyan (1 cup icing)
Chips: 5 drops yellow (1/2)
Meat (icing only): lots of brown coloring alone! (1 cup icing)
Now that we have that info…let’s get grilling! Or baking!
Step 1: Mix up a vanilla cookie dough (here or here!) and a half batch chocolate cookie dough (here!). Place the vanilla cookie dough covered in the fridge. Now it’s important to remember that if your cutters aren’t the same size as mine you may not get the same amount of burgers out. Also remember that each guest doesn’t actually need a full burger…ha! But for presentation these two recipes combined made about 4 full burgers, lots of pickles, and a hand full of chips. Begin by preheating your oven to 375 degrees F. Starting with chocolate, roll out dough and cut “meat” cookies out on parchment paper about 1/4 in thick (I use a guided pin) and bake for 6-8 minutes depending on your cookie size. (mine were perfect at 7).
Step 2: Split vanilla cookie dough in half and place the second half back in the fridge to keep cool. Roll out your hamburger buns in sets of two (about 8 will do) using the same exact cutter you used for the meat. Bake for 6-8 minutes. (again mine was perfect at 7)
Step 3: Grab any remaining dough and roll it into a log. Cut into 4 equal pieces (chips, cheese, tomato, and lettuce/pickles). Now it’s time to color! In order to get the most out of your dough you will want to color and bake your cookies one color at a time and in this order chips, cheese, tomato, lettuce, then pickles. The reason for this is you will find if you color in this order each left over from the first can go into a color for the next. So after you’ve made a few chips the left over yellow can go into the cheese orange, the leftover orange can go into the tomato red, the after the lettuce is made a small amount of red can go into the lettuce green to make pickles. Brilliant right! After you’ve colored and cut all the cookies ( I store the cookie trays in the fridge while I cut the others) it time to bake them. I baked my cookies 5-7 minutes each. 5 for the small ones like pickles and up to 7 for the tomatoes.
On to the royal icing!
Step 4: Next whip up a batch of royal icing found here. I did big batch, 8 cups of powdered sugar and 8 tbsp. meringue powder plus warm water to thin. (results in about 5 cups)
Step 5: Go ahead and divide the icing into 7 bowls and cover WELL with plastic wrap. Icing is always an estimate but this is the actual amounts I used for mine. Brown (1 cup), bun color (1 cup) tomato red (3/4 cup), chip yellow ( 1/2 cup), lettuce (3/4 cup) cheese color (1/2 cup). And set aside a little remaining white (about 1/4 cup) to make the black burger details and sesame seeds later on. I always fear running out of frosting. Since this has so many different colored cookies, I went ahead and colored and decorated my cookies one cookie at a time in the same order and just like the dough I added left over frosting the next color. Yay for less waste! In the end I threw the left overs in a bowl and added brown then black to make the meat patties.
Here are the consistencies you’ll need to make:
Chips: 15 second icing and soft piping icing
Tomatoes: Outline icing (slightly darker shade) and flood or 15 second icing.
Lettuce: soft tooth past consistency, just firm enough to hold most of it’s shape.
Cheese: 15 second icing
Pickles: 15 second icing and soft piping icing (I used left over green and red)
Burger: soft tooth past consistency (used leftover frosting colors here as well)
Black piping consistency (leftovers again!)
Sesame seeds: white leftover icing with a tiny bit of leftover bun color
Step 6: Frost frost frost frost! For all flooding and outline I used a Wilton tip #2 along with a coupler. With the exception of the lettuce with I used Wilton tip #69. For the texture on the burger I simple swirled the frosting with a paint safe food brush. And then “smoothed” black lines to make the grill marks with a brush as well. For the tomato I outlined the cookie in the darker shade piping icing, filled with a 15 second icing then piped a little of the outline icing inside and swirled with a toothpick. Once dried I piped the little yellow seeds on.
Oh man. That was a mouth full! Did you get it all? For being so simple it took a lot of words – but I think I covered every step. But don’t let the long instructions scare you. These were SO much fun to make. And the designs are really simple, as I said about I think this is a perfect begin project. Happy grilling!


Ohmygosh, these are awesome!!!
Thank you so much sweets!
I sure wish my husband liked to grill. He can open a can of soup and heat it in the microwave, so needless to say, I don’t let him prepare meals!
Enjoy the summer dinners. Your cookies are amazing! Each component is perfectly decorated.
My husband just love loves loves to grill! Maybe you can encourage yours with some new grill equipment and a few manly cook books, lol. Although I have to say I sure hope he takes the soup out of the can before he puts it in the microwave…;)
These are amazing!! You are so creative!! I have been planning out a picnic set inspired by the red basket and plaid tissue paper from the dollar store!! What a fun fun set you have created!!!! Now I’m off to stalk your blog!!
Best!
Lindy-owner Lindy’s Traveling Treats
Sounds like you have some fun baking to do! I hope these have inspired you. Have fun exploring the blog, I’m so glad you’ve found MBC. Happy baking!
LOVE this!!!
Yay! Thanks for visiting.
I am curious what is Cyan? In the color section?
Oh man, that’s what I get for late night blogging! It’s suppose to say crimson not cyan. Doh!